33
11. Installation
11.1 Mounting the instrument
Decide on a location.
Allow adequate clearance behind the unit for cable
connections to ensure that the cables are not unduly
stressed.
Ensure that there is sufficient length of cable to remove
the unit for servicing purposes.
Ideally, if the rear of the C-net 2000 is going into an
enclosed area, that the area should be adequately
ventilated so that the rear sees the same ambient
temperature as the front.
Most units will be mounted in a bulkhead and that
method is described here. A Trunnion mounting kit is also
available, Part Number 930293.
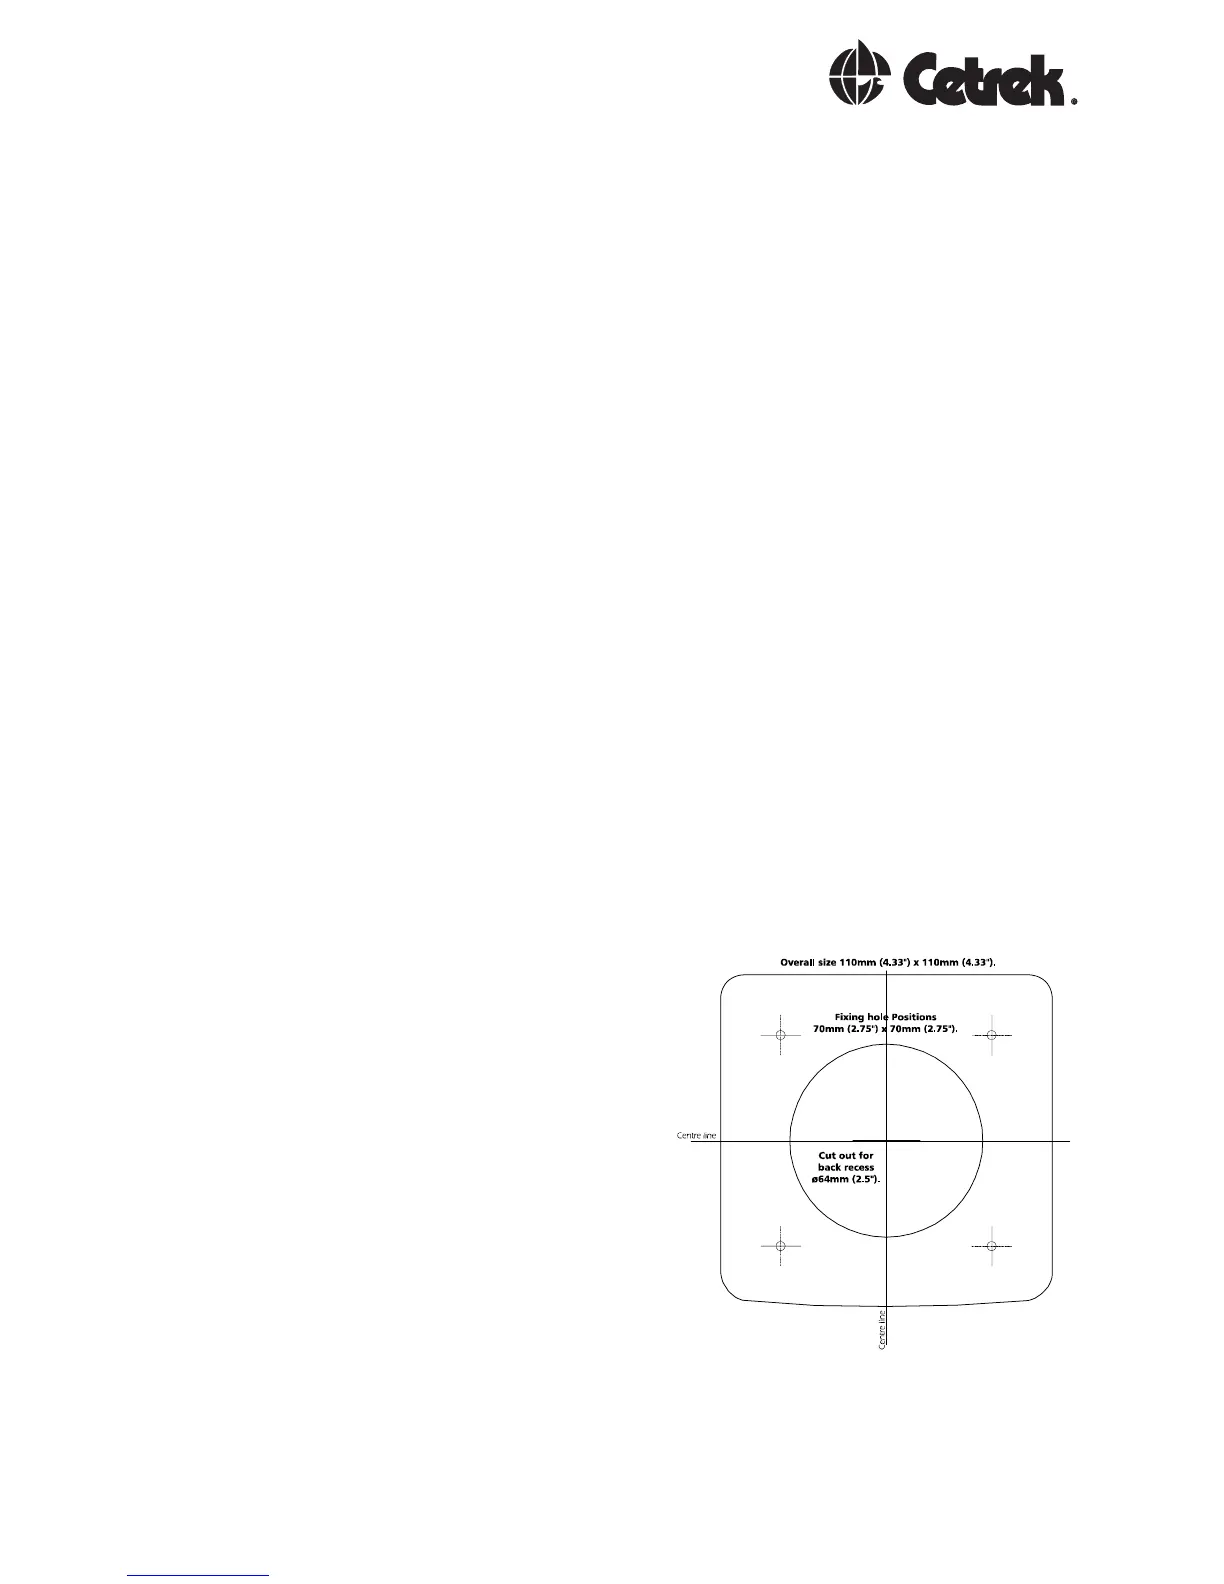
Using the supplied template as a guide, cut out the
hole for the back and drill the four ø 4.3 mm (0.170)
holes for the studs.
Screw the four
studs into the rear
case, longer M4
studs can be used
if required (not
supplied).
Connect the cables
to the rear of the
unit.
Place the unit into
position, then
secure it by
screwing the
thumb nuts onto the studs.
Not to Scale