8
:: Getting Started
Setting Up Your DVR+
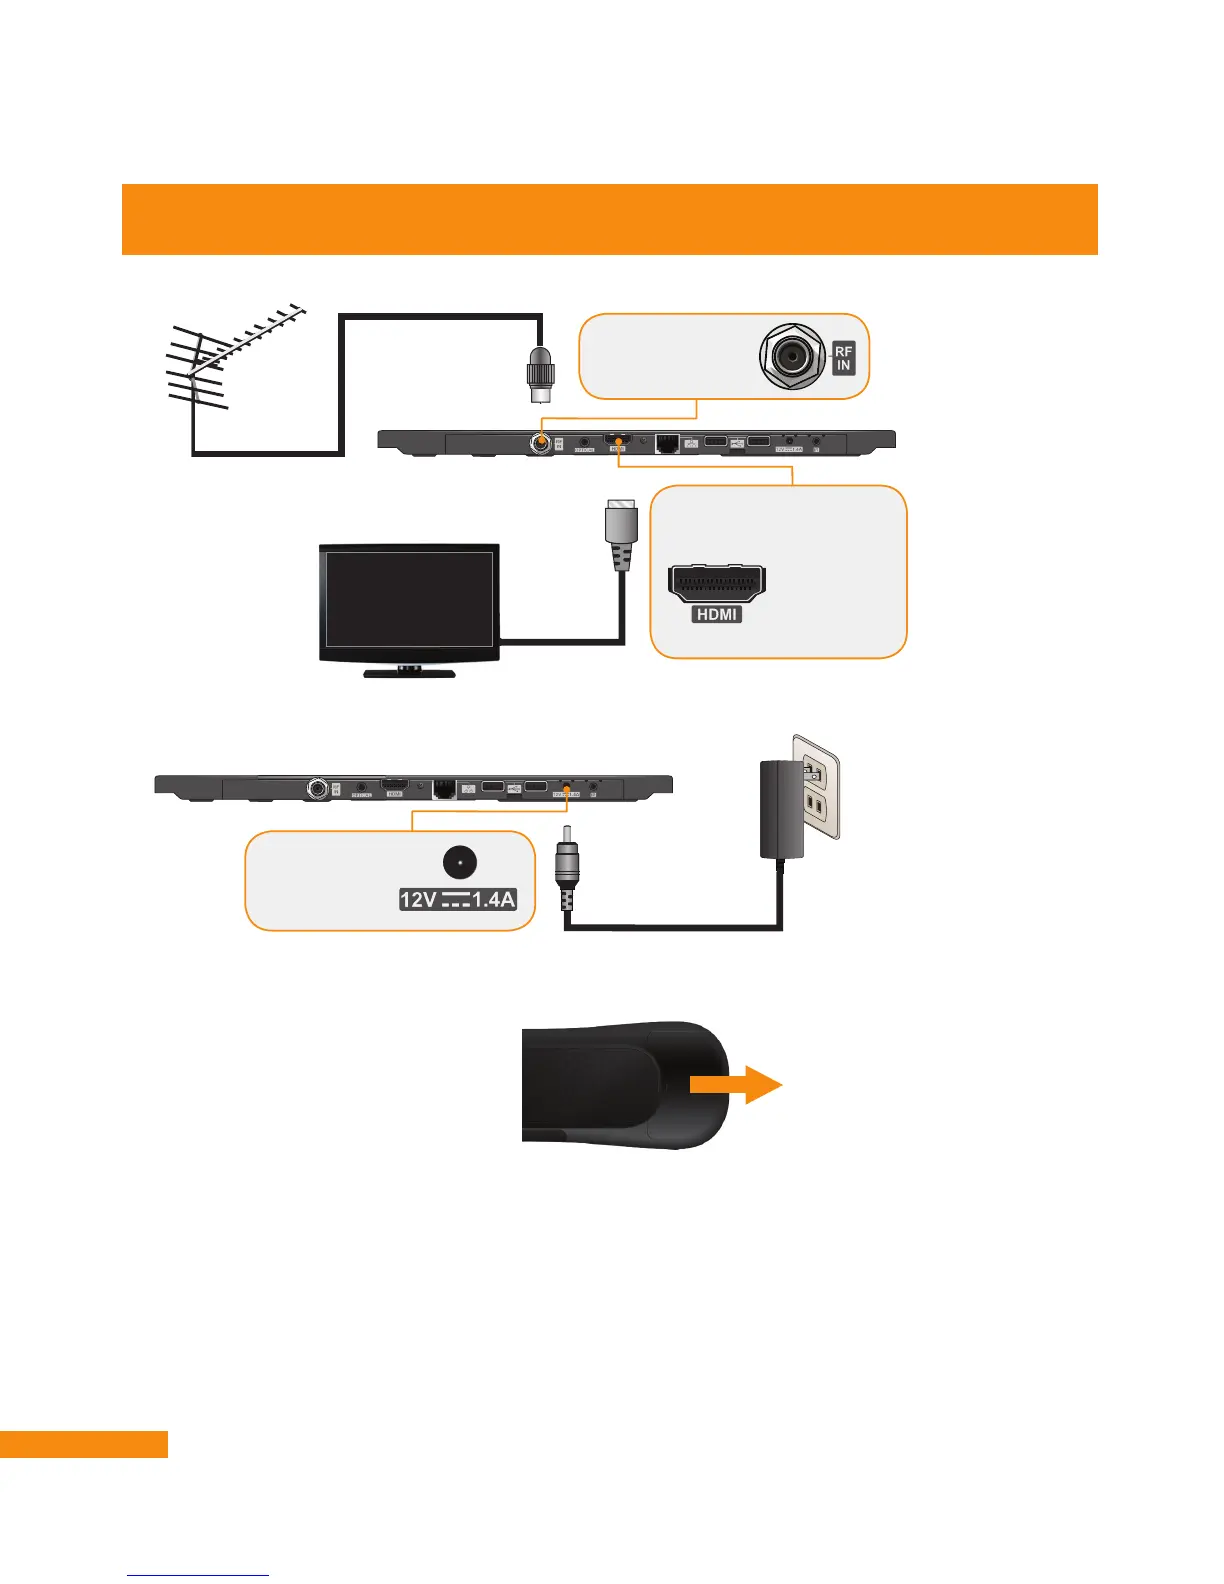
1 Connect the antenna to the DVR+ receiver.
3 Connect the power cord to the DVR+ receiver and plug the cord in to a wall outlet.
Turn on your TV and select the correct HDMI input.
4 Remove the battery compartment from the remote control and insert the provided batteries in the
correct orientation.
Power Input
Provides power to
the DVR+ receiver
RF IN
Connects the
over-the-air antenna
2 Connect the DVR+ receiver to your TV.
5 Using the remote, complete the on-screen Setup Wizard instructions.
6 Once you’re receiving TV channels, you can connect the optional Wi-Fi adapter or your own
Ethernet cable for access to Internet-delivered apps, channels, and enhanced guide information.
When connected, the DVR+ will guide you through the setup process.
7 You can also connect an external hard drive to one of the open USB ports. When connected, the
DVR+ will guide you through the setup process.
Note: Use only
high-quality HDMI
and USB cables
from major
manufacturers.
HDMI
®
Output
Provides high-defi nition digital
audio and video to the TV