30
:: Menus and Options
Hiding an Unwanted Channel
Pressing MENU on the remote, then selecting SETTINGS » Channel Setup » Antenna Channels »
Hide / Unhide Channels displays the list of scanned-in channels on your DVR+. If you need to hide a
channel (e.g., it’s a duplicate of another channel or one that you never watch), follow these steps:
1 Find the channel and press OK/SELECT on the remote to select the channel.
2 On the Manage Antenna Channels pop-up, select Hide this Channel.
3 Press OK/SELECT to confirm the change.
Setting Up Network Connectivity
Pressing MENU on the remote and selecting SETTINGS » Network Setup displays the current status
of your Internet connection, wired and wireless network connectivity, as well as related items and
screens. From here, you can:
1 View or choose your connection type, either Wired (the default selection for using an Ethernet
cable) or Wireless (for using the optional Wi-Fi adapter; please visit channelmaster.com
for details).
2 Select Advanced Settings to view IP connection settings and disable (or re-enable) the Automatic
Setup of the DVR+ Internet connection. If you select Enable (selected by default), the DVR+
receiver expects that it will be assigned its IP settings by a DHCP server or DHCP-enabled router
residing on your local network. If you select Disable, you’ll need to assign these settings manually
(advanced users only).
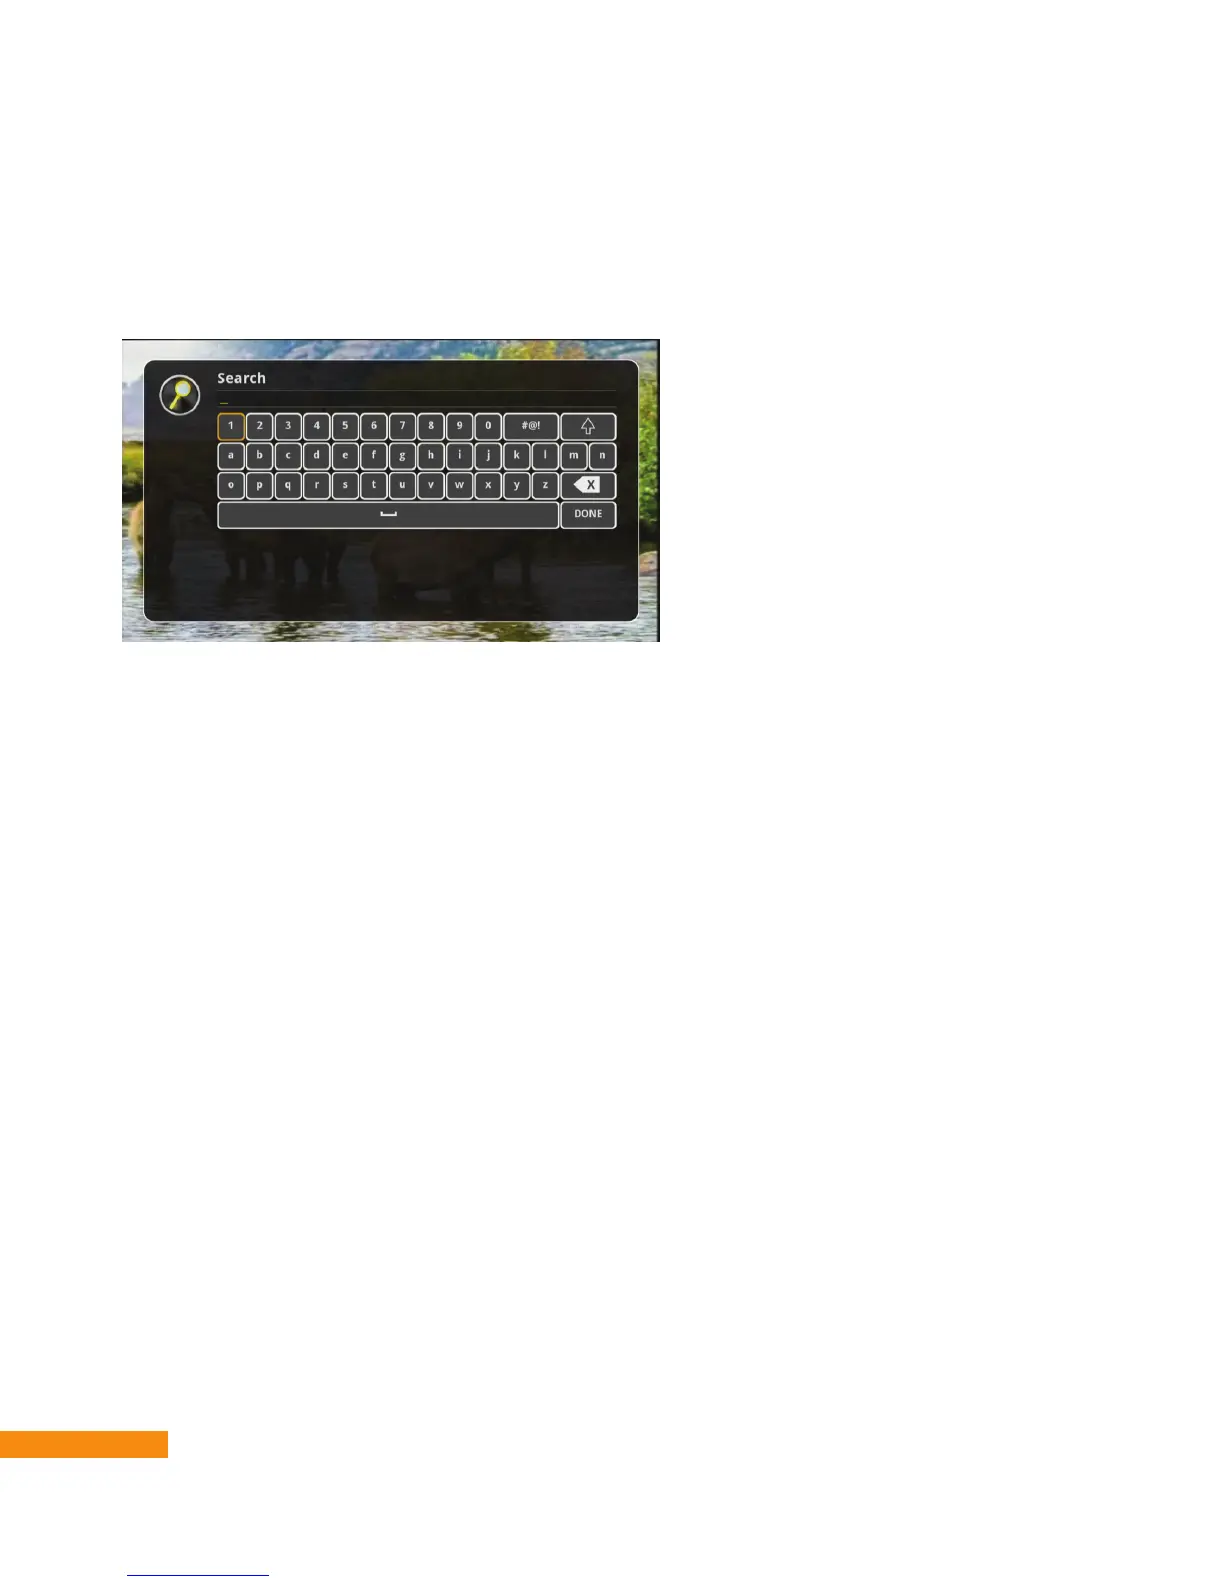
SEARCH
The search function of your DVR+ allows you to enter one or more keywords associated with
programs or events that you’d like to find in the program guide. After selecting SEARCH from the
DVR+ main menu, use the navigation buttons on your remote to highlight and select characters—
including letters and numbers—that spell out the keywords you want to find.