2-15
Cisco Aironet 1130AG Series Access Point Hardware Installation Guide
OL-8369-05
Chapter 2 Installing the Access Point
Mounting the Access Point Above a Suspended Ceiling
Follow these steps to mount the access point above a suspended ceiling. Refer to Figure 2-8 before
proceeding.
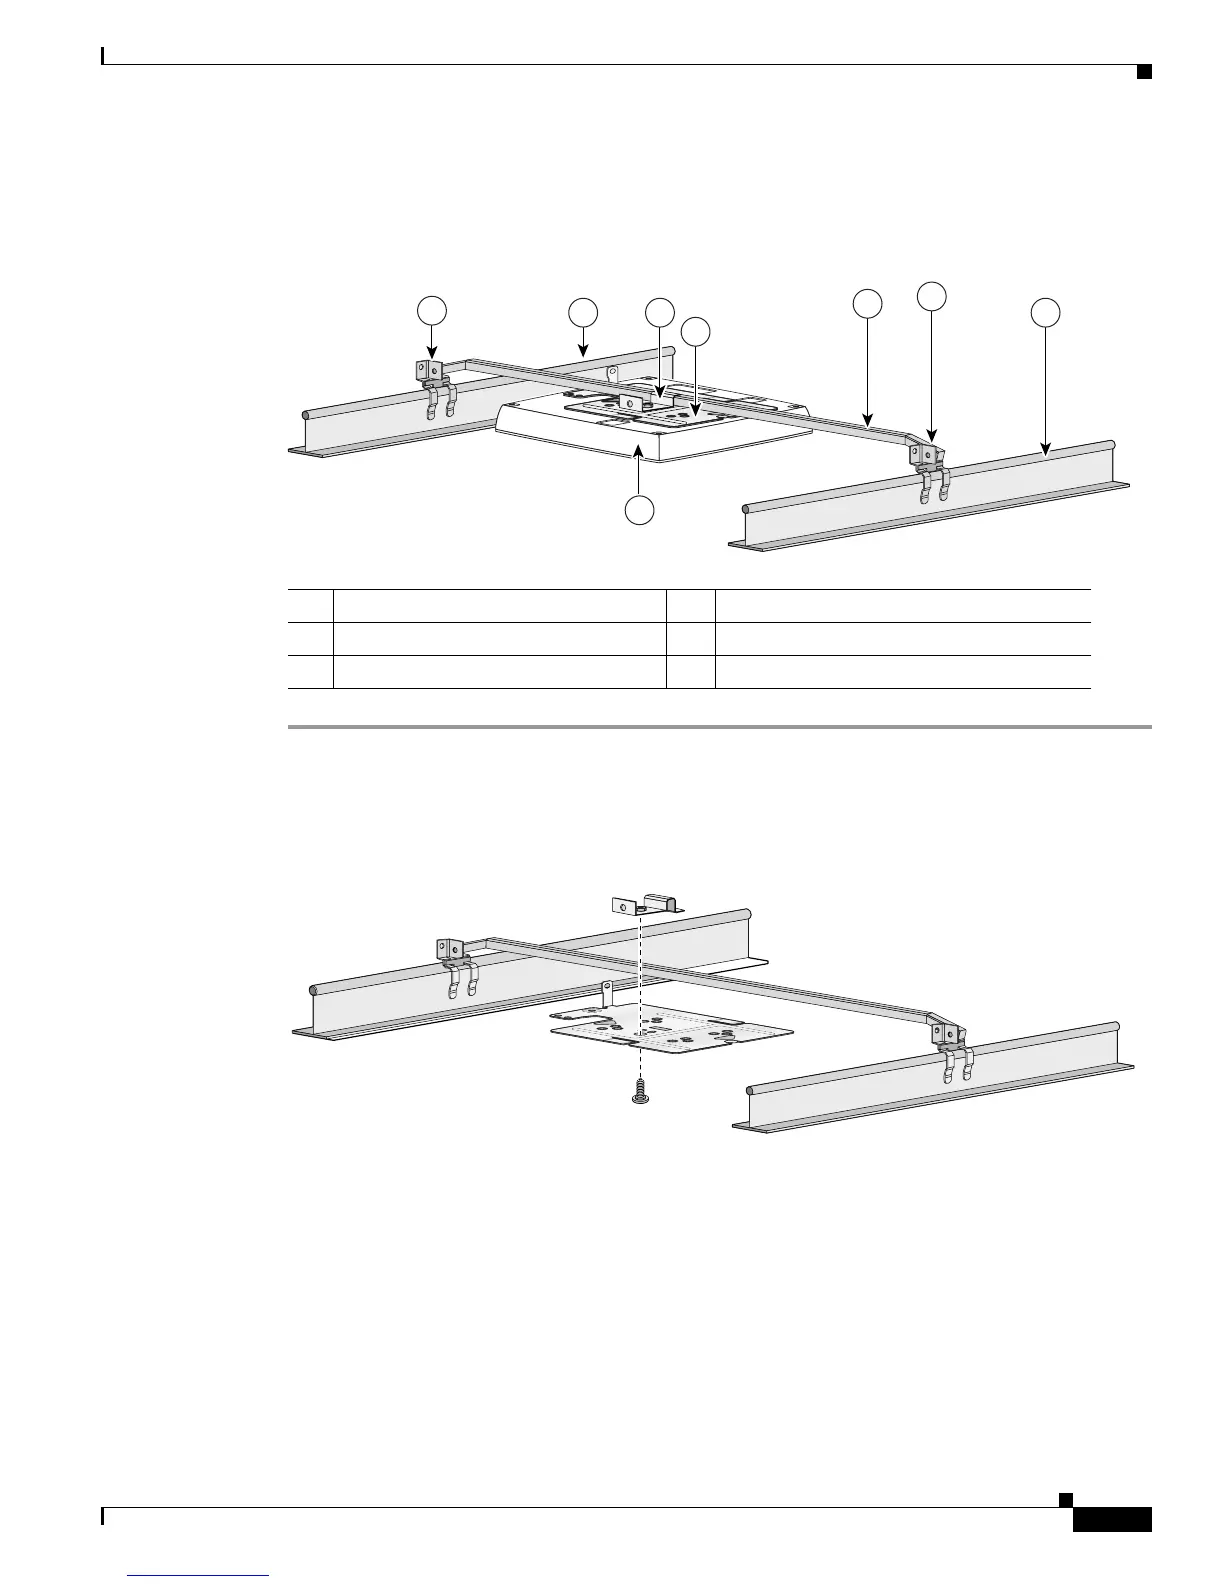
Figure 2-8 T-Bar Grid Mounting Bracket Parts
Step 1 Insert the bracket mounting clip’s tab into the rectangular hole on the access point mounting bracket.
Step 2 Place the clip over the T-bar box hanger (refer to Figure 2-9) and secure it to the access point mounting
bracket with the 1/4-20 fastener (supplied with the T-bar hanger).
Figure 2-9 T-Bar and Mounting Bracket
Step 3
Remove a ceiling tile adjacent to the mounting location.
Step 4 Configure the ends of the T-bar box hanger to allow for maximum clearance above the ceiling tile. See
the illustration above.
Step 5 Open the access point cover and connect the Ethernet cable to the access point (see the “Connecting to
an Ethernet Network with an Inline Power Source” section on page 2-22).
Step 6 Attach the access point to the access point mounting bracket (see the “Attaching the Access Point to the
Mounting Plate” section on page 2-16).
Step 7 Attach the T-rail clips on the each end of the T-bar box hanger to the ceiling grid T-rails. Make sure the
clips are securely attached to the T-rails.
1 Suspended ceiling T-rail 4 Access point mounting bracket
2 T-bar box hanger 5 Access point
3 Bracket mounting clip 6 T-rail clip
 Loading...