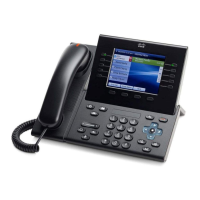
CISCO IP Phone 8961 Quick Reference Guide
2
CISCO 8961 Quick Reference Guide
Voicemail
Setting Up Your Voice Mailbox
The first time you access voicemail, you will be asked to enroll your
mailbox. Pre-recorded prompts will guide you through the process,
which includes recording your name, recording a greeting, and
changing your temporary PIN -
1234. Creating a new minimum 4-
digit PIN is mandatory.
Note: Do not hang up until you receive the system prompt: You have
finished enrollment.”
Accessing Voicemail
New message indicators
• A solid red light on your handset.
• A red voicemail icon next to the line label and session button.
Access voicemail from your phone
1. To listen to a voice message, do one of the following:
• Press the MESSAGES button.
• Select a line wit
h a Message ico
n, and press the Session
button next to the Voicemail icon.
2. Follow the prompts to listen to your voice messages. Enter your
four (4) digit mailbox I.D. (your extension number), followed by
the
# key when prompted.
• Press
1
to listen to new messages.
• Pr
ess
2
to create/send a message.
• Pr
ess
3
to review old messages
• Press
4
to access Setup options.
Access voicemail from offsite
1. Dial
(303) 860-4295
2. When voicemail
answers, press the
*
key.
3. Enter your 4-digit mailbox ID number followed by the
#
key.
4. Enter your PIN f
ollowed by the
#
key.
WHILE LISTENING TO
A MESSAGE
AFTER LISTENING TO A
MESSAGE
To: Press: To: Press:
Restart message 1 Replay 1
Save 2 Save 2
Delete 3 Delete 3
Slower playback 4 Reply to an internal user 4
Change volume 5 Forward message 5
Fast playback 6 Save the message as
New
6
Rewind message 7 Rewind message 7
Pause/Resume 8 Play message properties 9
Fast-forward 9 Cancel playing message
*
Skip message #
Skip, save as is ##
Changing Voicemail Options
Use the following procedures to change the setup of your voicemail
after you have completed initial enrollment.
Re-recording Your Greeting
1. Access your mailbox.
2. Press 4 for setup options.
3. Press 1 for Greetings, and to cha
nge Greetings.
Re-recording Your Name
1. Access your mailbox.
2. Press 4 for setup options.
3. Press 3 for personal settings.
4. Press 2 to chan
ge name.
Changing Your PIN/Password
1. Access your own mailbox.
2. Press 4 for Setup options.
3. Press 3 for personal settings.
4. Press 1 to chan
ge PIN.
Using Your Phone
Answering a Call
1. Lift handset, or press ANSWER softkey, or press SPEAKER
button, or press HEADSET button to answer primary line.
2. Press ringing session button to a
nswer incoming call on another
session button (f
irst call is automatically put on h
old).
Placing a Call
Use any of the following methods:
1. Lift the handset and dial the num
ber.
2. Dial the number with the phone on hook. Then, lift the handset
or press the DIAL softkey.
3. Press the button for the line you want to use.
4. Press the SPEAKER button; or
5. Pr
ess the NEWCALL softkey; or
6. Press the HEADSET button; or
7. Press the REDIAL
soft key.
8. Internal calls at Grant Street: Dial the 4-digit extension.
9. External calls (off-site)-Dial 9+1+10-digit telephone number.
10. To reach Emergency service, dial
911 or 9 + 911.
Transferring an Active Call
1. Press the TRANSFER button or softkey to place the current call
on hold.
2. Dial the number/extension to which you want to transfer the call.
NOTE: To transf
er directly to voice mail, press *
before the
number, when v
oicemail answers, press TRANSFER, hang up.
3. Then, either press the TRANSFER button or softkey to complete
the transfer, or
wait for the recipient to answer so you may
announce the call while the original call stays on hold, then
press the TRANSFER button or
softkey and han
g up. Transfer
confirmation will
display on
your phone screen.