39
Current image running: Boot ROM0
Last reset cause: LocalSoft
ASR1000-RP1 platform with 4194303 Kbytes of main memory
mcp-2ru-1-rp0-rommon 1>
Step 5 Remove any power cables from the Cisco ASR 1002 Router.
a. For power supplies with a circuit breaker switch, position the switch to the Off (O) position.
b. For power supplies with a Standby switch, place the Standby switch in the Standby position.
Note After powering off the router, wait a minimum of 30 seconds before powering it on again.
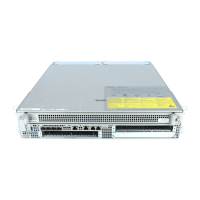
Replace the Cisco ASR1000-ESP5 or ASR1000-ESP10
This section provides instructions for removing the Cisco ASR1000-ESP5 or ASR1000-ESP10 from the Cisco ASR 1002 Router.
The Cisco ESP5 and ESP10 are Cisco Quantum Flow Processors (QFP) for the Cisco ASR 1002 Router. The Cisco ESP5 and
ESP10 are individual FRUs and support online insertion and removal operation. Before you begin, make certain the chassis is
grounded.
To remove the Cisco ESP5 or ESP10 from the Cisco ASR 1002 Router, follow this procedure:
Step 1 Slip on the ESD-preventive wrist strap that was included in the accessory kit. Loosen the captive screws on the Cisco
ESP5 or ESP10.
Step 2 Using the handles on both sides of the module, with two hands, gently slide the Cisco ESP5 or ESP10 out of the chassis
slot.
Note Handle the Cisco ESP5 and ESP10 by the carrier edges only; never touch the printed circuit board components or
connector pins.
Step 3 Place the Cisco ESP5 or the ESP10 on an antistatic surface with its printed circuit board components facing upward or
in a static shielding bag.
You have completed the procedure for removing the Cisco ESP5 or ESP10.
To install the Cisco ESP5 or ESP10 in the Cisco ASR 1002 Router, follow this procedure:
Step 1 Slip on the ESD-preventive wrist strap that was included in the accessory kit.
Step 2 Using the handles on both sides of the module, with two hands, gently insert the Cisco ESP5 or -ESP10 into the top
chassis slot.
Note Handle the Cisco ESP5 and ESP10 by the carrier edges only; never touch the printed circuit board components or
connector pins.
Step 3 Once the board is seated, tighten the captive screws.
Step 4 Place the Cisco ESP5 or Cisco ESP10 on an antistatic surface with its printed circuit board components facing upward
or in a static shielding bag.