5
Attach the Rack-Mount Brackets—Chassis Rear-Mounted
To install the rack-mount brackets on a Cisco ASR 1002 Router in a rear rack-mount configuration, follow these steps:
Step 1 Locate the threaded ear holes in the rear sides of the chassis.
Step 2 Position the rear rack-mount bracket's top hole with the chassis from the back (See Figure 2). Ensure that you hold the
rear rack-mount bracket with the ear holes facing outward and towards the rear of the chassis. Align the rack-mount
bracket to the side of the router.
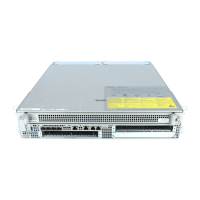
Figure 2 Installing the Cisco ASR 1002 Router Rear Rack-Mount Brackets
Step 3 Insert and tighten the screws. After the bracket is secured to the side of the chassis, slide the two remaining components
into the side rack-mount bracket.
Step 4 Repeat Step 1 through Step 3 on the other side of the chassis. Use the screws on each side to secure the rear rack-mount
brackets to the chassis.
This completes the procedure for attaching rear rack-mount brackets to the chassis. Continue to the procedure described in the
Four-Post Rack Installation, page 5 or the Two-Post Rack Installation, page 7.
Four-Post Rack Installation
Note We recommend that you allow at least 1 or 2 inches (2.54 or 5.08 cm) of vertical clearance between the router and the
equipment directly above and below the router.
1
Rear rack-mount bracket ear and holes
3
Rear rack-mount bracket screws
2
Rear rack-mount bracket