a) From the Security Zone drop-down list, choose an existing outside security zone or add a new one by
clicking New.
For example, add a zone called outside_zone.
b) Click OK.
Step 5 Click Save.
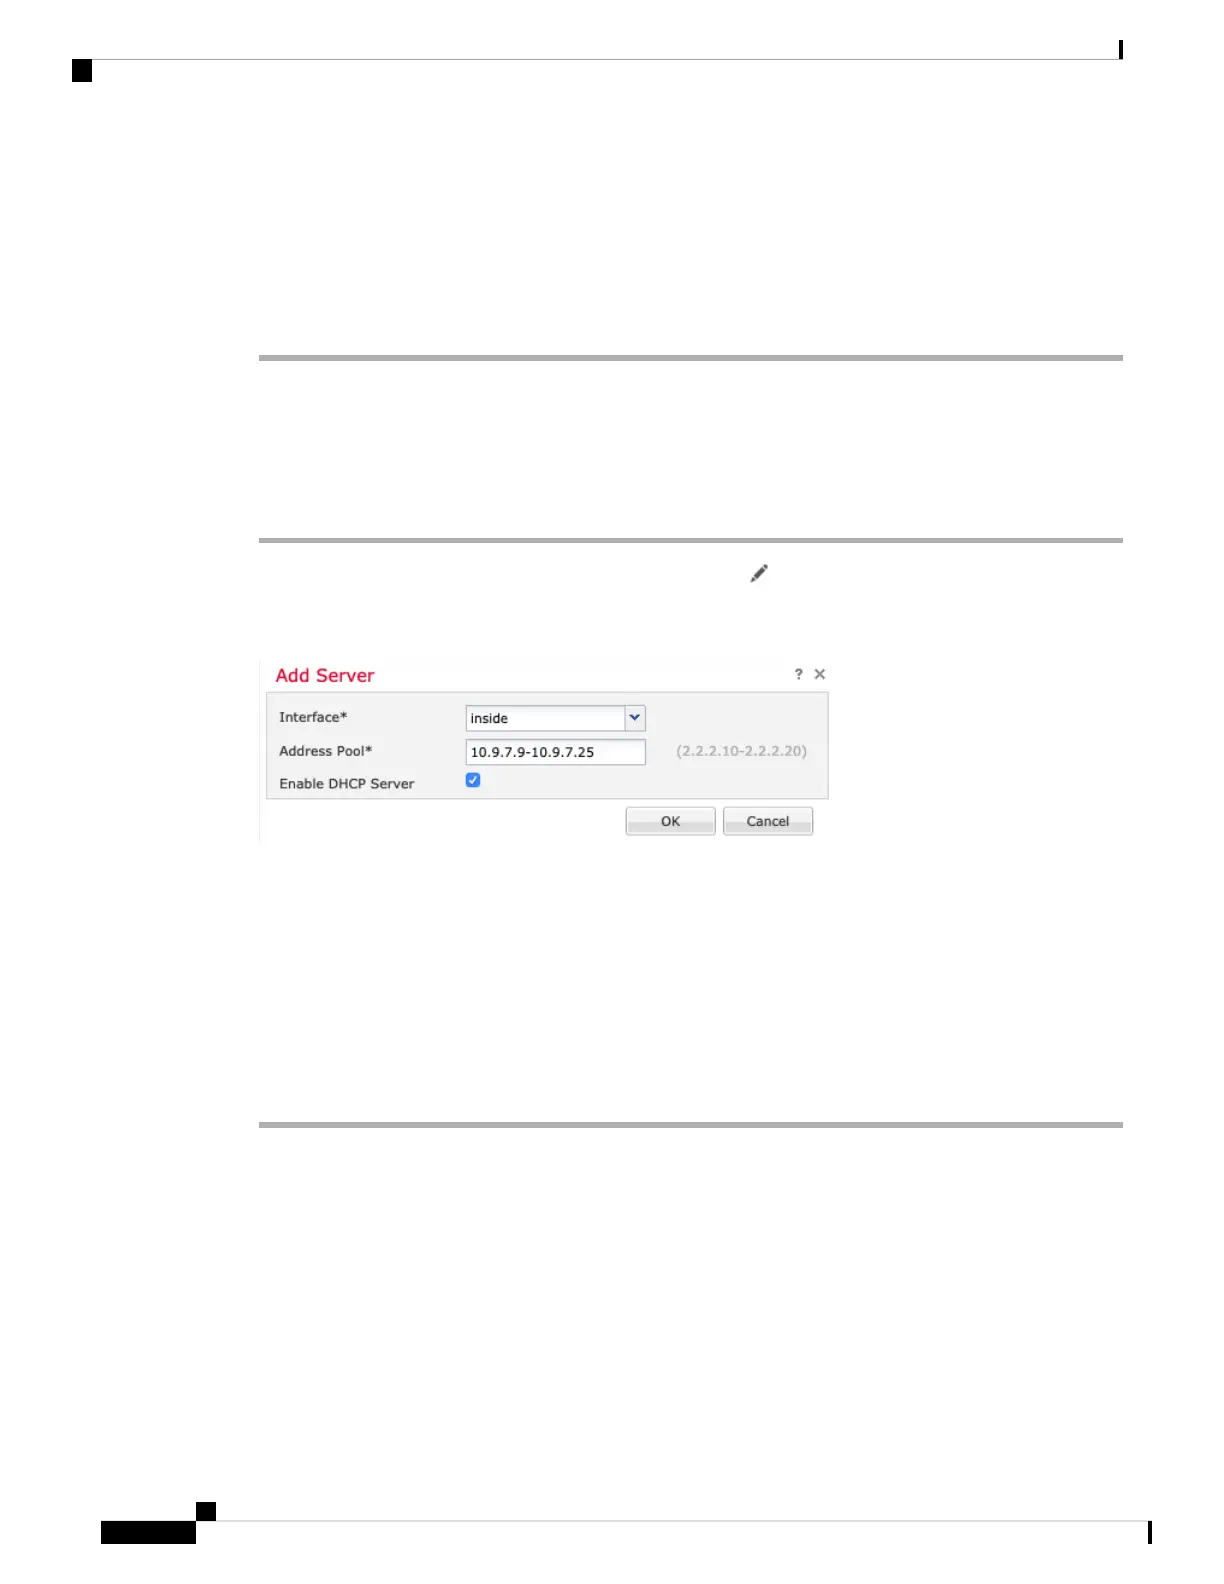
Configure the DHCP Server
Enable the DHCP server if you want clients to use DHCP to obtain IP addresses from the threat defense.
Procedure
Step 1 Choose Devices > Device Management, and click the Edit ( ) for the device.
Step 2 Choose DHCP > DHCP Server.
Step 3 On the Server page, click Add, and configure the following options:
• Interface—Choose the interface from the drop-down list.
• Address Pool—Set the range of IP addresses from lowest to highest that are used by the DHCP server.
The range of IP addresses must be on the same subnet as the selected interface and cannot include the
IP address of the interface itself.
• Enable DHCP Server—Enable the DHCP server on the selected interface.
Step 4 Click OK.
Step 5 Click Save.
Configure NAT
Configure NAT
A typical NAT rule converts internal addresses to a port on the outside interface IP address. This type of NAT
rule is called interface Port Address Translation (PAT).
Cisco Firepower 1100 Getting Started Guide
66
Threat Defense Deployment with a Remote Management Center
Configure the DHCP Server

 Loading...


