- Connection to the internet (if you are setting up your MR74 as a gateway
to the internet)
- Appropriately sized metal straps (if mounting to a pole larger than 3.9” in
diameter)
- Specialized mounting hardware if mounting to surface other than wood,
stucco or stone
- Laptop with wireless to verify setup (recommended)
4
Installation Instructions
4.1
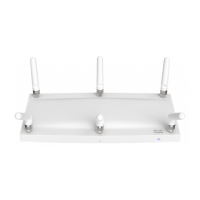
Choose Your Mounting Location
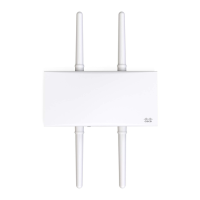
A good mounting location is important to getting the best performance out
of your MR74 access point. Keep the following in mind:
1. The device should have unobstructed line of sight to most coverage areas.
For example, if installing in an office filled with workspaces divided
by mid-height cubicle walls, installing on the ceiling or high on a wall
would be ideal.
2. Power over Ethernet supports a maximum cable length of 300 ft (100 m).
3.If being used in a mesh deployment, the MR74 should have line of sight
to at least two other Meraki devices. For more detailed instructions
regarding access point location selection, reference the Meraki
Network Design Guide (cisco.meraki.com/support/#documentation).
4.The antennas should be as unobstructed as possible. Make sure that
there is clearance around the MR74 for installation of all of your
chosen antennas.
Safety note on mounting locations:
It is recommended that the MR74 be mounted to at a minimum, a 13 mm
thick plywood/concrete wall or ceiling using the mount plate with 6.35
mm in diameter of screws for physical security reasons.