LAB 2: PBX, Voicemail & DialPlan
LAB 2: PBX, Voicemail & DialPlan
Introduction:
The UC520 supports two voice system configuration types – PBX type and Keysystem type. LAB2
focuses on the PBX system configuration. Keysystem configuration is included as an addendum in
Appendix B. Outbound calls are routed through the SIP and/or PSTN line based on the dialplan that is
configured. In addition to this, local extensions have voicemail boxes where callers can leave messages.
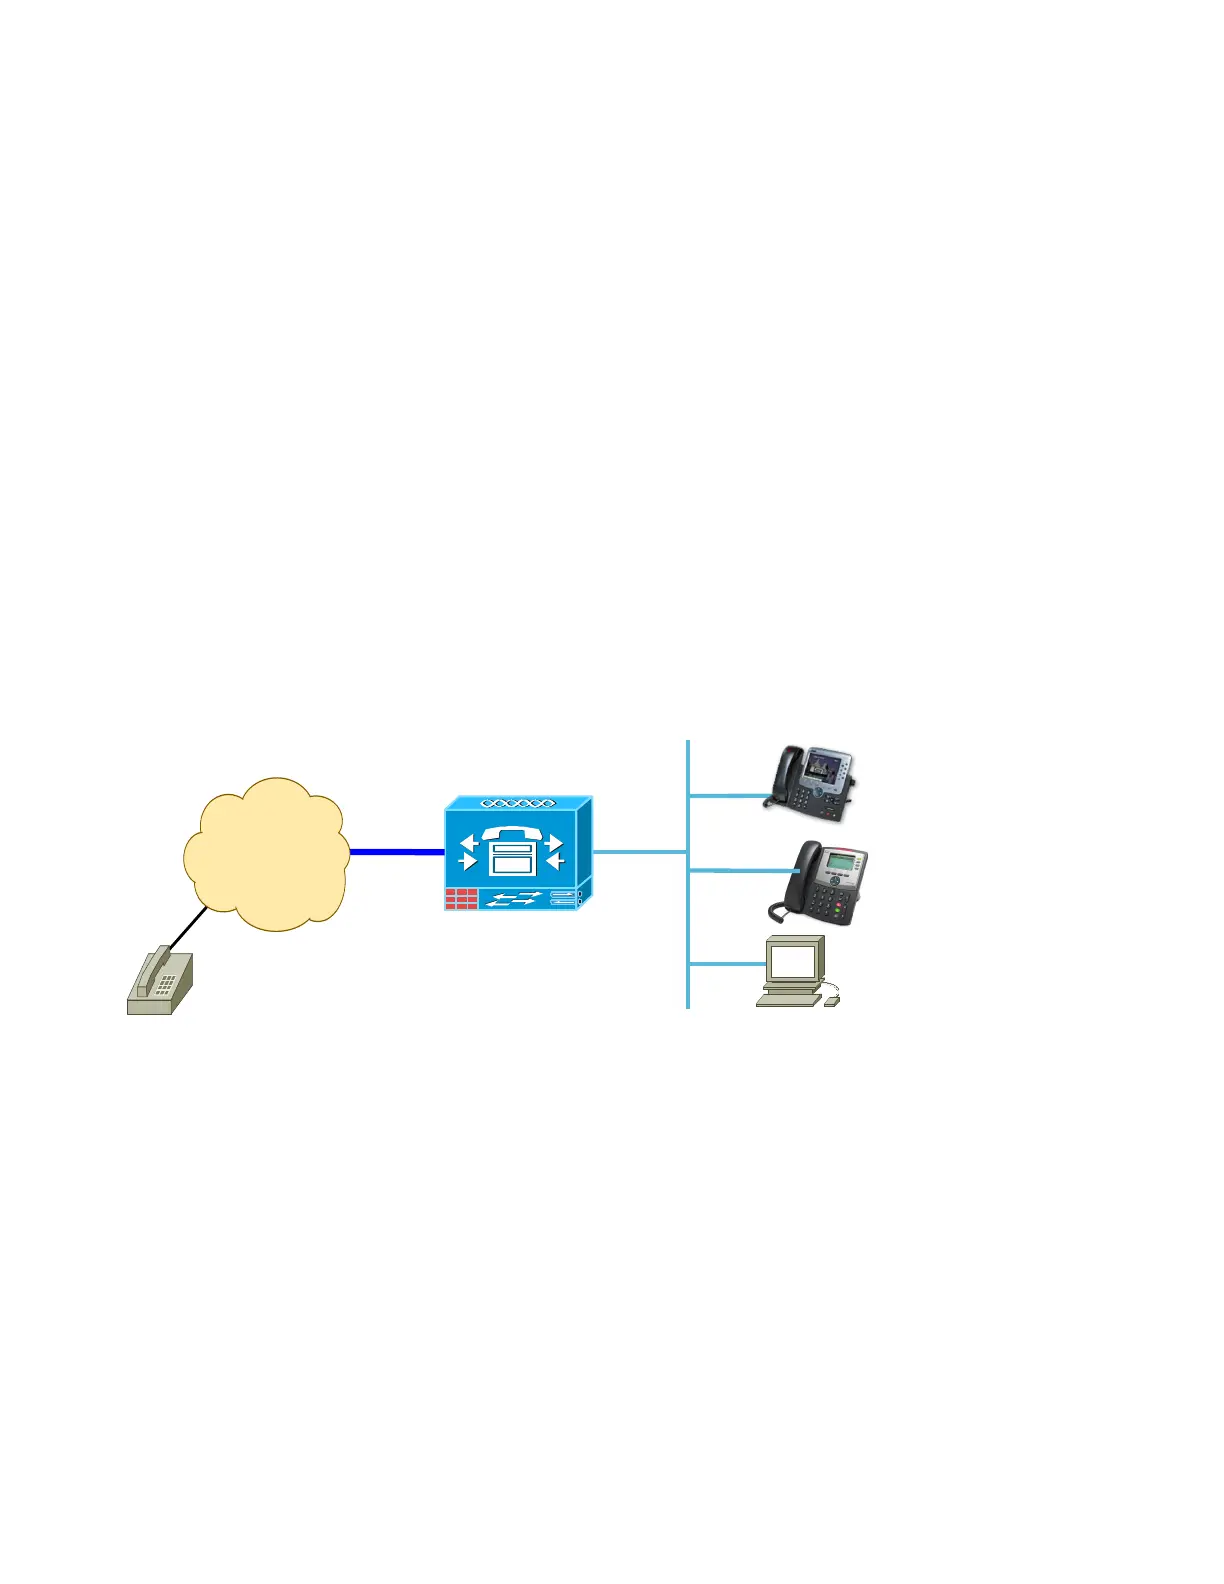
A typical PBX system involves an Auto Attendant that handles incoming calls from a PSTN line (eg.
Analog FXO or ISDN trunks) and transfers the caller to one of the internal extensions. Auto Attendant
configuration is covered in Lab xx.
Objective:
The main objective of this lab is to configure the basic PBX system, voicemail and outbound dialplan.
These features will be configured using Cisco Configuration Assistant (CCA). After completion of this
lab – you will be able to:
a) setup the SBCS system as a PBX
b) place calls between extensions
c) setup a SIP Trunk on the UC520 to a Service Provider (Lab Simulation)
d) place calls in & out to the PSTN via the SIP trunk.
Topology:
Setup steps:
1. Install Cisco Configuration Assistant (CCA) on your laptop.
2. Connect your laptop to one of the UC520 Ethernet ports or the Ethernet connection on the back of an
IP phone (if not already connected) & launch CCA.
 Loading...