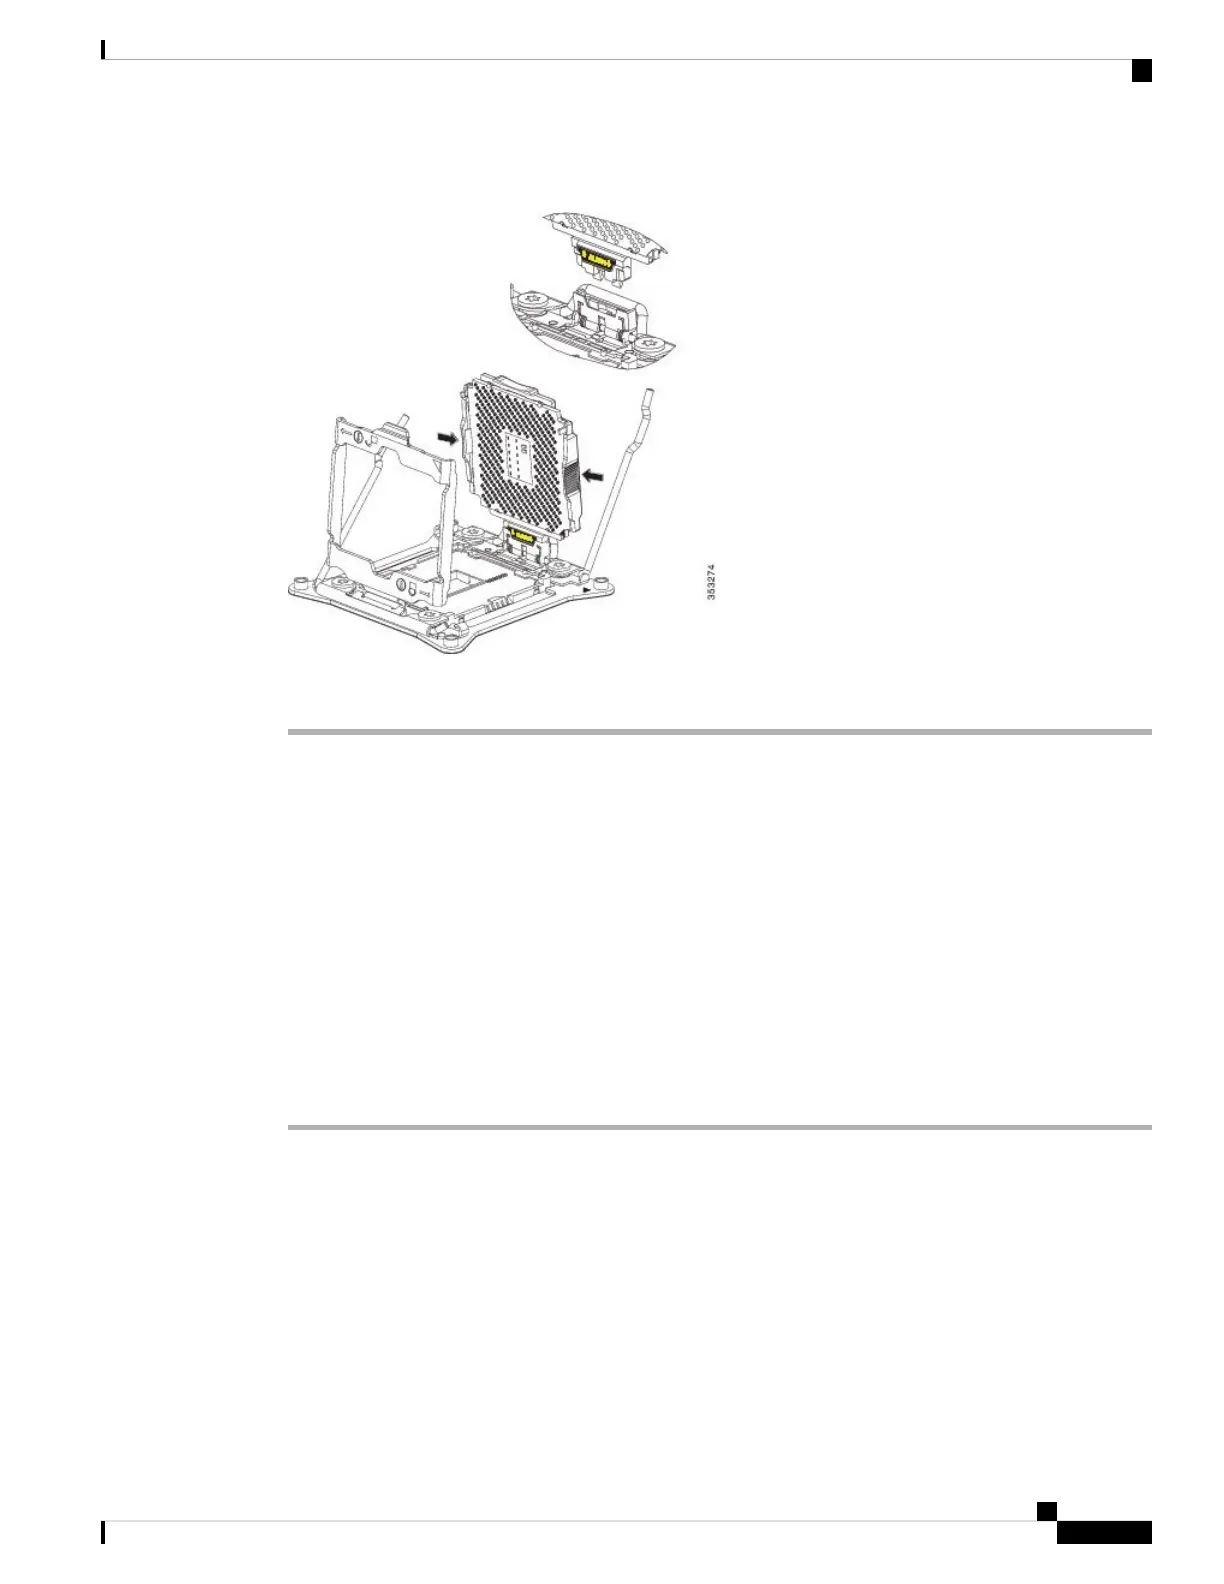
Figure 8: CPU Carrier and SLS Plug Seat
Step 6 Pull the CPU carrier up and out of the SLS plug seat.
Installing a New CPU and Heat Sink
Before installing a new CPU in a server, verify the following:
• A BIOS update is available and installed that supports the CPU and the given server configuration.
• The service profile for this server in Cisco UCS Manager will recognize and allow the new CPU.
• The CPUs and heat sinks are different and must be installed in the correct location. The front heat sink
and CPU 1 can only be installed in the front of the blade server and the rear heat sink and CPU 2 can
only be installed in the rear of the blade server.
Procedure
Step 1 Hold the CPU carrier by its sides (indicated by the arrows). Insert and align the two CPU carrier pegs into
the self-loading socket (SLS) plug seat. To ensure proper seating, verify that the horizontal yellow line below
the word ALIGN is straight.
Servicing a Blade Server
11
Servicing a Blade Server
Installing a New CPU and Heat Sink
 Loading...