Installing Memory
To install a DIMM into the blade server, follow these steps:
Procedure
Step 1 Open both DIMM connector latches.
Step 2 Press the DIMM into its slot evenly on both ends until it clicks into place.
DIMMs are keyed. If a gentle force is not sufficient, make sure the notch on the DIMM is correctly aligned.
Be sure that the notch in the DIMM aligns with the slot. If the notch is misaligned you may damage
the DIMM, the slot, or both.
Note
Step 3 Press the DIMM connector latches inward slightly to seat them fully.
Supported DIMMs
Do not use any memory DIMMs other than those listed in the specification sheet. Doing so may irreparably
damage the server and require down time.
Memory Population
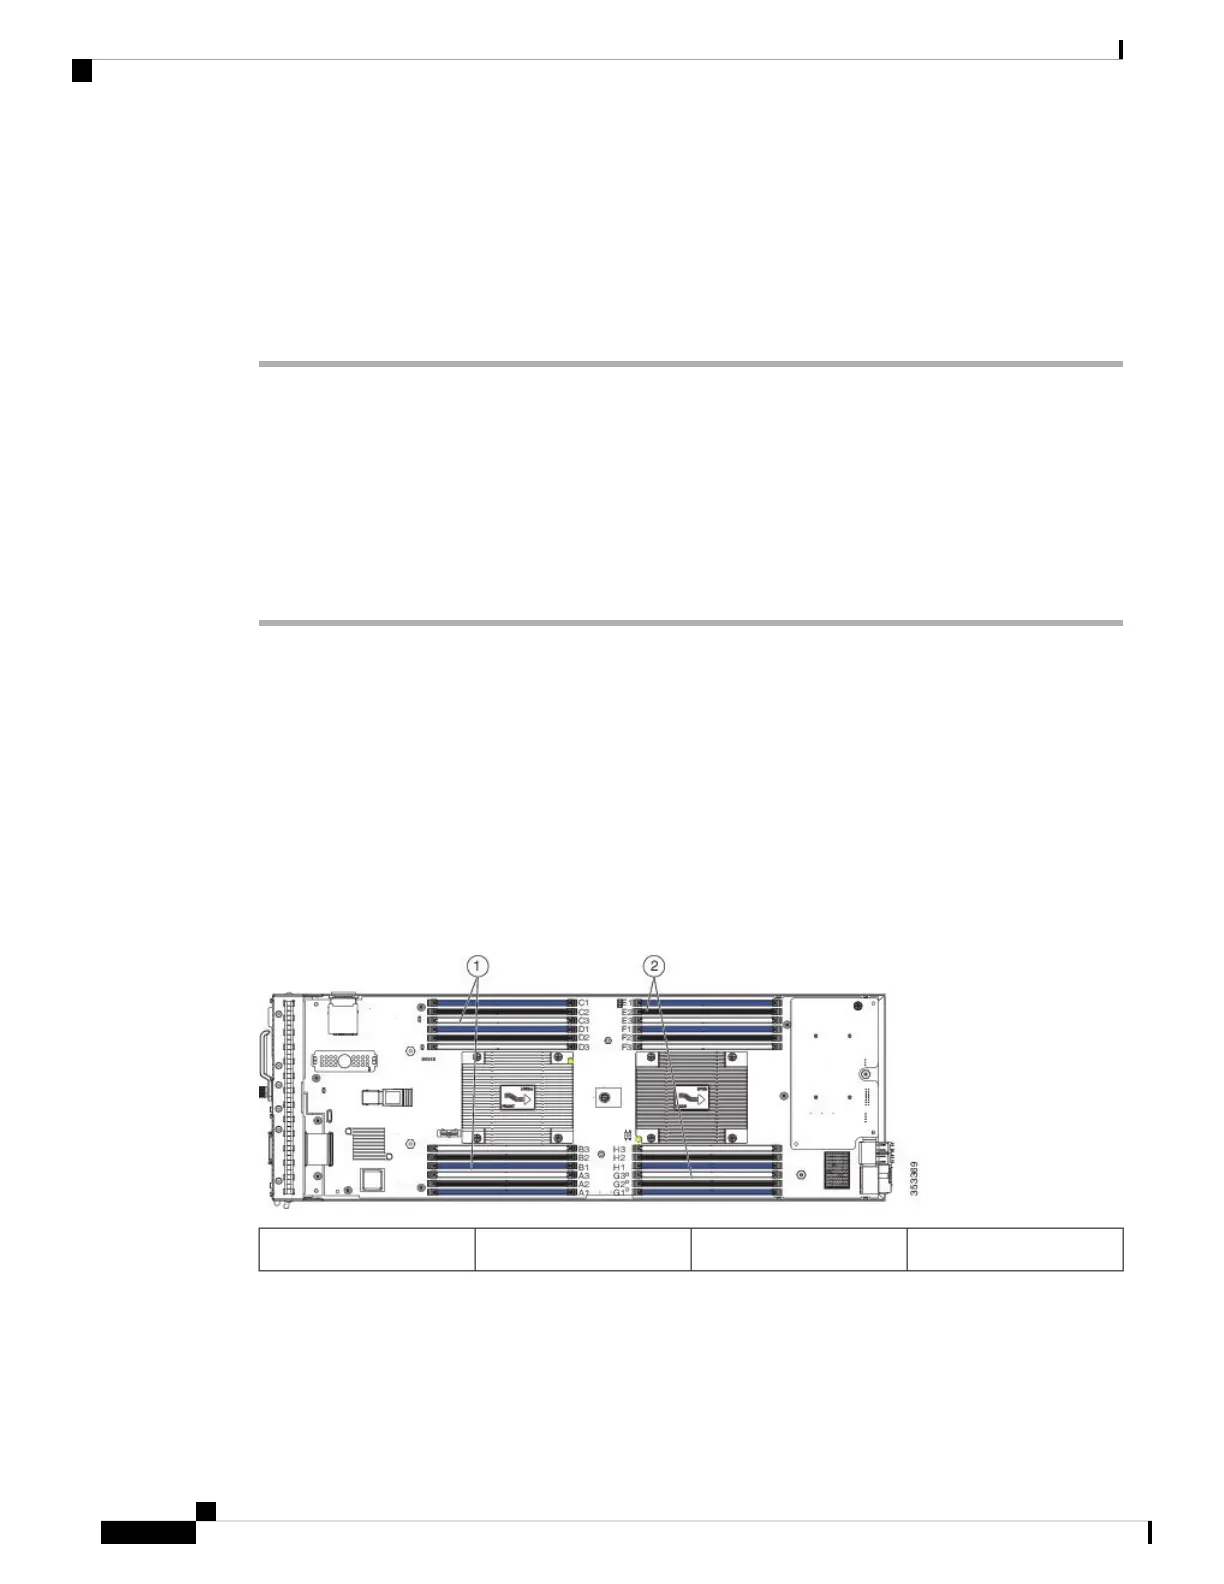
The blade server contains 24 DIMM slots—12 for each CPU. Each set of 12 DIMM slots is arranged into
four channels, where each channel has three DIMMs.
Figure 12: Memory Slots In the Blade Server
Channels E-H for CPU 22Channels A-D for CPU 11
Servicing a Blade Server
14
Servicing a Blade Server
Installing Memory

 Loading...