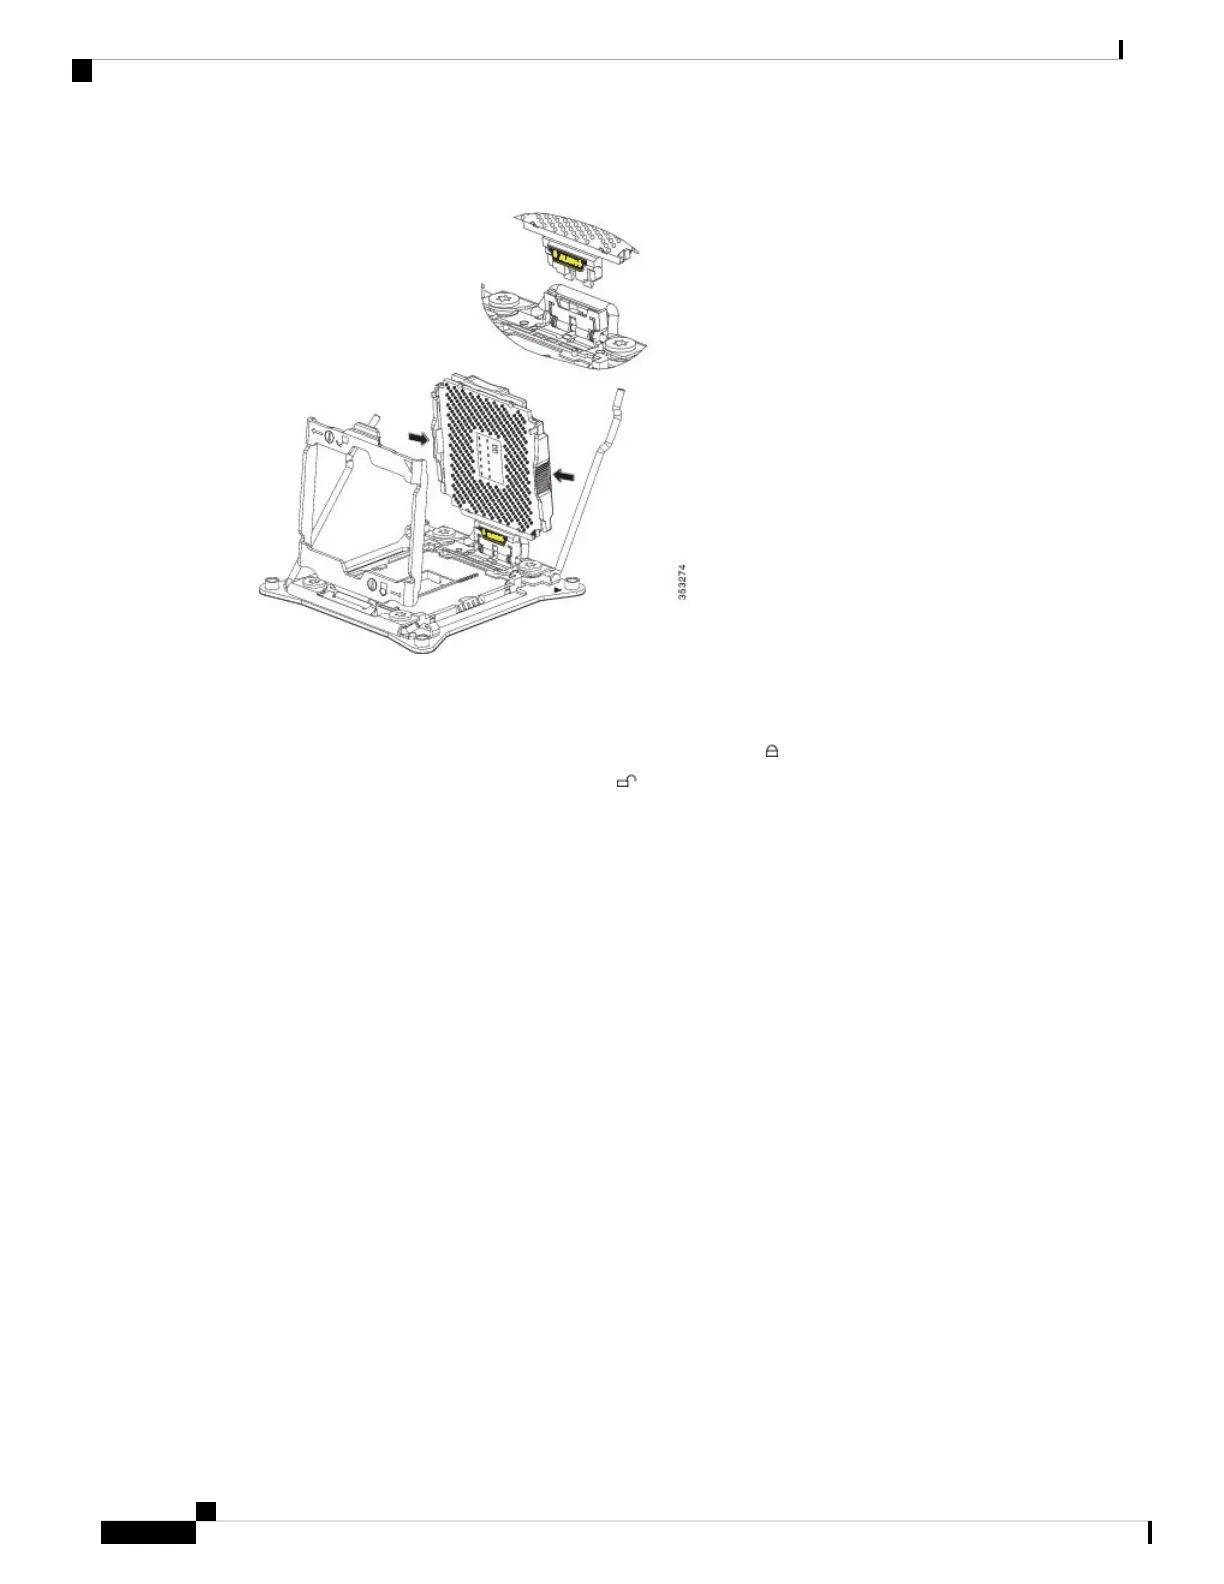
Figure 9: Inserting the CPU Carrier
Step 2 Press gently on the top of the CPU carrier from the exterior side until it snaps into place.
Step 3 Close the socket latch.
Step 4 Hook the self-loading socket (SLS) lever that has the lock icon .
Step 5 Hook the SLS lever that has the unlock icon .
Step 6 Thermally bond the CPU and heat sink. Using the syringe of thermal grease provided with the replacement
CPU, apply 2 cubic centimeters of thermal grease to the top of the CPU where it will contact the heat sink.
Apply the grease in the pattern shown in the following figure, which should use approximately half the contents
of the syringe.
Servicing a Blade Server
12
Servicing a Blade Server
Installing a New CPU and Heat Sink
 Loading...