The default SSID under factory default mode is CiscoSB-Setup. Associate your portable device to the Access
Point with this SSID and the pre-shared key, cisco123. Launch a browser and enter an arbitrary IP address or
a domain name. A web page with login fields is displayed. Enter the default user name and password: cisco.
Click Log In. The Access Point Setup Wizard is displayed.
Note
Step 1 Click Next on the Welcome page of the wizard.
Step 2 In the Configure IP address window, the Dynamic (DHCP) is configured by default to receive an IP address from a
DHCP server, or you may click Static to configure the IP address manually. For a description of these fields, see IPv4
Configuration, on page 17.
Step 3 Click Next. The Configure Single Point Setup window appears.
Step 4 Click Skip and go to Step 6.
Step 5 To join an existing cluster, enter the cluster group name and click Next. A summary page with the cluster information
is displayed. Confirm the data and click Submit.
To create a new cluster, click Create, enter a cluster name, and go to Step 6.
Note
Step 6 In the Configure Device - Set Password window, enter a new password and re-enter the password in the Confirm
Password field.
Step 7 Click Next. The Configure Your Wireless Network window appears.
a) Enter a Network Name which serves as the SSID for the default wireless network.
b) Enter a Security key (security type, WPA2 Personal - AES is by default)
c) Enter the VLAN ID for traffic received on the wireless network.
Check the check box to apply same configuration to Radio 2 or switch to another radio tab and repeat Step
7 to configure again.
Note
Step 8 Click Next. The Setup Captive Portal window appears.
Step 9 Click Skip. Go to Step 12.
Step 10 Click Yes. The Configure Captive Portal window appears.
Step 11 Select Radio 1 (5 GHz) or Radio 2 (2.4 GHz).
a) Specify a Guest Network Name.
b) Enter a Security key (security type, WPA2 personal - AES is by default)
c) Specify a VLAN ID for the guest network.
d) Optionally, you may specify a redirect URL with a fully qualified domain name (FQDN) to redirect users to the
specified URL after authentication.
Step 12 Click Next. The Summary window appears.
Step 13 Review the configured settings. Click Back to reconfigure one or more settings.
Step 14 Ensure the data is correct and click Submit to save.
Step 15 The WAP device is configured successfully. You are required to log in again with a new password.
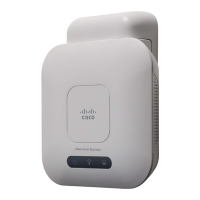
Cisco WAP150 Wireless-AC/N Dual Radio Access Point with PoE / Cisco WAP361 Wireless-AC/N Dual Radio Wall Plate Access Point with PoE
5
Getting Started
Using the Access Point Setup Wizard with mobile