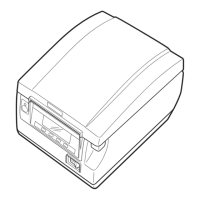
CT-S310II Series Service Manual
2-2. T roubleshooting Procedure
When a fault occurs, confirm its phenomenon, locate the problem in accordance with “2.2 Troubleshooting
Guide”, and troubleshoot it as described below.
Phenomenon
Find the fault phenomenon in this column. If there are multiple phenomena, take all the applicable
items into consideration. This will help you locate hidden problems as well.
Cause
Possible causes are listed here. Find probable causes from the list and follow the check method to
identify the cause of the fault.
Check Method The check method for identifying the cause of the fault is described.
Remedies Take the remedies described in this column.
By following the above-mentioned procedure, you can troubleshoot problems efficiently with fewer
misjudgments.
2-3. T roubleshooting Guide
● Power Supply Failure, Malfunction
Phenomenon Cause Check Method Remedies
The power cable is not
connected, or not inserted
securely.
Connect the power cable.
Insert the cable securely.
Power cannot be turned
on.
(The POWER LED not
illuminated.)
24 VDC is not output due to
power PCB failure.
Check the output between
PIN1 or 2 (24 VDC) and
PIN3 or 4 (GND) at the J11
terminal.
Replace the power PCB with a
new one. If the power PCB
has no problem, check “SA,
MAIN PCB”.
Continuous detection of
low voltage error
The USB cable is not inserted
correctly or the fuse is blown.
Check if the USB cable is
inserted into the drawer
connector.
Check if the fuse has blown
out.
Turn the power off and
disconnect the USB cable.
Replace the fuse with a new
one.
The brightness of the
POWER LED remains
low.
The printer is set in the USB
power saving mode (USB
power off status).
The USB cable is
disconnected.
The power of the host device
is off.
The printer power is turned
off and on within a short-time
interval.
Connect the USB cable.
Turn on the power to the host
device. Wait two or three
minutes after turning the
printer power off.
- 31 -

 Loading...