58 NX604/FX503
English
CAUTION
s Verify wires with a digital multi-meter
prior to making any connections.
Many new vehicles use multiplexed
and/or low voltage circuits that can
be damaged if a test light or logic
probe is used.
s Connect cables appropriately. If a
wrong connection is made, this may
cause a fire or accident.
s When passing cables through
the body of the vehicle, use non-
conductive grommets.
If the coatings of the cables are
worn out by rubbing, this may cause
an accident, fire or a short circuit.
s After wiring cables, fix them with
insulation tape.
s Be sure to switch off the vehicle
when connecting or disconnecting
cables to/from the unit, otherwise
an electric shock, injury or accident
may occur.
2. PACKAGE CONTENTS
Main unit
Quick Start Guide & Installation
Manual
CD-ROM
sOwner’s manual
sOwner’s manual - Navigation (NX604
only)
Power supply cable
RCA pin cable (6ch)
RCA pin cable (Rear AUX-IN/Rear
Video Out)
Bag for accessories
sFlat head screw (M5 × 8 mm)
............................................................8
sHexagonal bolt (M5 × 8 mm)
............................................................8
sRubber cap (for RCA pin cable)
..........................................................10
sCable holder (NX604 only)
………………………………………… 3
sDouble-sided tape for fastening GPS
antenna (NX604 only)
………………………………………… 1
sCable tie ……………………………… 1
Finisher
Warranty card
GPS antenna (NX604 only)
USB Cable
Notice
s4HEPROVIDEDDISC#$2/-MANUAL
CANNOTBEPLAYEDBACKONTHISUNIT
3. GENERAL CAUTIONS
●
Do not open the case. There are no user-
serviceable parts inside. If you drop
anything into the unit during installation,
consult your dealer or an authorized
Clarion service center.
4. CAUTIONS ON INSTALLATION
●
Prepare all articles necessary for
installing the main unit before starting.
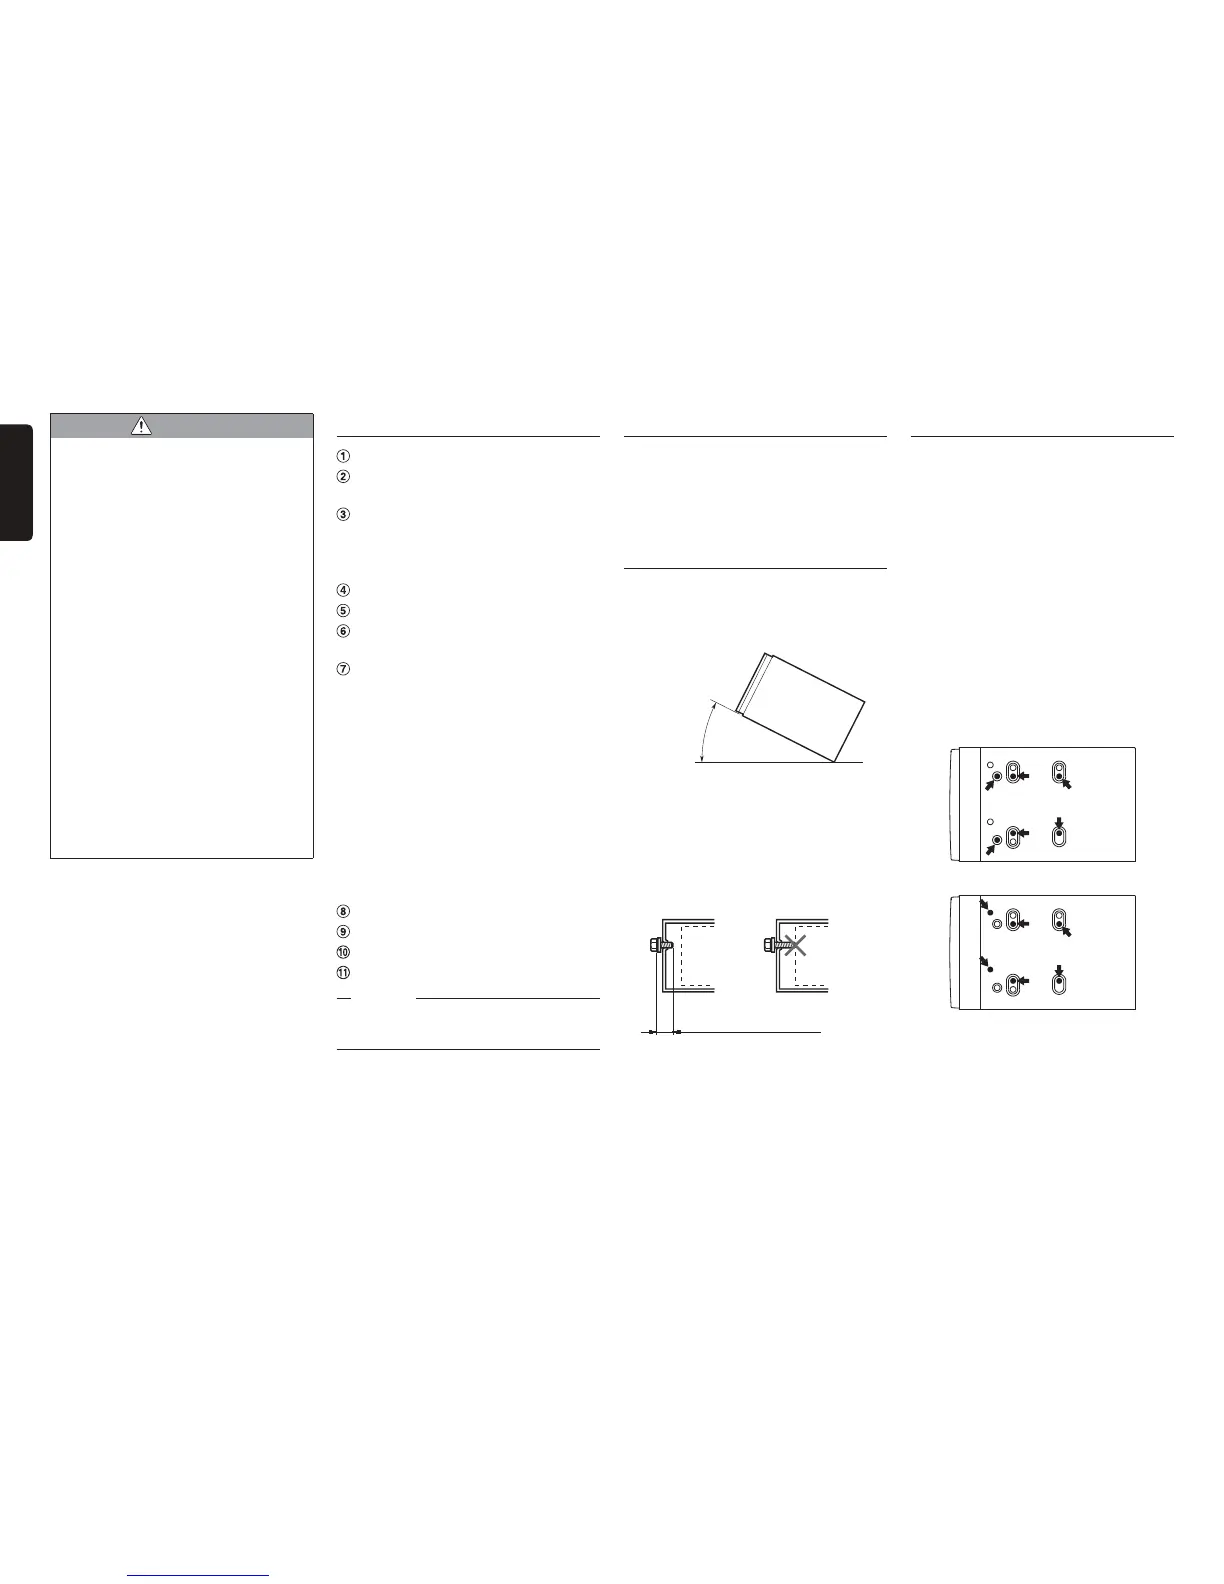
●
Install the unit within 35° of the horizontal
plane. (Figure 1)
Max. 35°
Figure 1
●
If you have to do any modification on the
car body, such as drilling holes, consult
your car dealer beforehand.
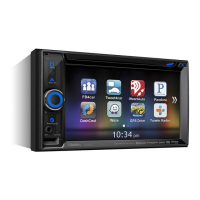
●
Use the included screws for installation.
Using other screws can cause damage.
(Figure 2)
Figure 2
Chassis Chassis
Damage
Max. 3 mm (M4 screw)/
Max. 8 mm (M5 screw)
5. INSTALLING THE MAIN UNIT
This unit is designed for fixed installation in
the dashboard.
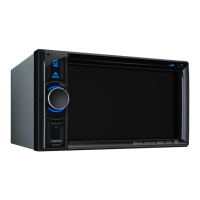
●
When installing the main unit in NISSAN
vehicles, use the parts attached to the
unit and follow the instructions in Figure
3.
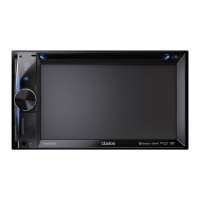
When installing the main unit in TOYOTA
vehicles, use the parts attached to the
vehicle and follow the instructions in
Figure 4.
●
Wire as shown in Section 9
p
P.61.
●
Reassemble and secure the unit in the
dashboard and set the face panel and
center panel.
Mounting Screw Holes (Side View of
the Main Unit)
For NISSAN vehicle
For TOYOTA vehicle