WARNING!
NEVER START THE MACHINE WITH THE BLADE GUARD REMOVED.
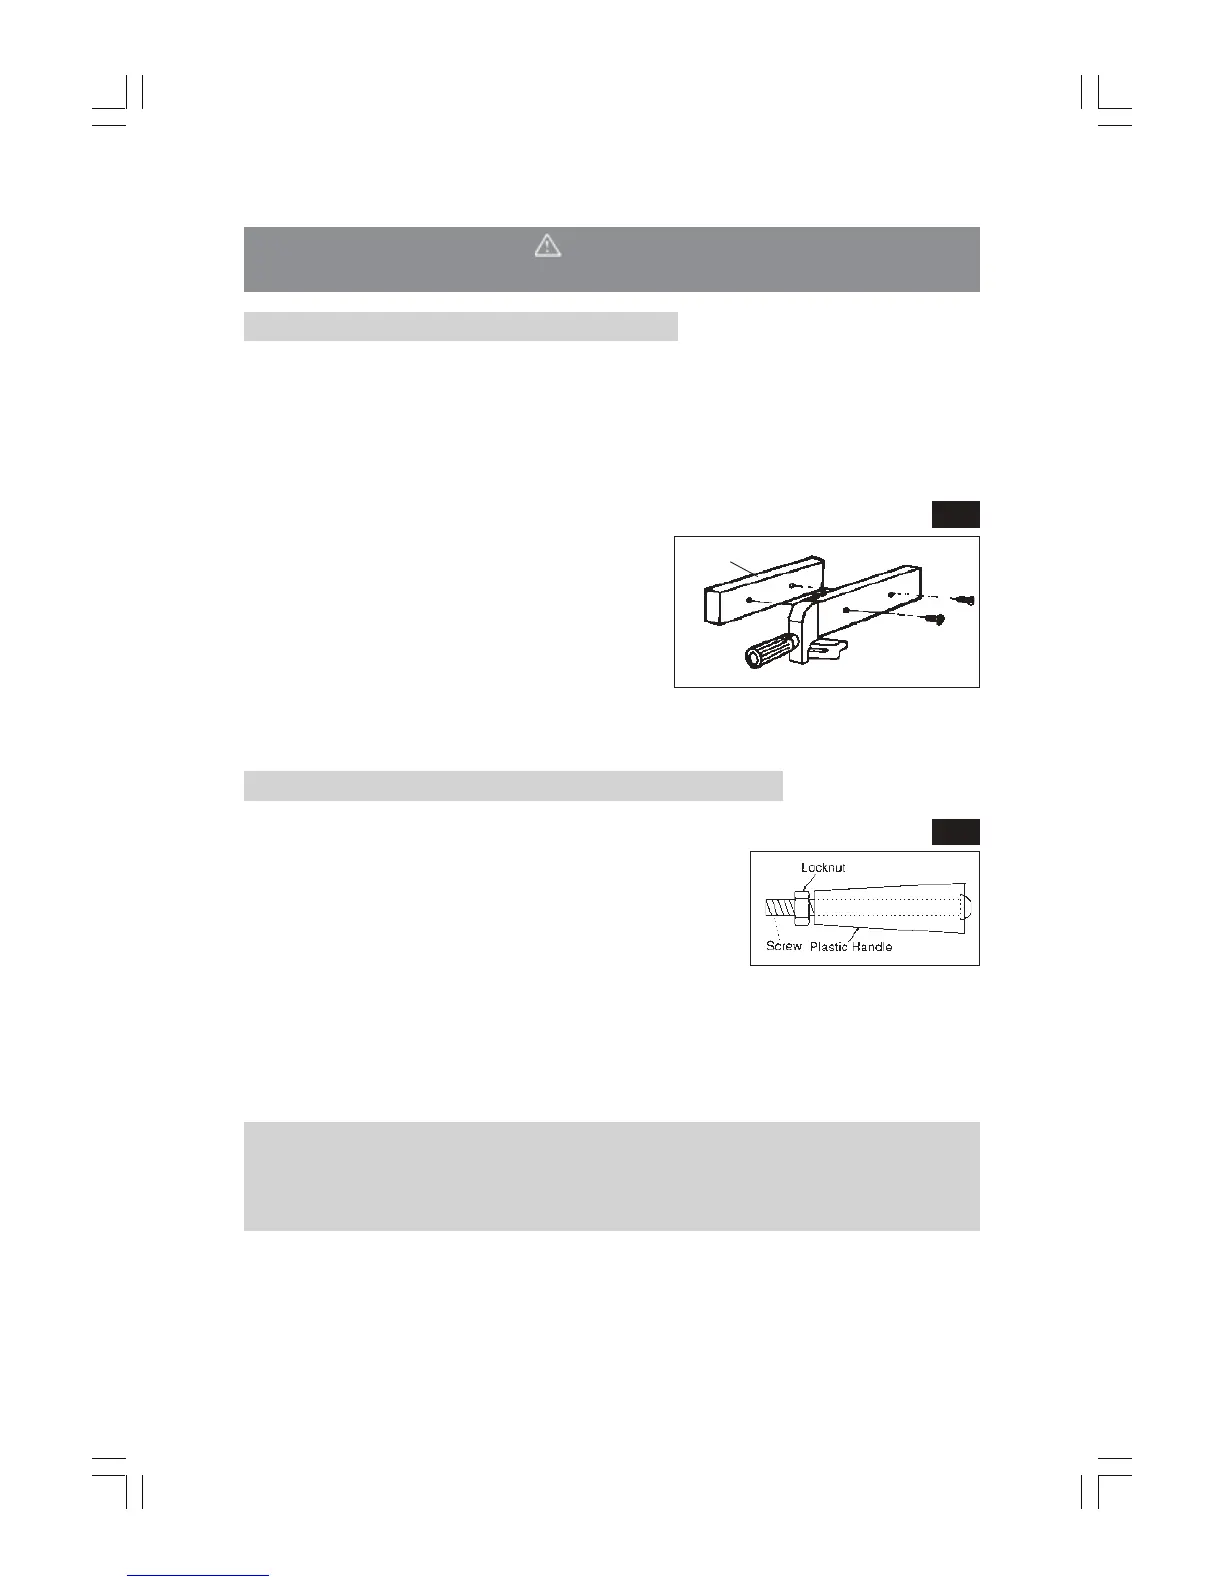
C. Rip Fence
1. Remove and discard the shipping nut from the threaded rod on the front end of the
fence clamp bracket and thread the fence locking handle on to the threaded rod.
2. Place the fence on the table. Hold the plastic casting, on front of the rip fence, firmly
against the front edge of the table and tighten the lock handle securely.
DO NOT overtighten the handle, as this will damage the plastic front block.
NOTE: Holes are provided in the rip fence for attaching a wood facing if required.
Select a piece of smooth straight wood, approx.
19mm (
3
/
4
”) thick and the same size as the rip
fence. Attach it to the fence with two round head
No.10 wood screws 40mm long.
If you are making a rip type cut in thinner materials,
the facing should be attached to the fence so
that the bottom edge touches the top surface of
the table.
In this situation, the facing must be lower than the fence, i.e. flush with the table. This will
prevent thin material from sliding under the rip fence.
D. Handle (to Blade Height Adjuster Handwheel)
1. Locate the following loose parts:
1 x M6 x 55mm Cross Head Screw
1 x 6mm nut
1 x Small Plastic handle
2. Thread the screw through the hole running through the
handle and screw on the locknut as far as it will go, as
shown in the diagram.
Then screw the assembly into the rim of the Blade Height Adjuster handwheel until the
plastic handle tightens. Back off the screw slightly and unscrew the nut until it is tight
against the rim of the handwheel, thereby locking the screw in that position.
When properly assembled, the handle will rotate freely about the screw, with minimal
end play.
Your Table Saw is now fully assembled. However, before it can be used, you must ensure
that it is securely and correctly mounted, and checks MUST be made to ensure that all
necessary adjustments are correct, and that parts are properly aligned.
These details are covered in the following paragraphs.
11
Wood facing
Screw IN lock handle to secure Rip Fence
Fig.4
Fig.5
 Loading...