NOTE: For proper stability, holes must be counter sunk on the underside of the plywood so that screw
heads are flush with the bottom surface of the mounting board.
IMPORTANT
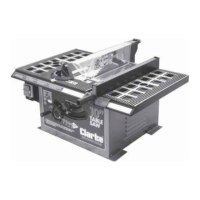
Ensure the Bottom Grid is in place when bolting the machine to the workbench.
2. Securely clamp the board to a workbench
using two or more “G” clamps, as illustrated
in Fig. 7.
The supporting surface, where saw is to be
mounted, should be examined carefully
after mounting to ensure that no movement
can occur during use. If any tipping or
creeping is noted, it should be investigated
and rectified. The mounting surface must be
flat and even.
IMPORTANT CHECKS - BEFORE STARTING
IMPORTANT:
Before attempting to use the machine, it is necessary to ensure the various
components are correctly adjusted, and checked for security.
1. The Riving Knife
The Riving Knife is essential in producing a good clean cut without chattering or binding
taking place. This adjustment is critical and must ALWAYS be checked before starting your
machine.
To adjust the riving knife remove the Bottom Cover
to give access to the riving knife mounting bolts.
(The Bottom cover is secured with four self tapping
screws, one in each corner).
Slacken off the Riving Knife mounting bolts and
adjust the knife so that a MAX. clearance of 15mm
is maintained around the entire length of the knife,
as shown in Fig.8.
Check to ensure the riving knife is straight and
directly in line with the blade, and in the middle of
the cut (KERF) made by the saw blade, as shown
in Fig .9 on page 14.
NOTE: The riving knife is thinner than the width of the KERF.
Should the Riving Knife become out of shape or misaligned, it must be gently eased back
into line, or if the damage is more severe, it must be removed and bent back into shape
accordingly, or replaced.
13

 Loading...