17
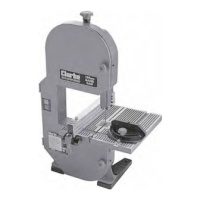
When the width of rip is 150mm (6”) and wider
use your RIGHT HAND to FEED the workpiece,
use LEFT HAND only to GUIDE the workpiece,
do not feed the workpiece with the left hand.
(Fig.13).
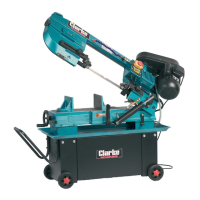
When width of rip is 50 - 150mm (2”- 6”) wide
use a push stick to feed the work. (Fig.14).
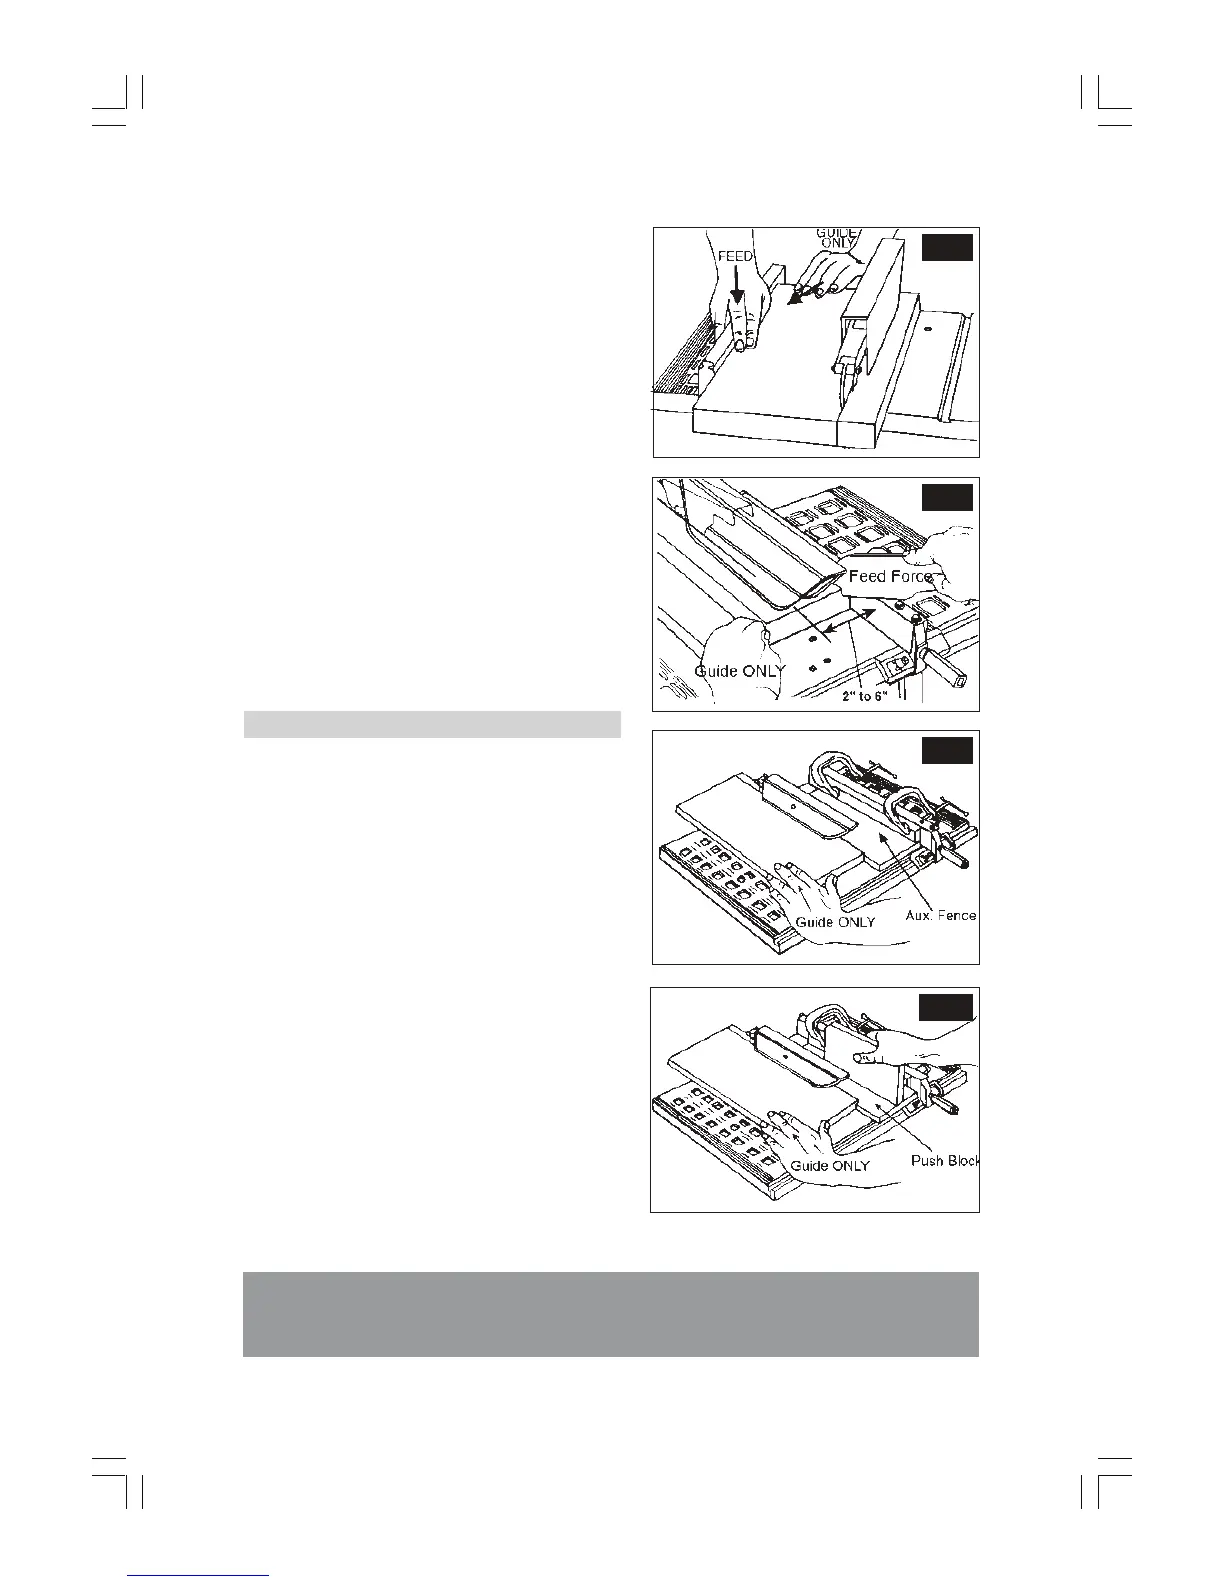
When width of rip is narrower than 50mm (2”),
the push stick cannot be used because the
guard will interfere. It is therefore necessary to
use the auxiliary fence, and push block together
as shown in fig. 16.
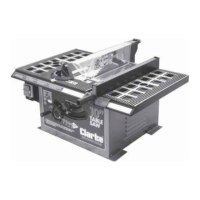
Attach auxiliary fence to rip fence with two ‘G’
clamps as shown in fig 15.
Feed the workpiece by hand until the end is
approximately 1” from the front edge of the
table. Continue to feed using the push block
on top of auxiliary fence until the cut is
complete.
3. Rip Cutting a Bevel.
By tilting the saw blade (by up to 45
O
), it is
possible to rip cut a bevel in your work. To do
this, set the blade angle by slackening off the
Blade Tilt Lock knob, and position the blade
using the angle gauge and pointer mounted
on the front of the machine. (If absolute
accuracy is required, check the blade angle
with a protractor).
When bevel ripping material 150mm (6”) or
narrower, use the fence on the RIGHT SIDE of
the blade ONLY. This will provide more space
between the fence and the saw blade for the
use of a push stick. If the fence is mounted to
the left, the saw blade guard may interfere with
proper use of a push stick.
NOTE: Your saw is equipped with positive stops for fast
and accurate positioning of the saw blade at 90 and
45 degrees to the table. Should these stops become
out of alignment, they may be readjusted according
to the instructions given under ‘Maintenance’
WARNING!
TO PREVENT PERSONAL INJURY, ALWAYS DISCONNECT PLUG FROM POWER SOURCE
WHEN MAKING ADJUSTMENTS.
Fig.13
Fig.16
Fig.15
Fig.14
 Loading...