10
In direct sunlight
On exterior, non–insulated or poorly insulated walls
In the kitchen or other areas of potentially high heat and/or
humidity
In an area that could restrict air ow
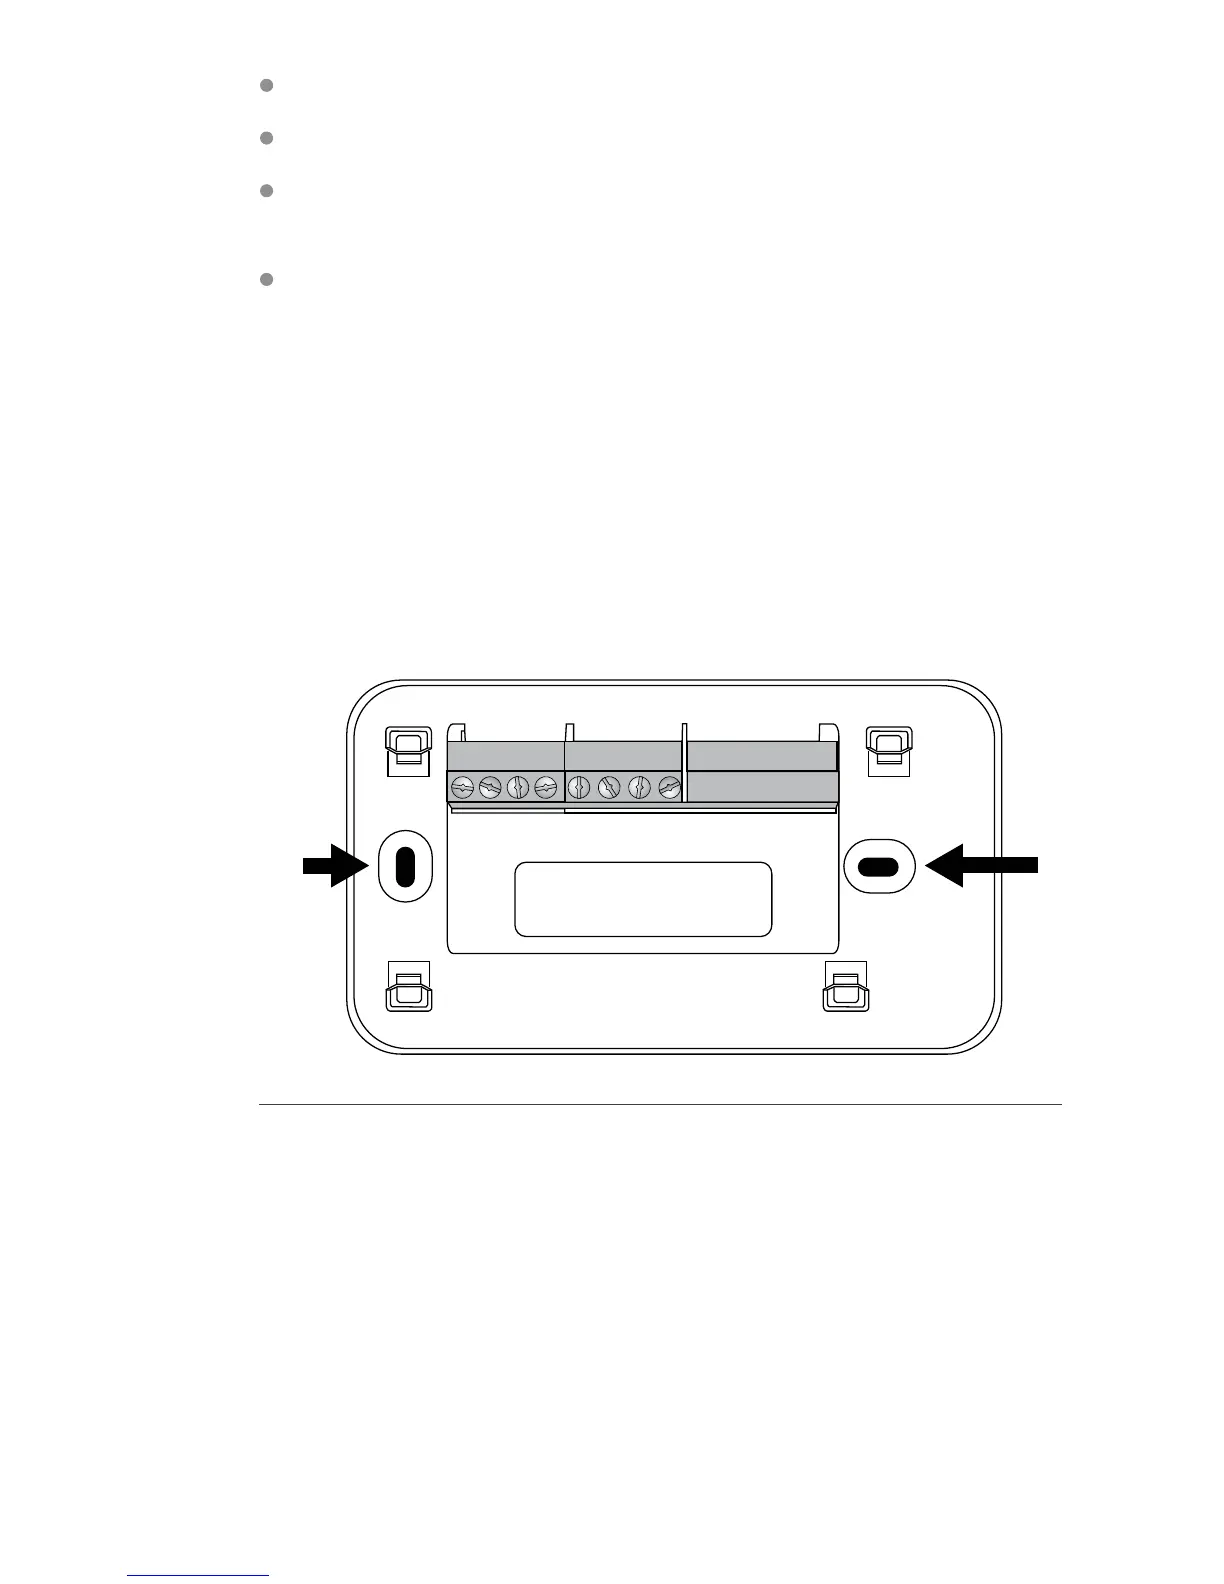
To install the thermostat:
1. Gently separate the backplate from the thermostat.
2. Place the thermostat backplate on the wall. Make sure that
any existing wires can be inserted through the opening for the
wiring.
3. Using the backplate as a template, mark the location of the
mounting holes on the wall as shown below.
4. Move the backplate out of the way and make holes where
indicated in step 3. The mounting holes can accommodate a
#6 pan–head screw. It is recommended to use the included
fasteners to ensure proper tting of the front housing.
5. Use the included drywall plugs (or other suitable anchors)
to ensure the thermostat can be mounted securely to the wall.
6. Fasten the backplate to the wall using the screws provided
(or other suitable screws).
24vGndA+B-
R2- R2+ R1- R1+
The solid color indicates mounting holes