9
INSTALLING THE IGATE
™
CONNECT
THERMOSTAT
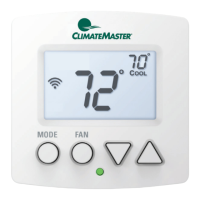
There are 5 steps to install the ClimateMaster iGate
™
Connect
thermostat:
Step 1. Power O Trilogy® Unit
Step 2. Remove Any Existing Thermostat
Step 3. Install the iGate
™
Connect Thermostat
Step 4. Connect the Wiring
Step 5. Power On Trilogy® Unit
Step 1. Power O Trilogy
®
Unit
Before disconnecting the existing thermostat, or installing
the iGate
™
Connect thermostat, disconnect the power to the
heating and air conditioning equipment.
Step 2. Remove Any Existing Thermostat
Disconnect the wires to the existing thermostat (if applicable)
and remove it from the wall (if you are installing the iGate
™
Connect thermostat in the same location).
Step 3. Install the iGate
™
Connect
Thermostat
The ideal location for the thermostat is approximately 5 ft (1.5
m) above oor level in the main living area.
Do not install the thermostat:
Close to sources of heat such as incandescent lights
Near supply heating/cooling sources