Chapter 2: Installation
6 Installing the Control Panel
4. Mount the two knobs on the sides of the bracket, but do not tighten
them yet.
5. Connect the cables as described in chapter 3.
6. Adjust the angle of the Control Panel to the wanted position. The
bracket can be adjusted ± 20°.
7. Tighten the two knobs on the sides of the bracket when the Control
Panel is in the desired position.
Flush mount
You can mount the Control Panel in a flat surface, e.g. in a console, using
the flush mount brackets and screws included with the Control Panel.
To mount the Control Panel in a console, do as follows:
1. Find a suitable location in the console. Check that there is enough space
for the Control Panel and an additional 80 mm space for cable entry.
Make sure that there is room for service access to the unit if it is fitted in
a custom designed console.
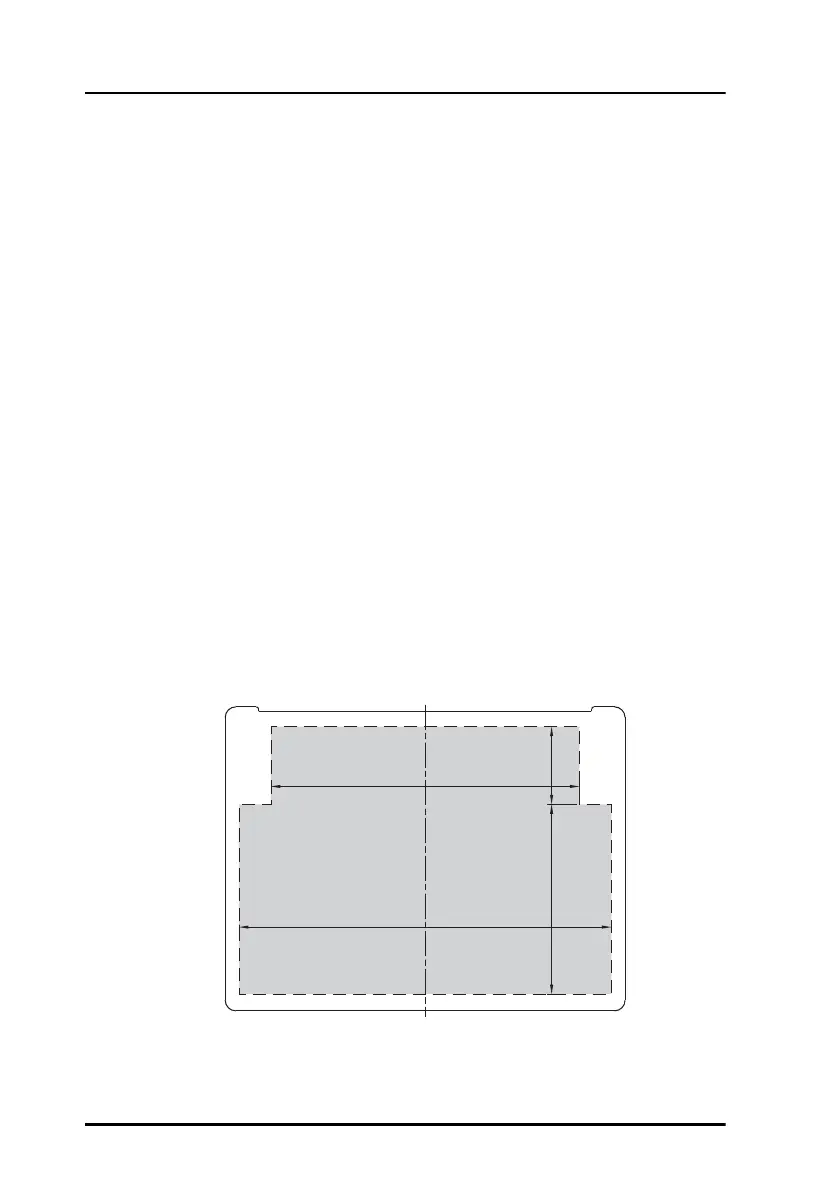
2. Cut a hole for the Control Panel, see the dimensions shown below.
177.5mm
147mm
90.5mm
37mm
Remove material from shaded area only!