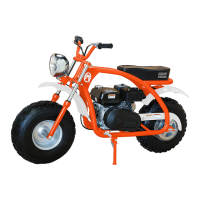
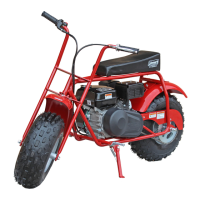
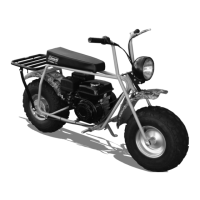
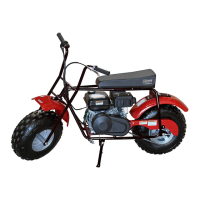
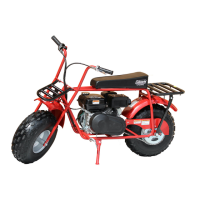
The Coleman BT200X is a mini bike designed for recreational use, requiring assembly and pre-ride inspection before operation. This manual outlines the necessary steps for setting up the mini bike, ensuring it is safe and ready for use.
Function Description
The Coleman BT200X mini bike provides a means of personal transportation for off-road recreational activities. It is powered by an internal combustion engine and features a simple design for ease of use and maintenance. The mini bike is shipped without engine oil, emphasizing the importance of proper fluid levels before its first start. Its primary function is to offer an enjoyable riding experience, provided all assembly, inspection, and maintenance procedures are followed diligently.
Usage Features
Assembly:
The assembly process begins with removing components from the crate. Key parts include the owner's/operator's manual, tool kit, zip ties, handlebar hardware (clamps and M8 x 32 bolts), front fork suspension, M10 steering bolt, M10 small washers, M10 lock nut, M10 large washers, front fender (M8 x 20 bolts, 8mm large washers, M8 nuts), light/fender bracket (M8 x 15 bolts), rear fender (M8 x 20 bolts, 8mm large washers, M8 nuts), front wheel (M14 axle bolt, M14 washers, M14 lock nut), and light assembly (M8 x 50 bolts, light, M8 rubber grommets, M8 nuts).
-
Front Fork Installation:
- The front fork assembly is installed by inserting the M10 steering bolt through the components in a specific order: large washer, top bracket, small washer, steering neck, small washer, bottom bracket, large large washer, and finally the lock nut.
- The lock nut is then tightened to secure the assembly.
- Fork bolts on both sides of the assembly are tightened to a torque of 15 ft/lbs.
-
Light/Fender Bracket Installation:
- The light/fender bracket is attached using M8 x 15 bolts, torqued to 15 ft/lbs.
-
Front Fender Installation:
- The front fender is attached using M8 x 20 bolts, large M8 washers, and M8 nuts. These bolts are torqued to 15 ft/lbs.
-
Rear Fender Installation:
- The rear fender is attached using M8 x 20 bolts, large M8 washers, and M8 nuts. These bolts are also torqued to 15 ft/lbs.
-
Handlebar Assembly:
- The handlebars are lifted and centered on the fork assembly.
- A crucial caution is provided: ensure brake cables, throttle cable, and on/off switch wire are not kinked or pinched during installation.
- The handlebars are then attached using clamps and M8 x 32 bolts, torqued to 15 ft/lbs.
-
Front Wheel Installation:
- The front tire must be oriented so the arrow on the tire faces forward.
- The M14 axle bolt is inserted with M14 washers placed between the forks and the wheel on each side.
- The M14 lock nut is then installed and tightened.
-
Light Installation:
- The front light is installed onto its bracket using M8 x 50 bolts, M8 rubber grommets, and M8 nuts. The rubber grommets fit between the light and the light bracket.
- Torque bolts to 12 ft/lbs.
- Finally, the light wires are plugged into the corresponding wires from the engine assembly.
-
Secure Wires and Cables / Install Clutch Cover:
- Verify that the on/off switch wire, throttle cable, and brake cable are not kinked and allow free movement when the handlebars are turned.
- Secure all wires and cables to the frame using the provided zip ties.
- A warning emphasizes checking the throttle cable for free movement and ensuring it snaps back to idle when released before starting the engine.
Starting Engine:
- Place the fuel valve to the "ON" (right) position.
- If the engine is cold, place the choke lever to the "ON" (left) position.
- Place the ON/OFF switch on the handlebars to the "ON" position.
- Pull the starter recoil cord to start the engine.
- Once the engine has warmed up for a few minutes, return the choke lever to the "OFF" (right) position.
- A critical warning advises against starting or running the mini bike in enclosed areas due to hazardous exhaust fumes, which can cause severe injury or death. Always operate outdoors.
Maintenance Features
Engine Oil:
- The mini bike is shipped without engine oil. It must be filled with SAE 10W-30 Motor Oil.
- Refer to the owner's manual for the correct amount and grade of engine oil.
- Caution: Do not overfill or underfill with engine oil.
Fuel:
- Never use leaded gasoline, as it can damage the engine and affect emissions.
- The mini bike requires clean, unleaded regular gasoline with a minimum octane rating of 86 or higher.
- Fill the fuel tank up to the bottom of the filler neck.
Tire Pressure:
- Always check tire pressure before each ride. Incorrect pressure affects handling, rider comfort, steering, tire life, and traction.
- Recommended tire pressure for both front and rear tires is 10 psi.
Chain Tension:
- The chain tension should be 1/2 - 3/4 inches (15-20mm).
- Adjustment:
- Loosen bolt (2) on the rear axle assembly.
- Adjust chain tension by turning the tension nuts (3) (located on both sides of the mini bike). Clockwise tightens the chain, counter-clockwise loosens it.
- Once the correct tension is achieved, re-tighten axle bolt (2).
- Re-check chain tension.
Brake Adjustment:
- Brake Lever Adjustment (Front):
- The front left brake lever (1) should have 2.0 - 4.0mm (0.08 - 0.16 inches) of free play.
- To adjust:
- Loosen the jam nut (2) on the brake cable.
- Turn the adjuster nut (3) until the correct free play is achieved.
- Re-tighten jam nut (2).
- Brake Adjustment (Rear):
- To adjust the rear brake:
- Loosen the rear axle bolt (4).
- Locate the adjustment nut (5) on the rear brake drum assembly.
- Turn the adjusting nut (5) clockwise to increase braking or counter-clockwise to decrease braking.
Throttle Adjustment:
- The throttle grip should have a free play of 0.078 - 0.24 inches (2-6 mm).
- To adjust:
- Loosen jam nut (3).
- Turn adjusting nut (4) to the proper setting.
- Once the throttle grip has the correct free play, re-tighten jam nut (3).
Pre-Ride Inspection:
- A pre-ride inspection is crucial to ensure the mini bike is in good operating condition and to prevent injuries or breakdowns.
- Warning: Failing to inspect and maintain the mini bike can be hazardous, potentially leading to loss of control, accidents, or damage. Always perform a pre-ride inspection.
- Warning: Performing maintenance while the engine is running is hazardous due to moving parts and hot surfaces. Never perform maintenance or check procedures with the engine running, except for checking the engine stop switch or throttle.
Pre-Ride Checklist:
- Steering: Check for smoothness and no restriction of movement.
- Brakes: Ensure proper brake lever play.
- Tires: Verify proper tire pressure.
- Fuel Tank: Check for enough fuel, secure fuel cap, and no signs of cracks or leaks in hoses.
- Throttle Grip: Ensure it snaps back to idle when released, operates freely, and has correct free play.
- Engine Stop Switch: Confirm it shuts off the engine when activated.
- Engine Oil: Check for the correct oil level.
- Drive Chain: Verify proper tension and lubrication.
- General Condition: Ensure all nuts and bolts are tight, and there are no rattles from the engine or frame while running.
This comprehensive guide ensures that the Coleman BT200X mini bike is assembled correctly, maintained properly, and operated safely, providing a reliable and enjoyable experience for its users.