Atena Easy Addressable Fire Alarm Panel – Installation and Programming Manual
49
7.10.2 Panels Settings
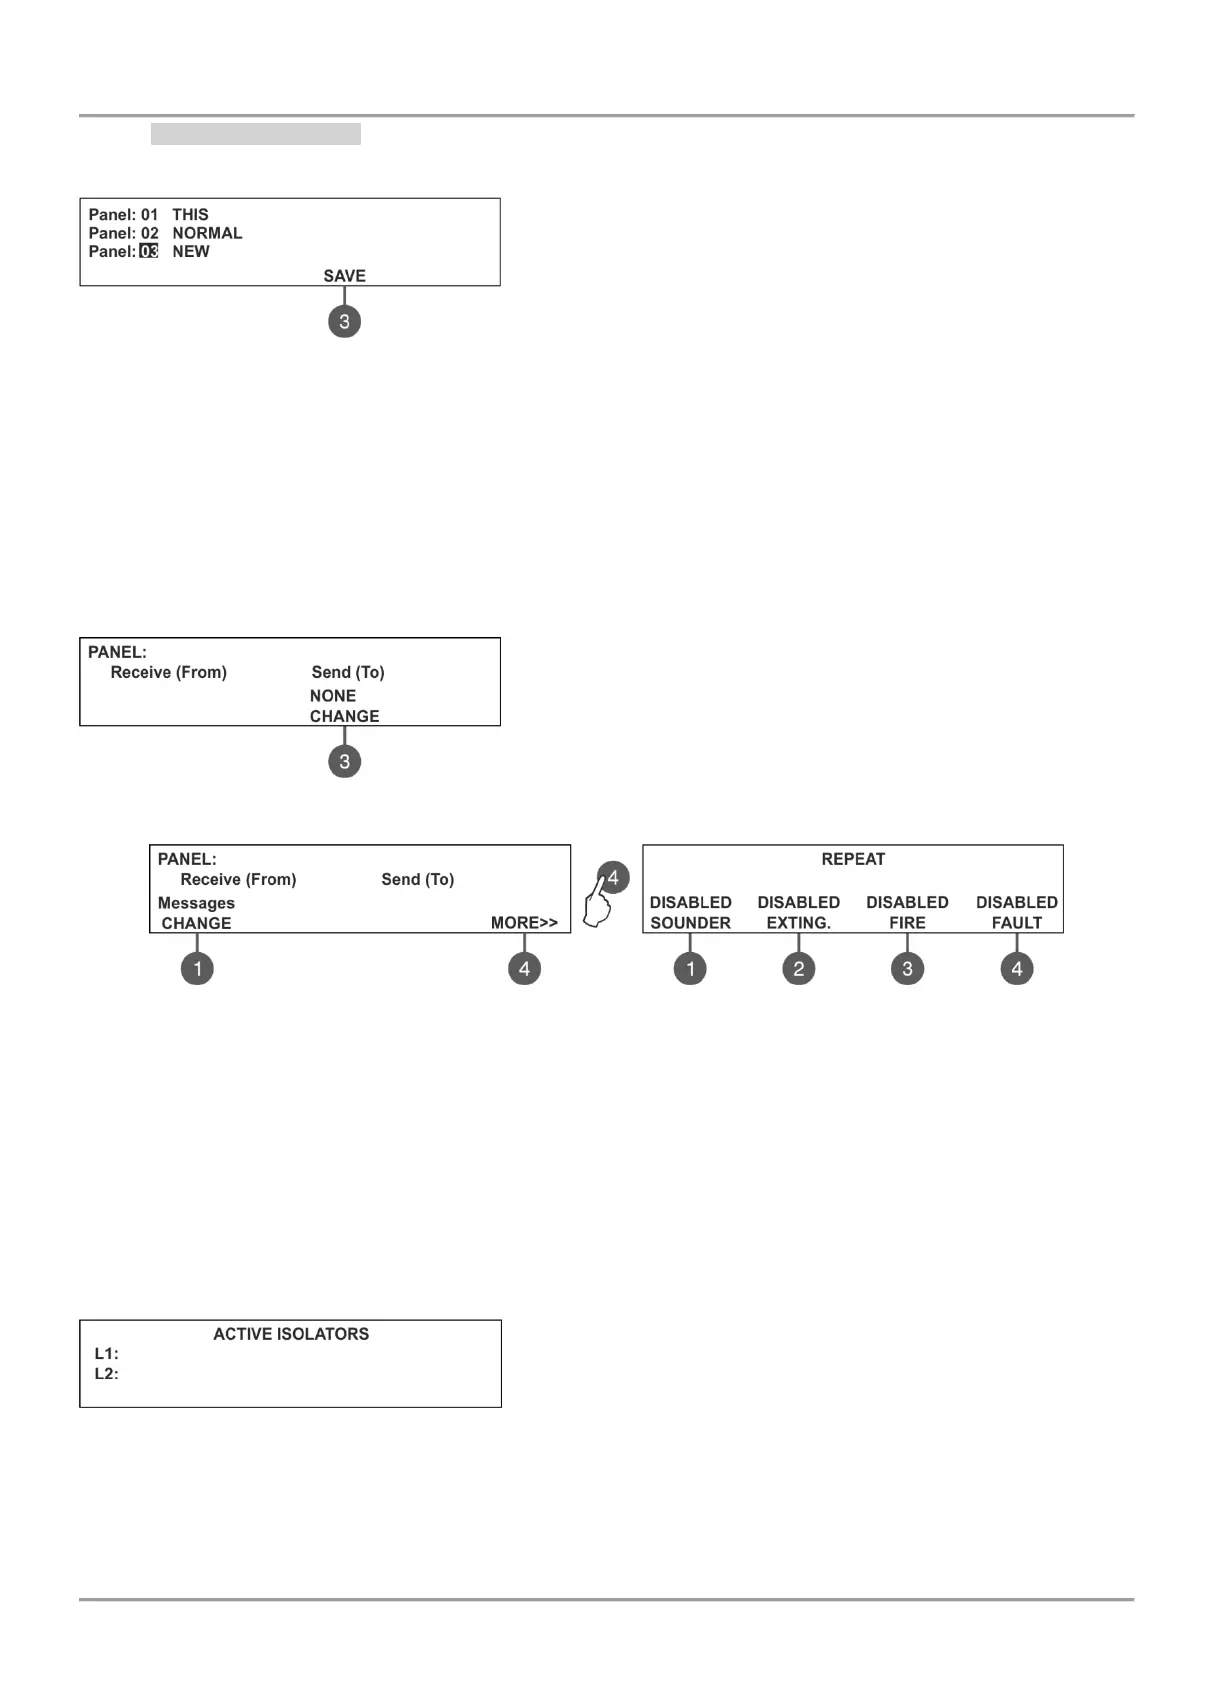
To access the PANELS settings, enter in the installer’s menu - 10. NETWORK – 10.2) PANELS.
On the screen are listed the panels with their current state in the
redundant network:
NEW – The panel is new in the system. To save it press
button (3) SAVE.
NORMAL – The redundant network for the panel is enabled.
THIS – The panel from which the redundant network is
reviewed.
FAULT – The panel is DISABLED or there is problem with the redundant network.
NONE – No panel connected to the redundant network.
All new panels connected to the redundant network can be saved with (3) SAVE button. The panels with current state
NORMAL, THIS and FAULT can be deleted from the network with (3) REMOVE button.
If a new panel enabled in the network is with number already set for another panel the “GENERAL FAULT” LED will
lights on and a message for fault event “Double Panel number” is generated. The installer should change the doubled
panel number for proper operation in the redundant network.
For every panel the installer can set individually the panel’s activity to Receive/ Send messages and/ or commands.
The settings for sending commands can be done only for THIS panel (current panel).
Use the (3) CHANGE button to set the options:
NONE – The panel cannot send any commands to other
panels in the redundant network.
COMMANDS – The panel can send commands to other
panels in the redundant network.
The settings for receiving commands can be done for all other panels.
Use the (1) CHANGE button to set the options:
NONE - The panel will not receive any data from the other panels in the redundant network.
MESSAGES - The panel will receive only messages from other panels in the redundant network.
COMMANDS - The panel will receive only commands from other panels in the redundant network.
MESSAGES & COMMANDS - The panel will receive commands and messages from other panels in the
redundant network.
Use the (4) MORE button to choose the activation of the outputs of the panel – for those cases when the alarm event is
reported from a panel connected to the network. In the REPEAT screen enable the outputs of the panel for repeating.
The repeating of the output is enabled/disabled with pressing the button. All of the outputs are disabled for repeating by
default. At the end press “ENTER” button to save the settings.
7.11. Active Isolators Menu
This is an information menu for reviewing the active isolators.
The active isolators in the system are displayed as device addresses
in the fields “L1” and “L2” for Atena Easy loops.
7.12. Access Level 1
Exit from Access Levels 2 and 3 to Access Level 1.
After choosing the menu with button ENTER, the panel automatically returns to Access Level 1. To enter in Access
Level 2 (Maintenance) and Access Level 3 (Installer) again, the user has to enter a valid code for the respective access
level.