11
INSTALLATION & USE
INSTALLATION (QUICKIE
®
)
The following instructions illustrate the base mounting plate found on each power chair.
WARNING! To prevent injury, damages or voided warranty, DO NOT make any alterations to the equipment. Modications in attempt
to interface with any other products than those listed in this manual potentially compromise the safety of the user and voids warranty.
QUICKIE
®
20W & up- (Allen wrench provided is required for installation.)
*Note: Quickie Wide Adapter Plates use an additional ¼” (6.4mm) of seat depth.
QUICKIE
®
- (Allen wrench provided is required for installation.)
3
5
3
4
6
4
3
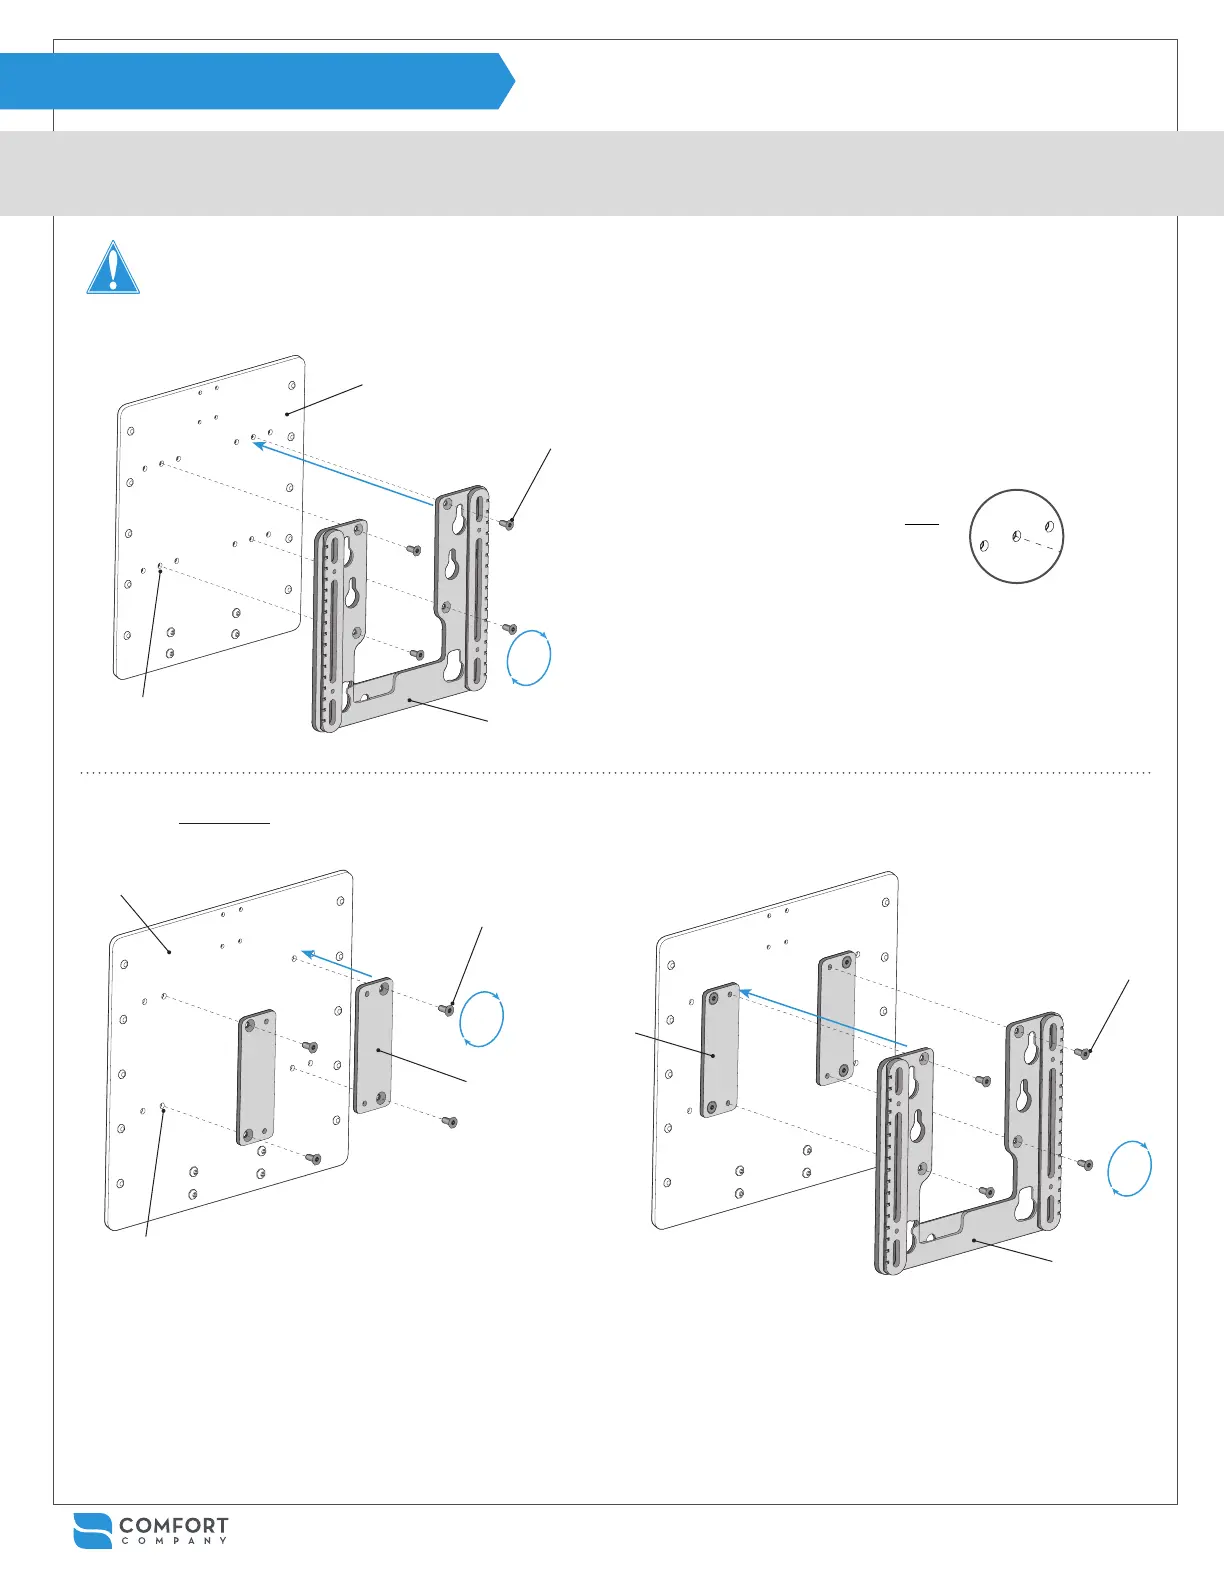
Align the two countersunk holes on each adapter plate L with the inside threaded holes H on base mounting plate G as shown.
4
Attach using four 12mm at head screws M and allen wrench provided. Note: The threaded holes on the adapter plates should
face in towards each other.
5
Align the four countersunk holes on mounting bracket B with threaded holes on adapter plates L as shown.
6
Use the four additional 12mm at head screws M and fasten with the allen wrench provided.
Continue with Step 7 on page 12
3
Align the four countersunk holes on mounting bracket B
with threaded holes H on base mounting plate G as shown.
Note: the mounting bracket can only
use the center holes on the base
mounting plate.
4
Use 12mm at head screws M provided and fasten with
the allen wrench.
Skip to Step 7 on page 12
H
H
H
G
G
M
M
L
L
M
B
B
Please contact Customer Service for Quickie Wide Adapter Plate
and fasteners if needed. (see page 2 for contact information)