2-4
Replacing the Bottom Case
3. Bend the shield tabs to a 90° angle and remove the top shield.
4. Lift the motherboard out of the bottom shield and replace it.
5. Reverse the preceding Steps to reassemble the case.
Replacing the Bottom Case
Follow the instructions for removing the System top case on page 2-1.
To replace the bottom case:
1. Remove the shield containing the mother board by following steps 1 and 2 under "Replacing
the Motherboard" page 2-3.
2. Replace the shield and motherboard in a new case.
3. Reverse the preceding steps to reassemble the case.
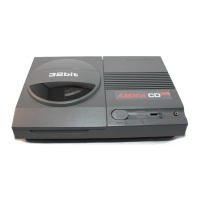
Replacing the CD Drive
Follow the instructions for removing the System top case on page 2-1.
To remove and replace the CD drive:
1. Locate the five CD drive screws on Figure 2-1 and remove the screws.
2. Lift the CD drive out of the top case and replace it.
3. Reverse the preceding steps to reassemble the case.
Replacing the CD Drive Cable
Follow the instructions for removing the System top case on page 2-1.
Follow the instructions for removing the CD Drive on page 2-4.
To remove and replace the CD Drive cable.
1. Locate the CD drive cable on the drive in Figure 2-2. Grasp the flat ribbon cable on the
outside edges near the socket and pull it straight out of the socket. To insert the cable,
grasp the flat ribbon cable on the outside edges near the socket and push it straight out of
the socket. Make certain that the cable is flrmly seated in the socket.
2. Reverse this procedure to reassemble the top and bottom cases.