Service Reference Guide, dx2000 uT 359782-002 6–19
Removal and Replacement Procedures— Microtower (µT) Chassis
6.13 System Board
1. Prepare the computer for disassembly (Section 6.1, “Preparation for Disassembly”).
2. Remove both the right and left access panels (Section 6.2, “Access Panel”).
3. Remove the front bezel (Section 6.3, “Front Bezel”).
4. Remove the diskette drive (Section 6.7.3, “Removing a Diskette Drive”).
5. Disconnect the power, and data cables from the back of all installed 3.5" drives.
6. Remove the lower drive cage (Section 6.7.4, “Removing the Lower Drive Cage”).
✎
It is not necessary to remove the chassis fan from the chassis.
7. Disconnect all cables from the system board.
8. Remove the heatsink from the system board (Section 6.12, “Processor and Heatsink”).
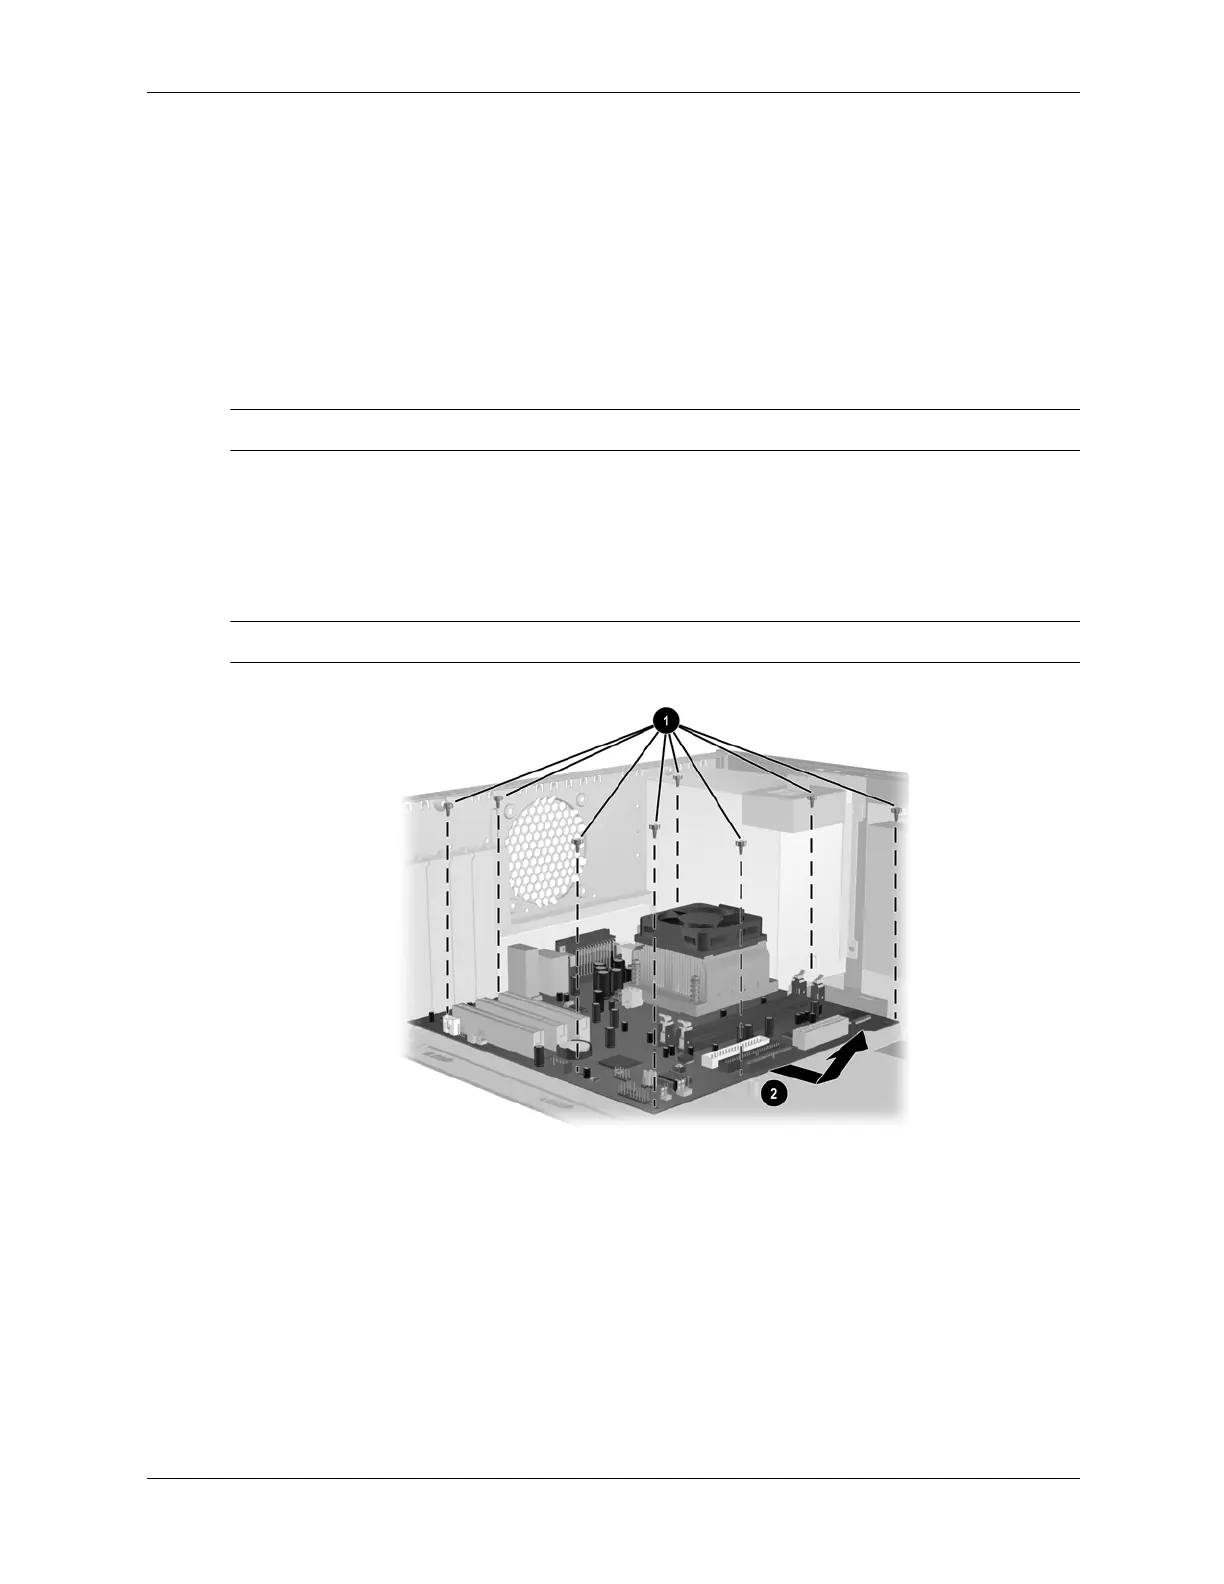
9. Remove the 8 screws that secure the system board to the chassis 1.
10. Slide the system board towards the front of the chassis 2 to remove it.
✎
The system board in the computer may look slightly different from the one shown here.
To install the system board, reverse the removal procedure.