28 UMC 600IS Installation Manual
Entering the Custom Transmits and Macros
After some examples of planning custom transmits
and macros, next enter the first two example files and
see what results.
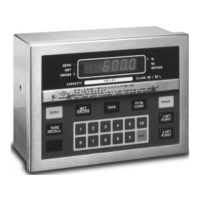
Follow the diagram in Figure 2-1 on page 4 to connect
the printer through the I/O barrier to port 1 of the IS
indicator.
NOTE: If the printer can not provide an active
current loop to retrieve the information from the
barrier, you must install an interface unit that can
and will output the format used by your printer.
Enable Option 7 if it is not already enabled (see
Section 3.4.1 on page 24). You can then select the
desired custom transmit file (we will enter files 7.1
and 7.2 from the first example) using the
TARE and
TARE RECALL keys. The TARE key takes you forward
and the
TARE RECALL key goes backwards. With
O P .7 o N displayed, press the TARE key once to
bring up file 7.1 (you will see
7 . 1. O F F displayed).
If you go too far, use the
TARE RECALL key to go
backwards. Now turn on custom transmit by pressing
the
lb/kg CONV key if it is not already enabled.
In the same way that the
TARE and TARE RECALL
keys step through the custom transmit files, the 1
SETPOINT and 2 SETPOINT keys step forward and
backward through the individual characters in the file
(the lines on your worksheet). Press the
1 SETPOINT
key to display the first character of File 7.1. If the
custom transmit has never been configured before, the
memory used to store the codes may be in a random
state. This could produce codes that do not seem to
make any sense. Enter File 7.1 per Table 3-15 on
page 26. Exit setup mode.
If the indicator is not displaying the gross mode, press
the
NET/GROSS key to display the gross weight.
Attach a weight simulator to the indicator, then dial
the weight up to 500 pounds and press the
PRINT key.
You get a ticket with the following format:
Figure 3-16. Print Example
Enter File 7.2 per Table 3-17 on page 26 and File 7.9
per Table 3-18 on page 27. Tare the indicator then dial
the weight up to 800 pounds and press the
PRINT key.
Figure 3-17. Print Example
The first time the PRINT key was pressed, a ticket was
printed using custom transmit file 7.1. With a tare
weight in the indicator and the net weight on the
display, the ticket was printed using custom transmit
File 7.2. Although this may seem rather obvious, we
have received a few phone calls from technicians who
insisted that the custom transmit was not working
properly when they simply had not done a tare or were
not in the net mode.
Summary
The following are some general points summarizing
what is covered in this document.
•Custom transmits are configured using option 7
of the indicator.
•Close DIP switches 2 and 3 to enter option
configuration mode.
• If the display shows “
------” with dip switches 2
and 3 closed, press and hold
ENT for the option
menu.
•
ZERO steps forward through the options.
•
NET/GROSS toggles the option on or off.
•
TARE steps forward through the option’s
subparameters (7.1, 7.2, 7.3, etc.).
•
TARE RECALL steps backward through the
options and subparameters.
•
Lb/kg CONV toggles subparameters on and off.
•
1 SETPOINT steps forward through the codes in
a custom transmit or macro.
•
2 SETPOINT steps backward through the codes
in a custom transmit or macro.
• Files 7.1 and 7.2 print the gross data and net data
in normal mode on port 1.
•Custom transmit files may contain up to 30
codes.
•Macros (7.9 - 7.16) may be called by your
custom transmit files to print custom transmits
up to 250 characters long.
•You may use any of the ASCII codes (see
Table 6.2 on page 37) and parameter control
codes (see Table 3-20 on page 29).
10:22 PM 04/16/02
500 LB GR
GLEN CO inc.
GLENWOOD MN.
10:22 PM 04/16/02
1300 LB GR
500 LB TR
800 LB NT