4-15
When returning a unit, obtain a Return
Authorization (R.A.) Number from CONMED
Technical Services. Please mark the R.A. number
on the outside of the carton for prompt service.
Please enclose a brief note with the unit describing
all of the symptoms found.
4.12 Assembly Breakdown/Parts Access
CAUTION: This device contains components
that can be damaged by static electricity. Proper
handling by grounding of personnel during servic-
ing is mandatory.
Following are instructions for unit disassembly
and reassembly instructions.
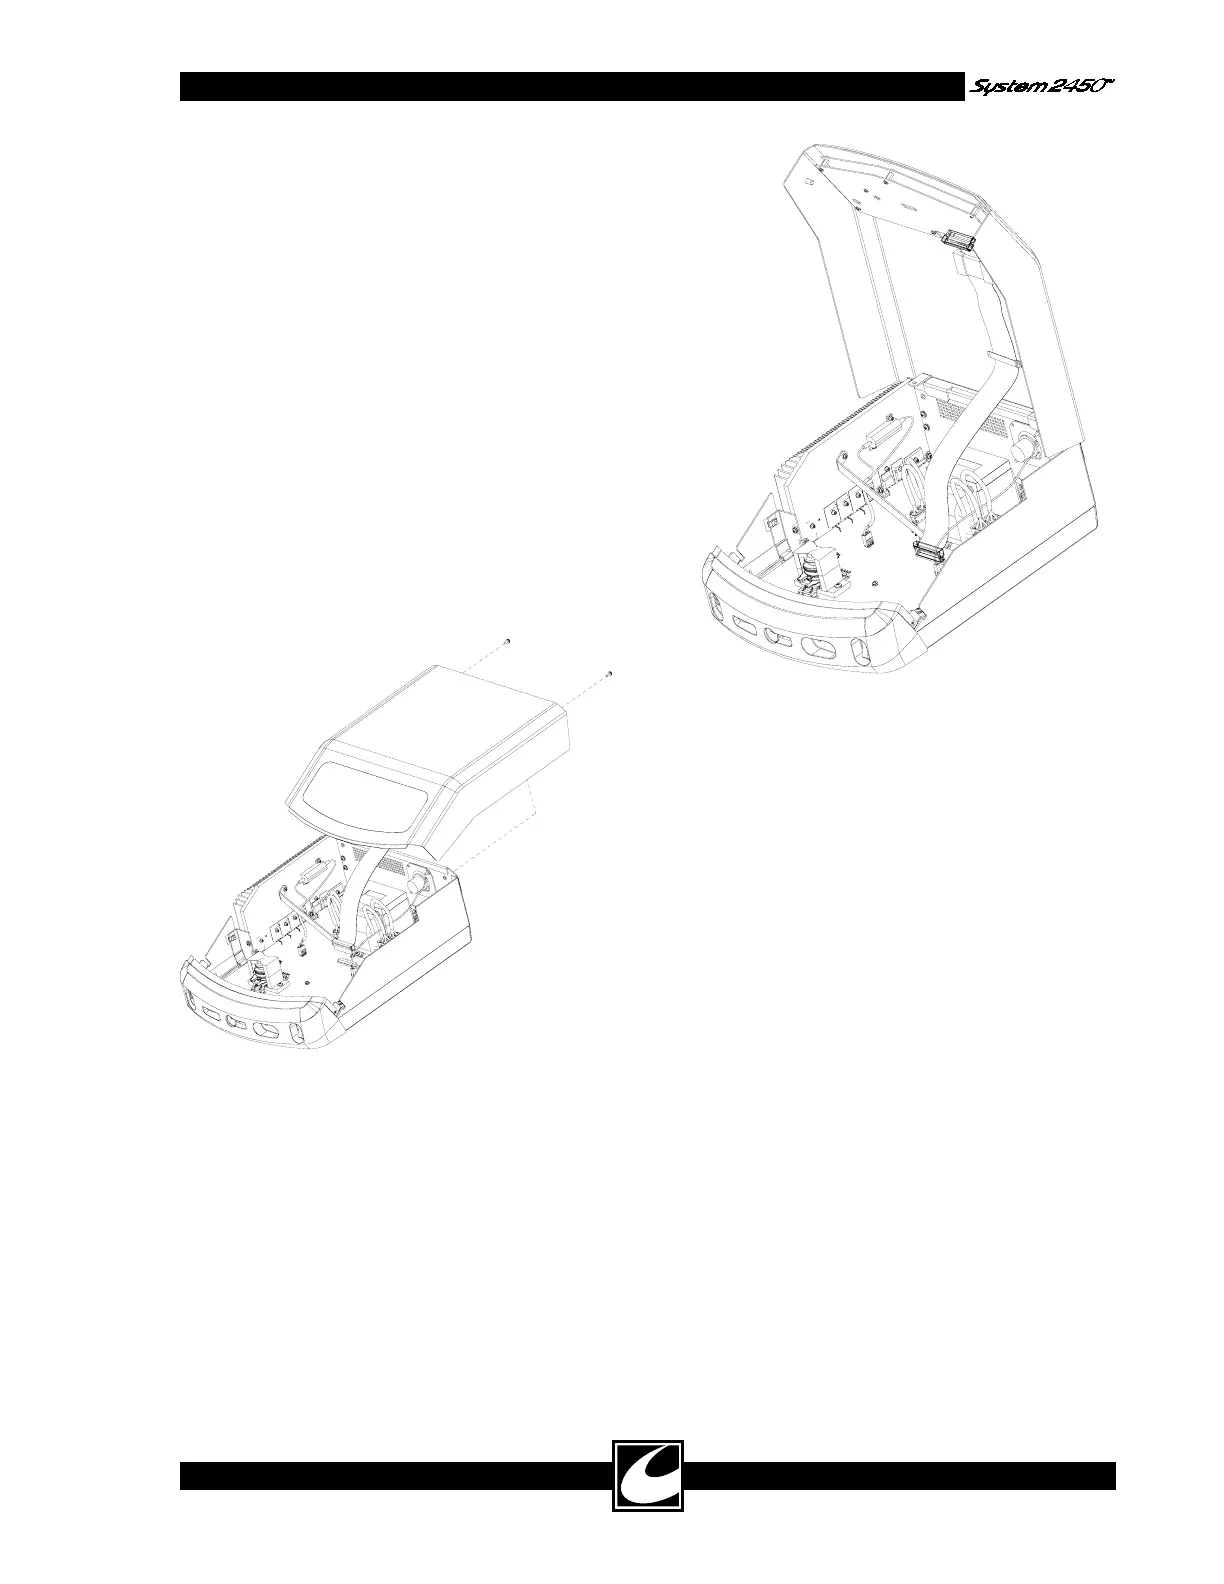
4.12.1 Top Cover Removal & Replacement
Top Removal:
1) Remove the two screws located on rear of
unit as shown.
4) To completely remove the top, disconnect the
ribbon cable at its Power Board connection
point.
Top Replacement:
1) Reconnect the ribbon cable to its Power
Board connection point.
2) Place top approximately ¾” from front bezel
on top of unit.
3) Press forward, aligning lip of front bezel with
groove in top.
4) Re-install screws.
2) Pull back and up to disengage the top.
3) Open the top by lifting the front edge. A
bracket is provided at the back edge of the top
to support the top in its service position as
shown.