www.cool-icam.com
© 2001 TCG. UK Version 1 0301
Page 11
Important Note:
To avoid lost images when changing batteries, please make sure your images are uploaded to your PC or Mac before changing batteries. Or make sure
Cool-iCam Plus is connected to your PC or Mac via the USB cable with your PC or Mac is switched on.
Diagram A Diagram B Diagram C
1.
2.
3.
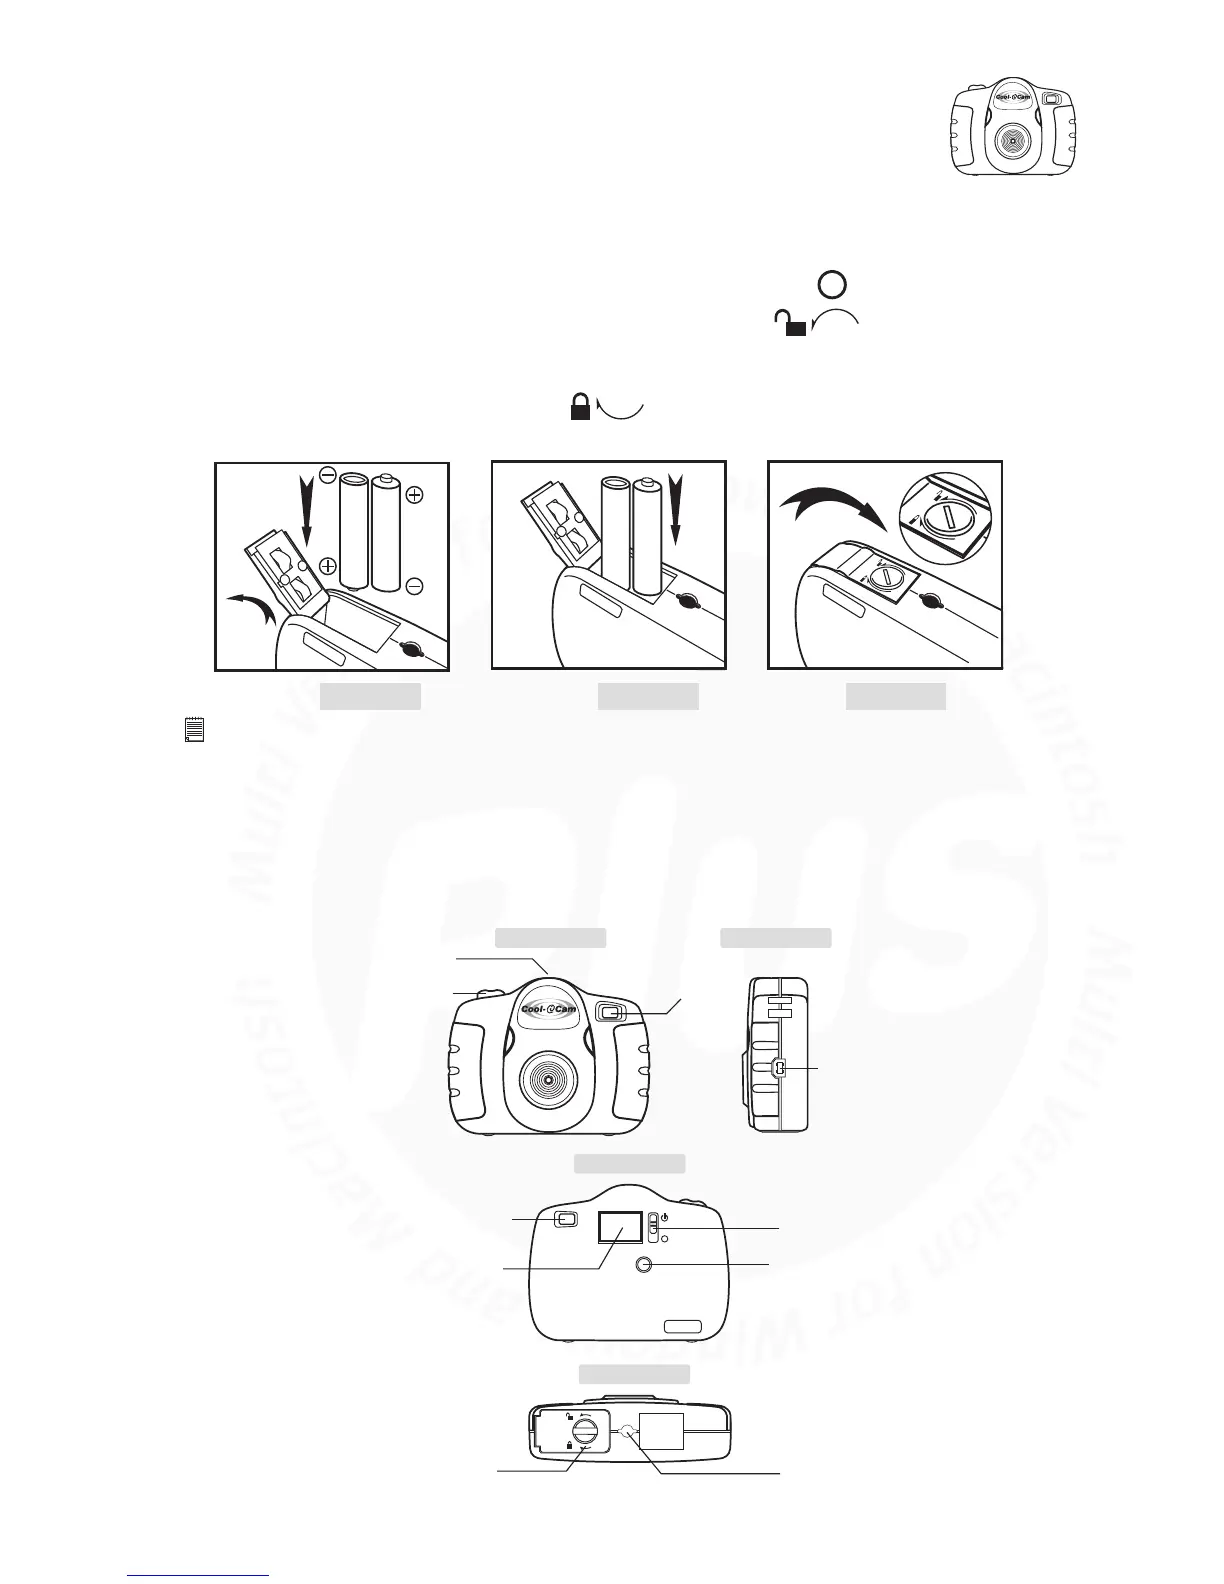
6. Battery Installation
7. Getting to Know Your Cool-iCam Plus
Refer to the picture below for a quick overview for your Cool-iCam Plus.
To change/install a battery, make sure the Cool-iCam Plus is turned off ( ).
Use a small coin or flat tool to rotate the lock on the battery door to to open. Insert the 2 AAA
alkaline batteries into the battery compartment. (Make sure you follow the correct polarity (+) (-) as
indicated.)
Close the battery door and rotate the lock to to securely fasten the battery door.
Front View
Back View
Bottom View
Side View
USB Cable Port
Shutter Button (7.1)
Microphone (7.3)
Viewfinder (7.2)
ON/OFF Switch (8.1)
LCD Display (7.5)
Battery Door
Viewfinder (7.2)
Mode Button (7.4)
Tripod Adaptor /
Cool-iCam Plus
Stand Mount (7.7)