Accessing the Mounting Holes
The mounting holes are located within the rear panel of the
Source Controller. To access the mounting holes (and circuit
wiring terminals) it is necessary to remove the front panels.
To Remove the Front Panels
CAUTION: If removing panels on a previously installed
Source Controller, power down breakers for the main supply
and dimmer channels first.
1. Open the main panel door.
2. Remove the two upper and two lower screws that
hold the main panel in place and carefully lift off the
complete panel.
3. Now remove the single upper and single lower screw
holding the right side panel in place. Carefully lift off the
panel.
4. For 24 circuit models, repeat step 3 for the left side
panel.
To Replace the Front Panels
1. Replace the side panel(s) first. Place the right side
panel onto the chassis and replace the upper and lower
fixing screws.
2. For 24 circuit models, repeat step 1 for the left side
panel.
3. Place the main panel onto the chassis and open the
door. Replace the two upper and two lower fixing
screws.
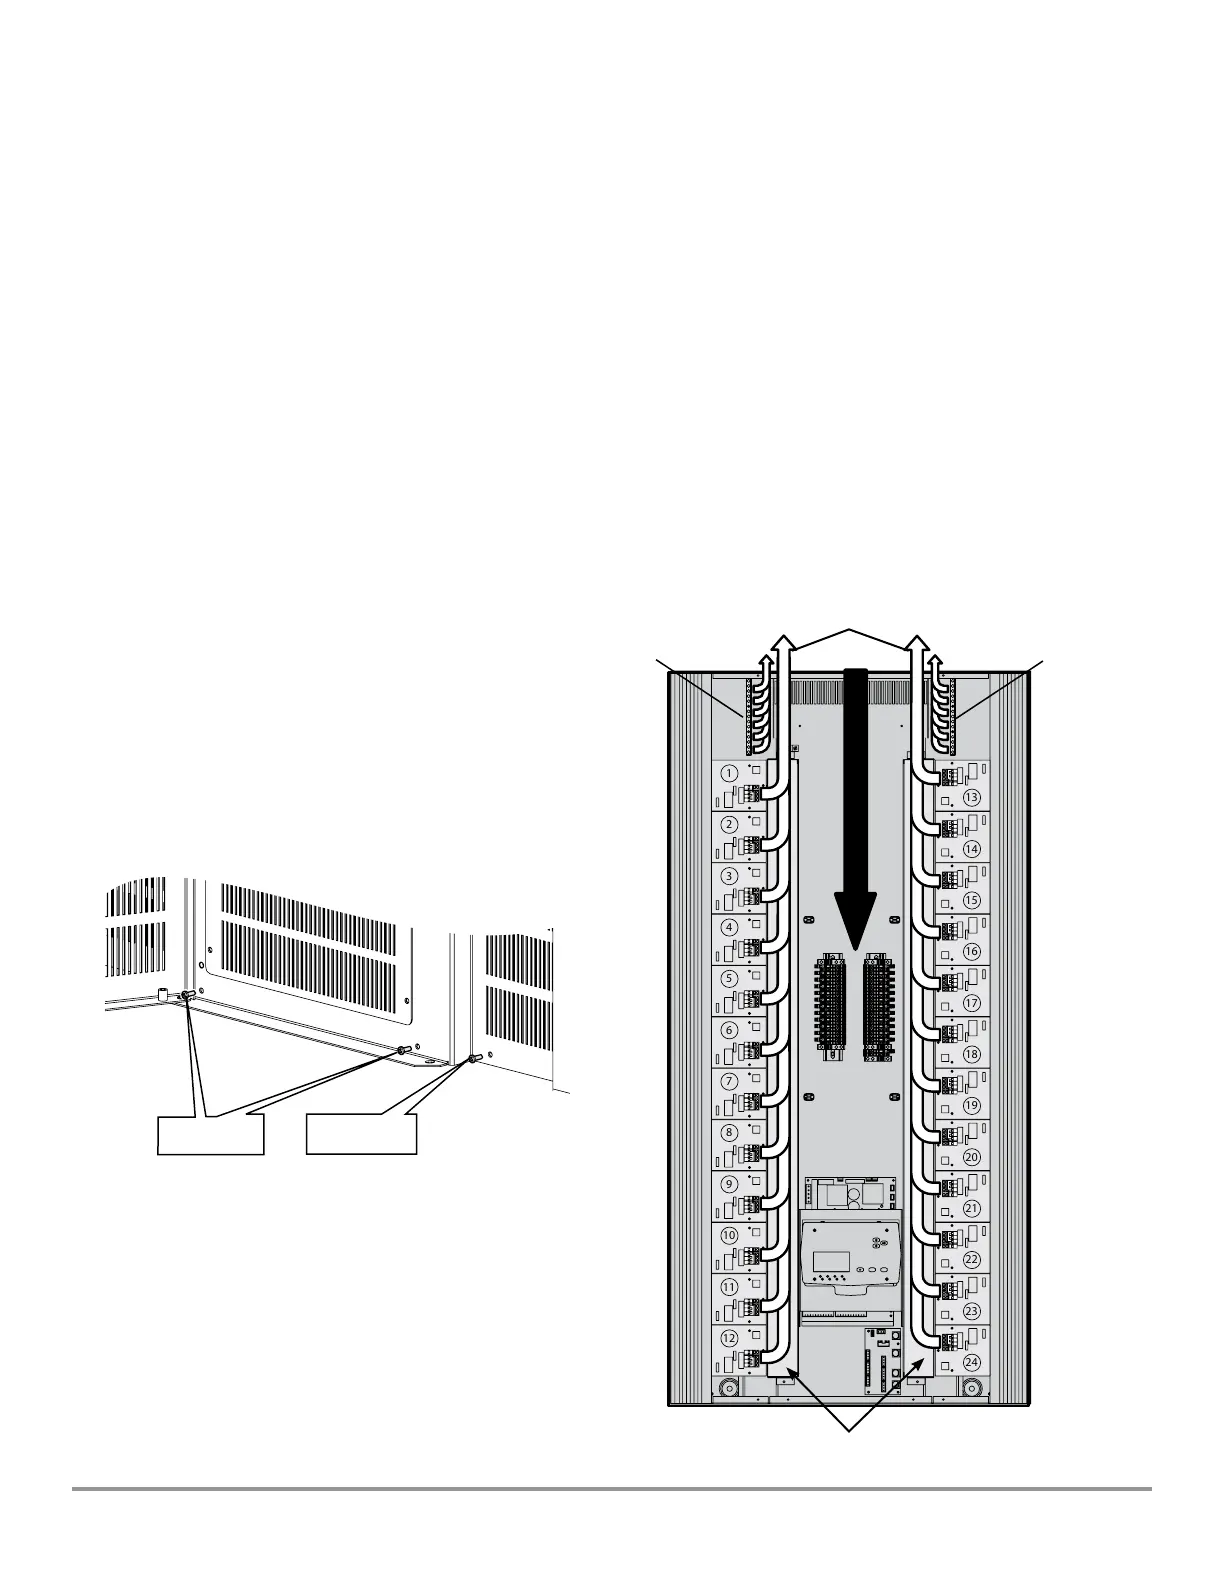
Supply Wiring
Wiring Flow
The Universal Source Controller range has been designed to
provide a clear layout and logical progression for all power
circuits.
The main supply and dimmer channel supply conductors
enter at the top panel and connect directly to Hot and
Neutral input screw terminals. Input power is then
distributed from these to each of the individual dimmer
cards.
Two vertical wireways (one for 6 and 12 circuit models)
provide clear routes from the dimmer card outputs up to the
earth terminals and the exit knockouts within the top panel
of the chassis.
The diagram shown right indicates a typical wiring flow with
the high voltage load wiring from the various channels (and
their earth connections) exiting from the top panel.
1
2
3
4
5
6
7
8
9
10
11
12
24
23
22
21
20
19
18
17
16
15
14
13
ESC
12
0
EN T
3
456
789
#
SUPPLY
Lower Screw for
Right Side Panel
Earth Ter-
minal
Earth Ter-
minal
Vertical Wire-
ways
Lower Screws
for Central Panel
Load Wiring
Universal Source Controller - Feed ThruWaveLinx Wired
9850-000234-02 page 8
May 2024
www.cooperlighting.com