33
6.5 Sensor Replacement Procedure
When the need for replacement is signaled via Modbus communication (coil 311 SensorExpired), proceed as follows
• Acquire a pre-calibrated sensor module with the same part number as the one mounted on the detector.
• Disconnect power.
Built-in Version
1. Open the cover.
2. Disconnect the sensor connector J7.
3. Unscrew the sensor module from the case.
4. Screw in the new sensor module.
5. Plug-in the sensor connector to terminal J7.
6. Close the cover.
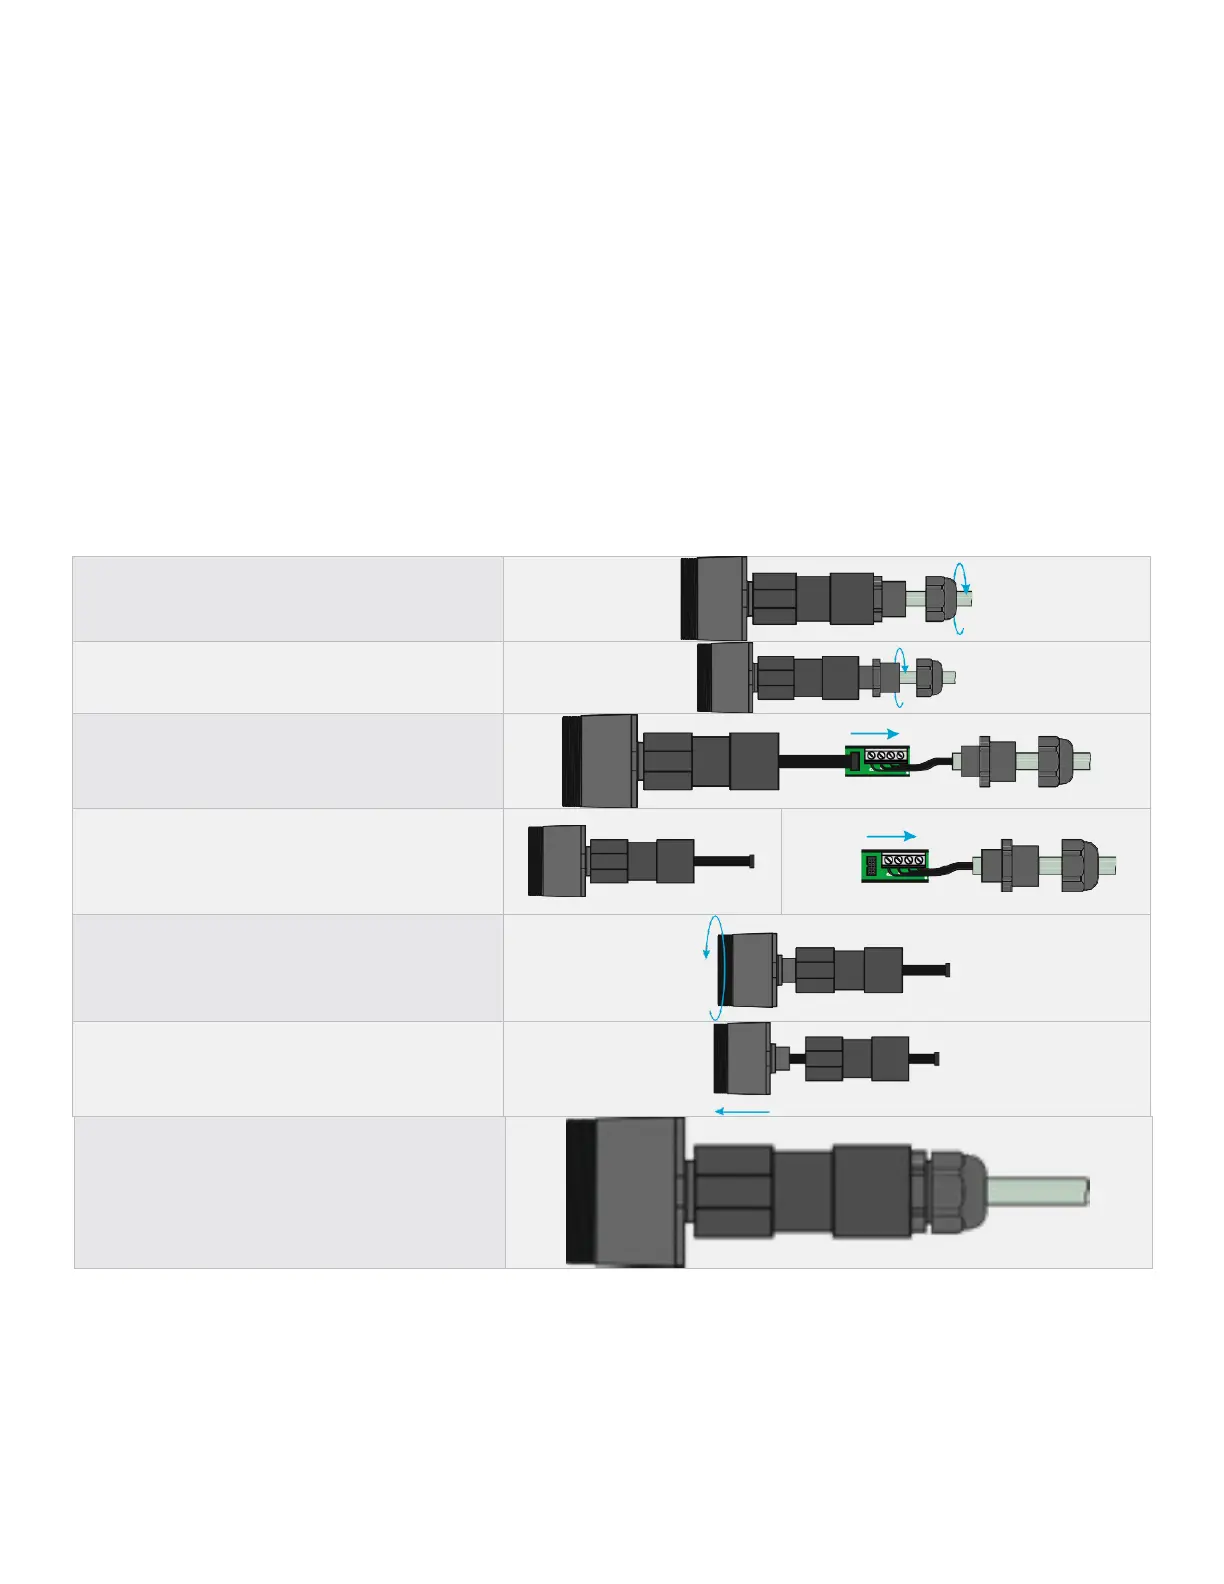
Remote Version
1. Loosen the cap off the cable gland so that
the cable is free to move inside the cable
gland.
2. Completely unscrew the cable gland. In the
event of difficulties when loosening, use pliers.
3. Pull out the electronic board from its housing
by pulling the remote sensor cable.
4. Unplug the sensor connector from the
electronic board.
5. Unscrew the sensor module from the tube so
as to separate it from the other parts of the
device.
6. Pull out the sensor module.
7. Make sure the new sensor module has the
same part number as the one just removed.
Mount the sensor module in the opposite
order to the above instructions for removal.
6.6 Cleaning the Device
Clean the detector with a soft cloth using water and a mild detergent. Rinse with water. Do not use alcohol, degreasers,
sprays, polishes, detergents, etc.
 Loading...