KIT Base Unit ED175 Installation Instructions
© 2016, Cornelius Inc. - 7 - Publication Number: 629097525INS
ELECTRICAL HOOK-UPS (SHOTS UNITS ONLY)
NOTE: Continue with steps 1 through 11 for shots units only.
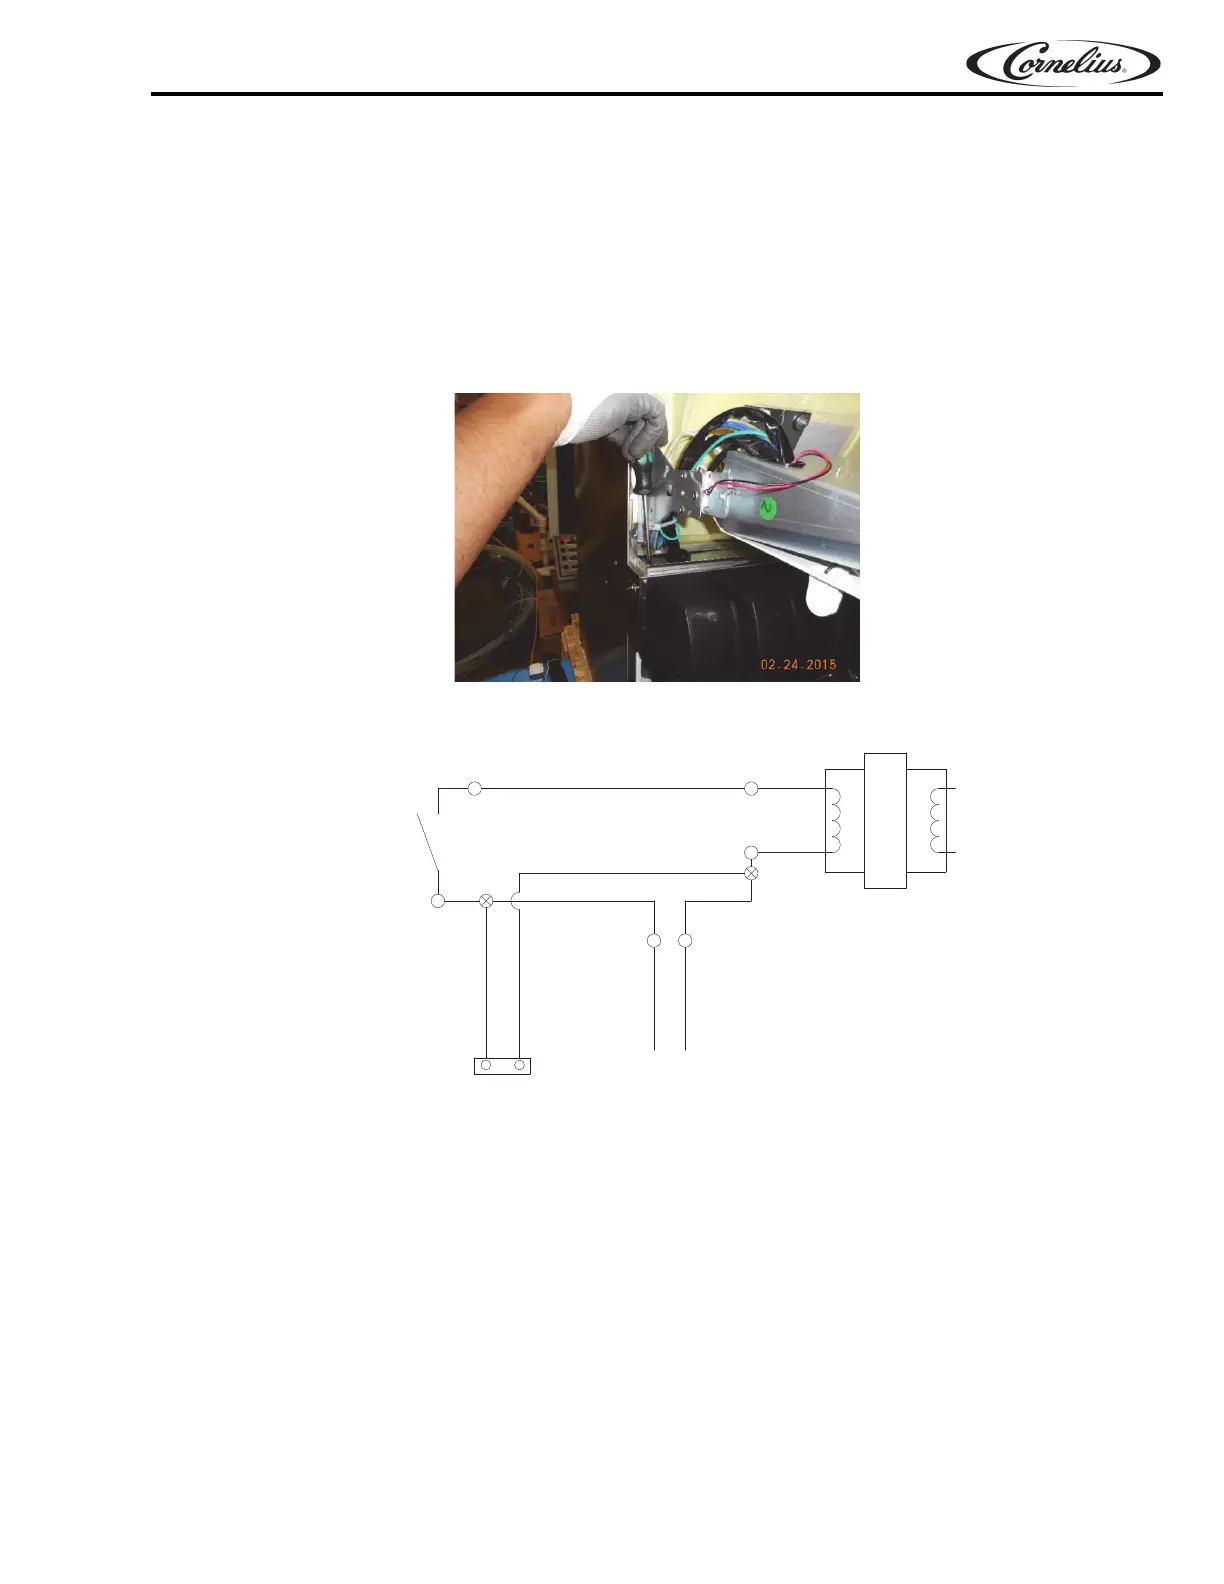
1. Remove baffles and metal covers from above and behind the valve area (See Figure 8).
NOTE: This is not easy due to space constraints but can be accomplished using a short stubby #2
Phillips screwdriver or by rotating entire electrical box forward enabling use of standard #2
Phillips screwdriver.
The plastic grommets on each baffle must be completely removed from each baffle to allow for
replacement of each baffle where applicable.
Figure 8.
Figure 9. Wiring Schematic (1 Transformer)
2. Connect 2-pin connector on power harness to 2-pin connector on control board.Tie the wires using cable
ties.
3. Connect solenoid harness to the solenoid valves prior to installing solenoid valve assemblies onto machine
(See Figure 20). Proceed with installing solenoid assemblies in area where baffles were removed (See
Figure 12).
NOTE: The plastic grommets on both sides must be re-installed into base plate of each assembly.
Once Solenoid assemblies are in place install Nozzle bracket and use the same screws that secured the
baffles, removed in Step 2, to secure/install Nozzle bracket & solenoid assemblies (See
Figure 13).
Connect 6-pin connector on solenoid harness to control board. Route solenoid harness under electrical
box and secure to bottom of electrical box with cable tie mount and cable ties, as shown in
Figure 10.
Remove the plastic grommet and discard. Install the plastic bushing in its location.
24V
LINE
TRANSFORMER
YEL
YEL
YEL
WHT
BLK
YEL
BLK
WHT
KEYSWITCH
TO BEVERAGE
VALVES
POWER HARNESS
(FOR FLAVOR OPTION)
YEL
X=SPLICE