KIT Base Unit ED175 Installation Instructions
Publication Number: 629097525INS - 4 - © 2016, Cornelius Inc.
INSTALLATION
NOTE: Common Procedure For Renew & Shots.
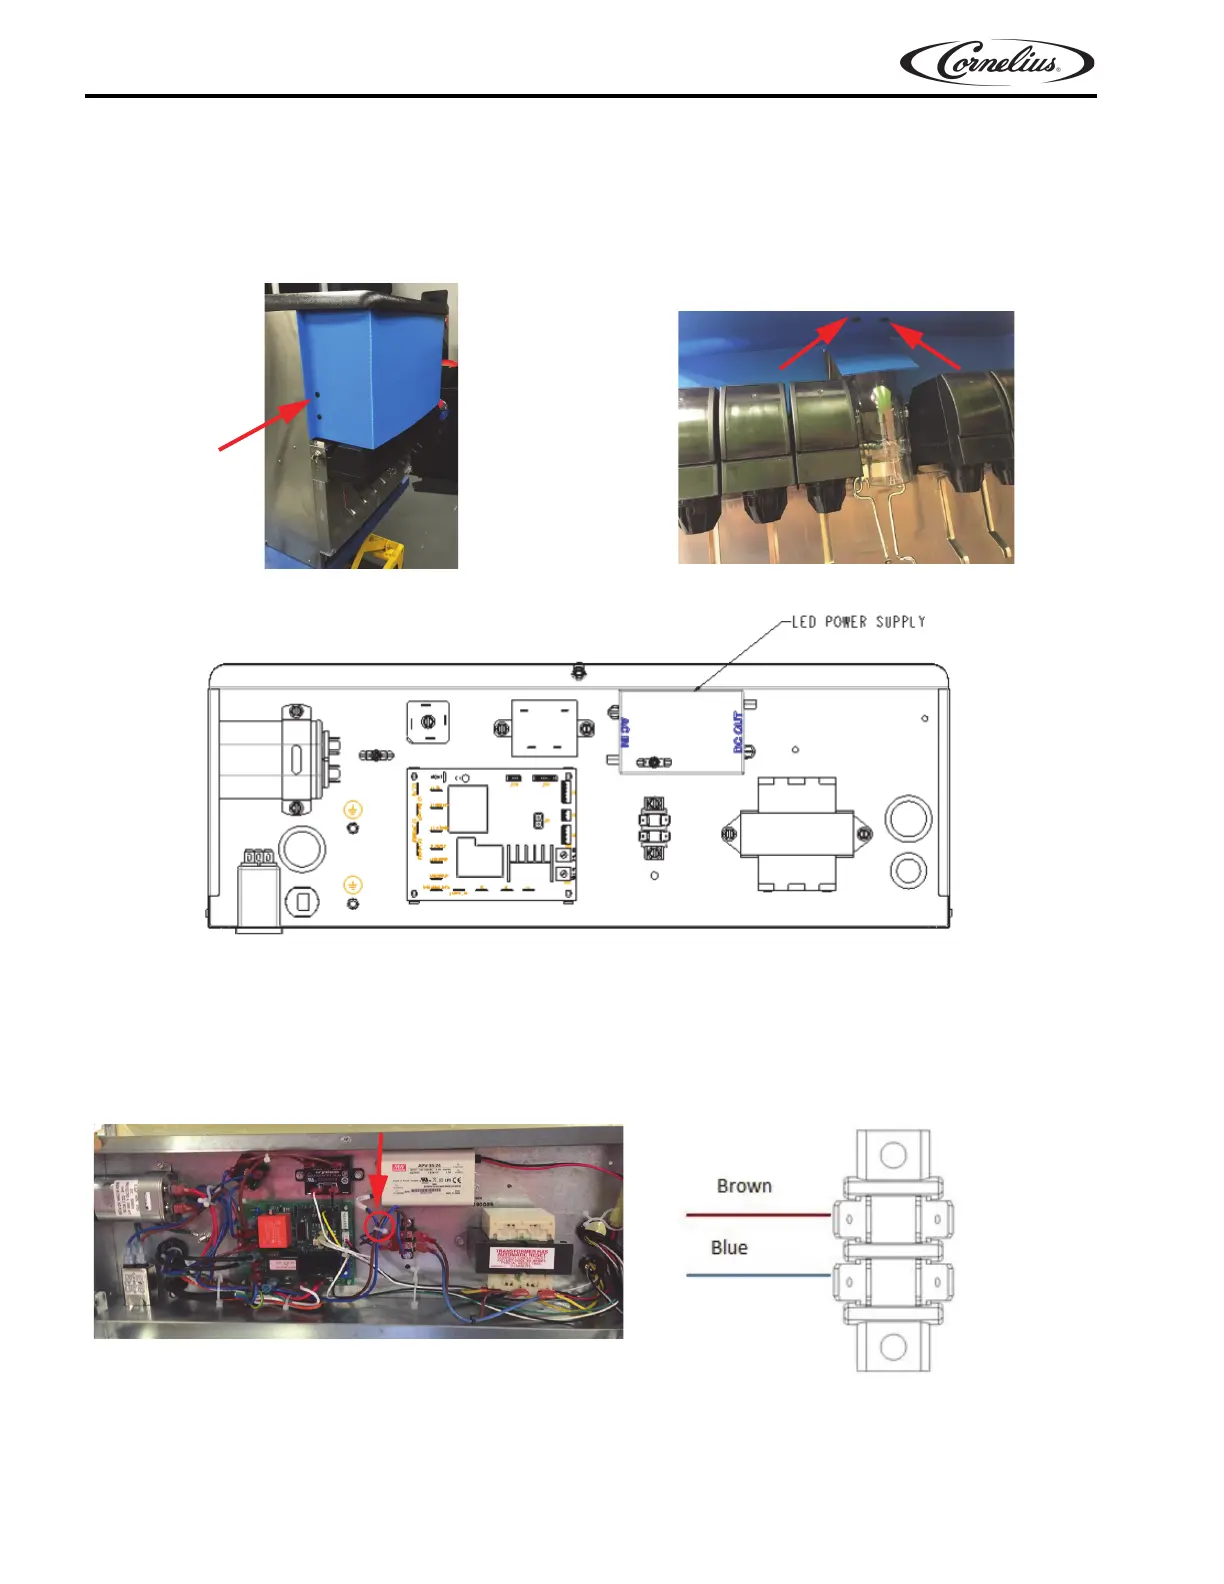
1. Remove the dummy merchandiser components by removing the push-in clips, as shown in Figure 1A and
Figure 1B and recycle the merchandiser parts.
Figure 1A. Figure 1B.
Figure 2.
2. Add the 24V extender harness provided in the Renew Kit or shots Kit to the power supply and route out of
the electrical box through the grommet on the right side, carrying the low voltage harnesses.
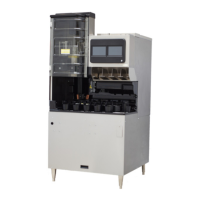
3. Connect line voltage of the power supply to the terminal block in locations, as shown in Figure 3A & Figure
3B. Use a cable tie to tie the wires neatly together, as shown in Figure 3A.
NOTE: High and low voltage wires need to be separated by 8mm at least.
Figure 3A.
Figure 3B.