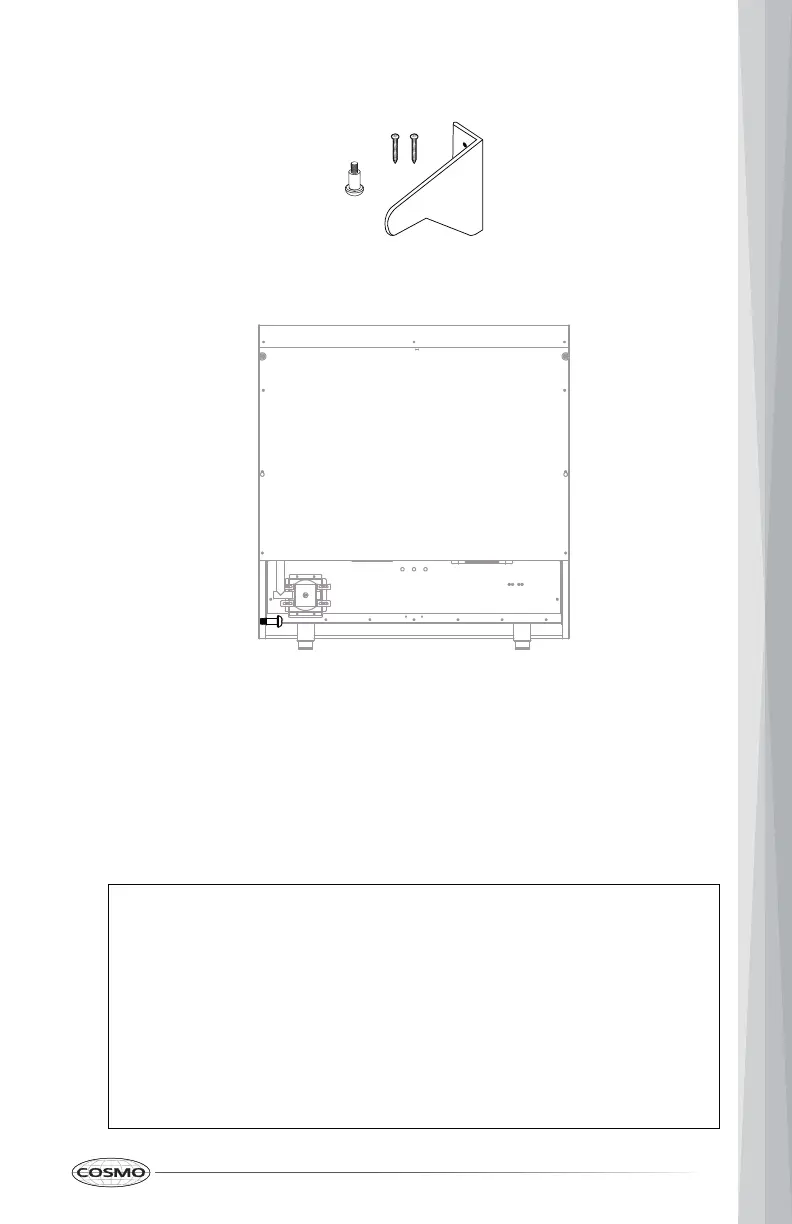
27
1. Locate and remove the anti-tip bracket, screw pin, and mounting screws
from the parts bag.
2. Insert and tighten the screw pin into the screw hole at the bottom side
panel from the back of the range.
3. Locate the preferred location on the wall for installation of the anti-tip
bracket. The screw pin must be under the arm of anti-tip bracket when
sliding range into final position.
• The top of the bracket should be at least 3
1
/
2
" (88.6 mm) above floor.
• The edge of the bracket should be between 13/16" and 1
1
/
4
" (21 mm
and 32 mm) from the side edge of the range.
NOTE:
• Heights given here are minimum clearances with the leveling legs
of the range fully contracted. If the leveling legs are to be extended
to level the cooking surface with the countertop, the anti-tip
bracket position should also be raised by the same amount.
• It is recommended to adjust leveling legs carefully and measure the
heights from the floor to the pin and to the arm of anti-tip bracket
to ensure the pin will be under the anti-tip bracket when the range
is in final position.
 Loading...