17
Figure 23
NOTE:
It is always good to check the fence
periodically to ensure alignment of your
fence and that it is parallel to the blade.
WARNING!!!
The rip fence must be parallel to the
blade during cutting operations. Failure
to set the rip fence so that it is parallel to
the blade can result in kickback causing
property damage or even personal
injury.
Aligning the Rip Fence 90° to
The Table
Take a machinist square and place it on
the table top and against the fence and
look between where the fence and table
meet the machinist square for gaps. If
needed you can adjust the two nylon set
screws A and B to tilt the fence slightly
to square it up with the table. See figure
25 in the next column.
Leveling the Rip Fence
The Fence should be parallel to the
table and rest approximately 2mm
above the table surface so that it doesn’t
scratch or score the table top.
Note:
The rip fence should be no higher than
2mm above the table surface to prevent
thin pieces of material possibly getting
jammed or stuck under the fence during
cutting operations resulting in property
damage or even serious personal injury.
How To Level and Adjust the Height
of The Fence:
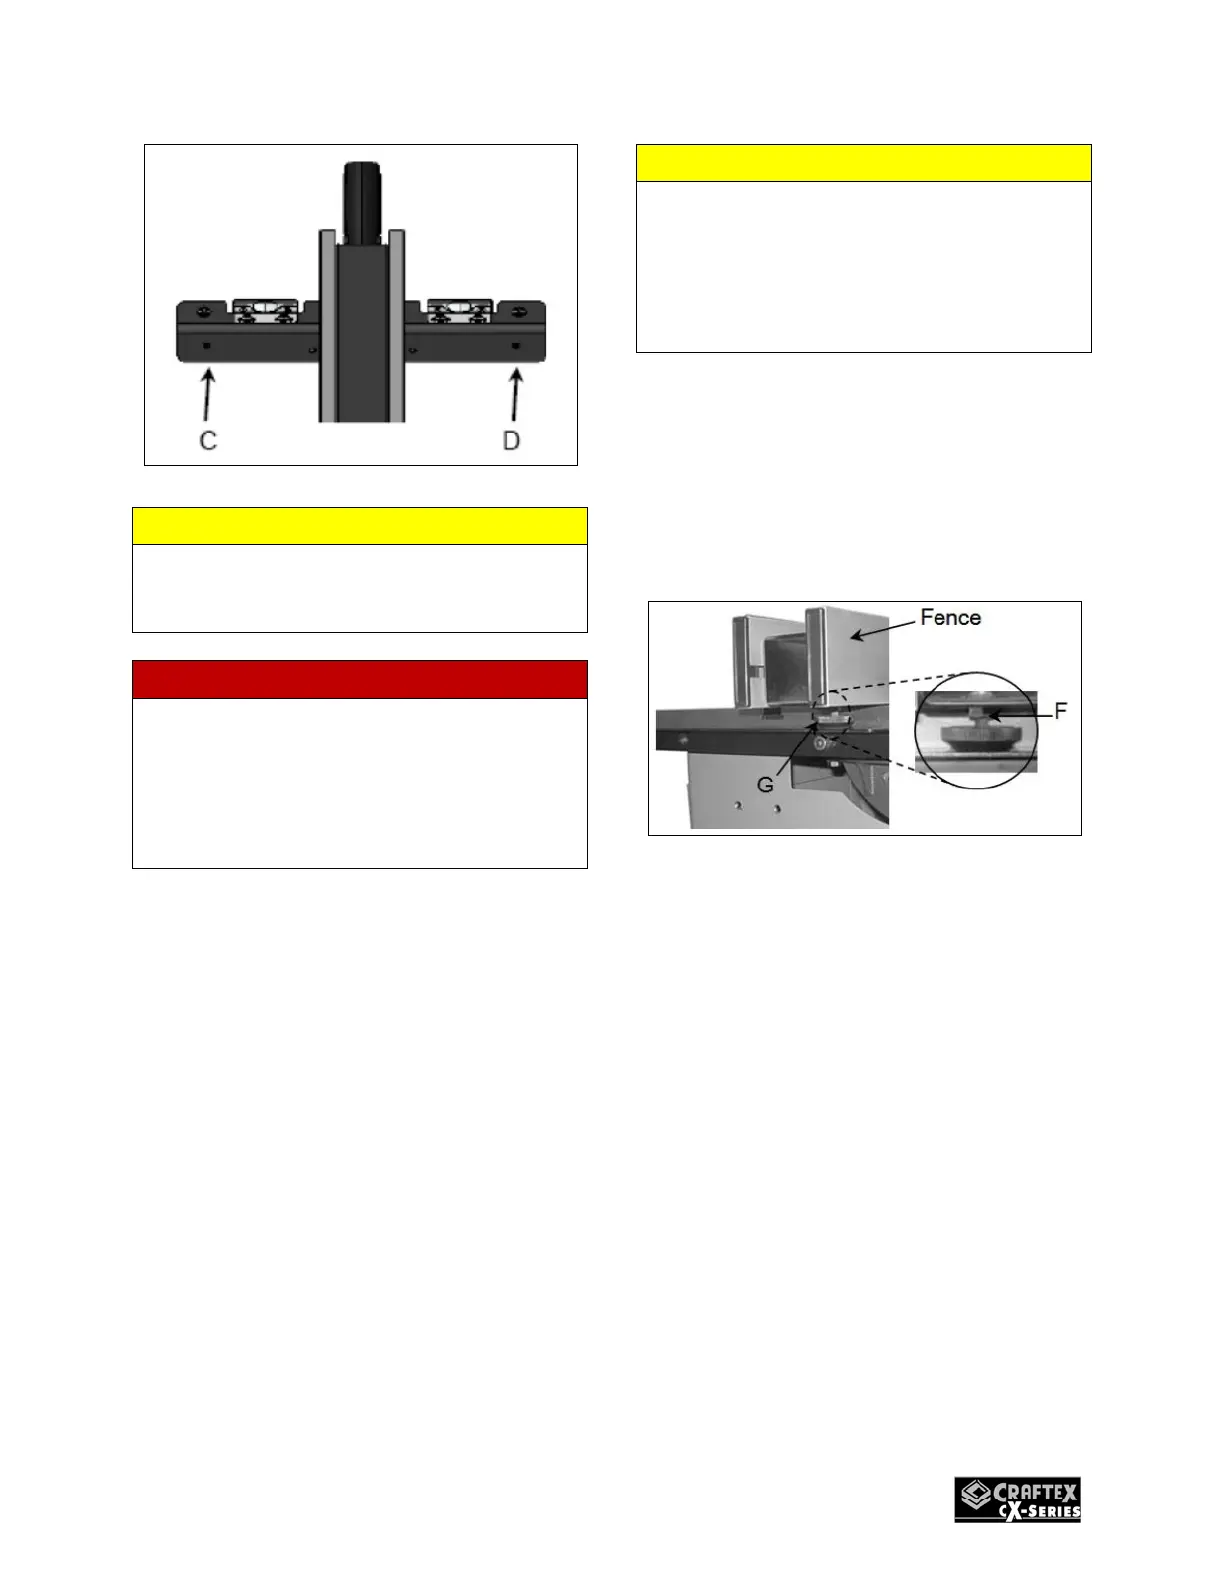
1.) Loosen the hex nut F on the leveling
foot G which is located under the
rear end of the fence as shown in
figure 24 below.
Figure 24
2.) Raise or lower the leveling foot until
there is a gap of no more than 2mm
between the bottom of the rip fence
and table surface. Once you have
achieved the appropriate spacing
tighten the hex nut to lock the setting
of the leveling foot.
3.) If the fence is not level you will need
to adjust the nylon screws E located
on the top of the rip fence by the
locking lever. Adjust them until the
front of the rip fence has an equal
amount of space between the table
surface and bottom of the fence as
well as from side to side insuring that
the fence is at 90° in relation to the
table surface. See figure 25 below.\

 Loading...


