22
Deg. stop screw (F), figure 36 under the
table using a hex wrench. Then turn the
hand wheel until the blade is at 45 Deg.
to the table surface. Re-tighten the 45
Deg. Stop screw and Hex Nut until a
slight resistance is felt. Do not over-
tighten.
Figure 36
Bevel Angle Pointer Adjustment
The bevel pointer should be at “0”
when the blade is at 90 Deg. to the
table. If this is not the case, then with
the blade set at 90 Deg. to the table,
follow the procedure below:
1. Remove the hand wheel by
loosening the hand wheel lock
knob. Figure 37
Figure 37
2. With the hand wheel removed,
loosen the caps screw on the
pointer mounting bracket with a
screw driver FIG.29 then
manually align the pointer with
zero on the bevel scale. Re-
tighten the screw and re-attach
the hand wheel.
Figure 38
WARNING!!!
Make sure the saw has been turned off
and disconnected from the power before
performing any maintenance.
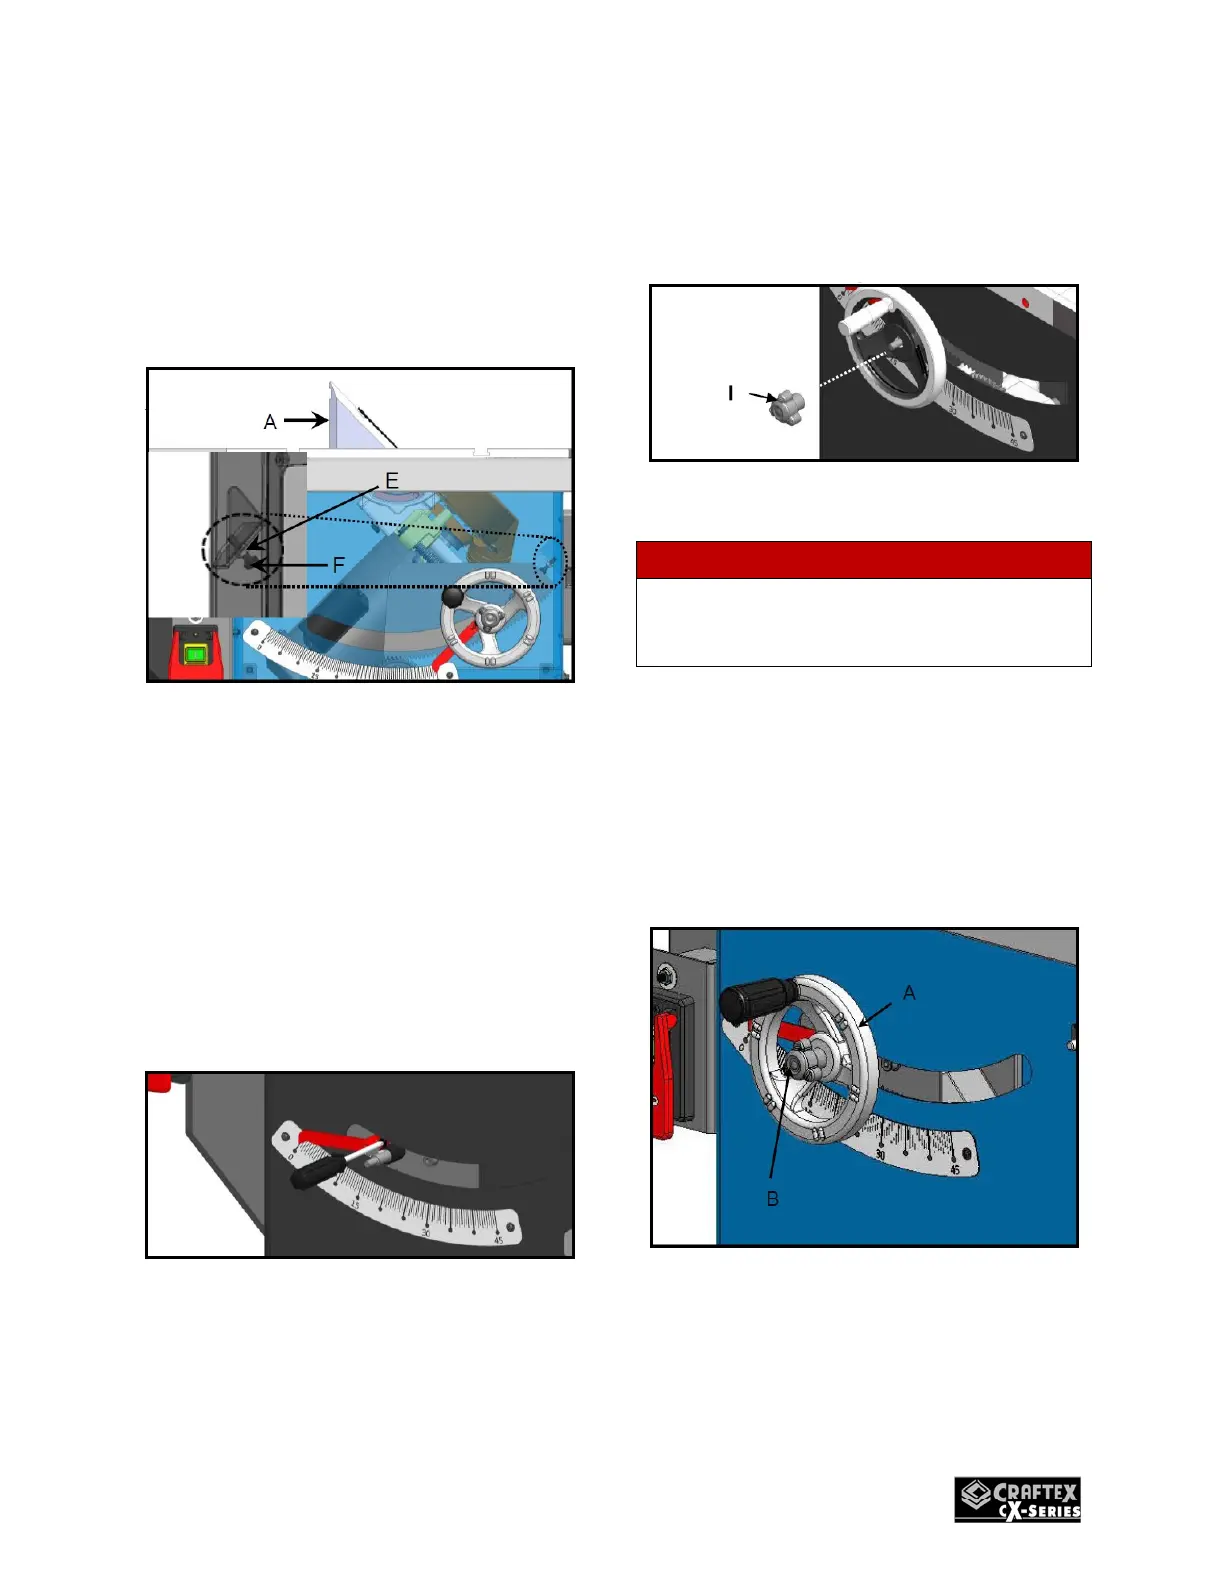
Bade Height Adjustment
The blade height adjustment hand
wheel (A) and lock knob (B)is located on
the front of the saw. The lock knob (B)
allows you to lock the blade height at
your desired height. Figure 39
Figure 39
Raising & lowering the blade:
 Loading...


