24
4. Remove the dust hood (Philips
screwdriver needed) and the
fixing plate, (5mm Hex Key
required). Figure 43
Figure 43
5. Loosen the Hex cap screw (E)
figure 44 then push the motor
down.
Figure 44
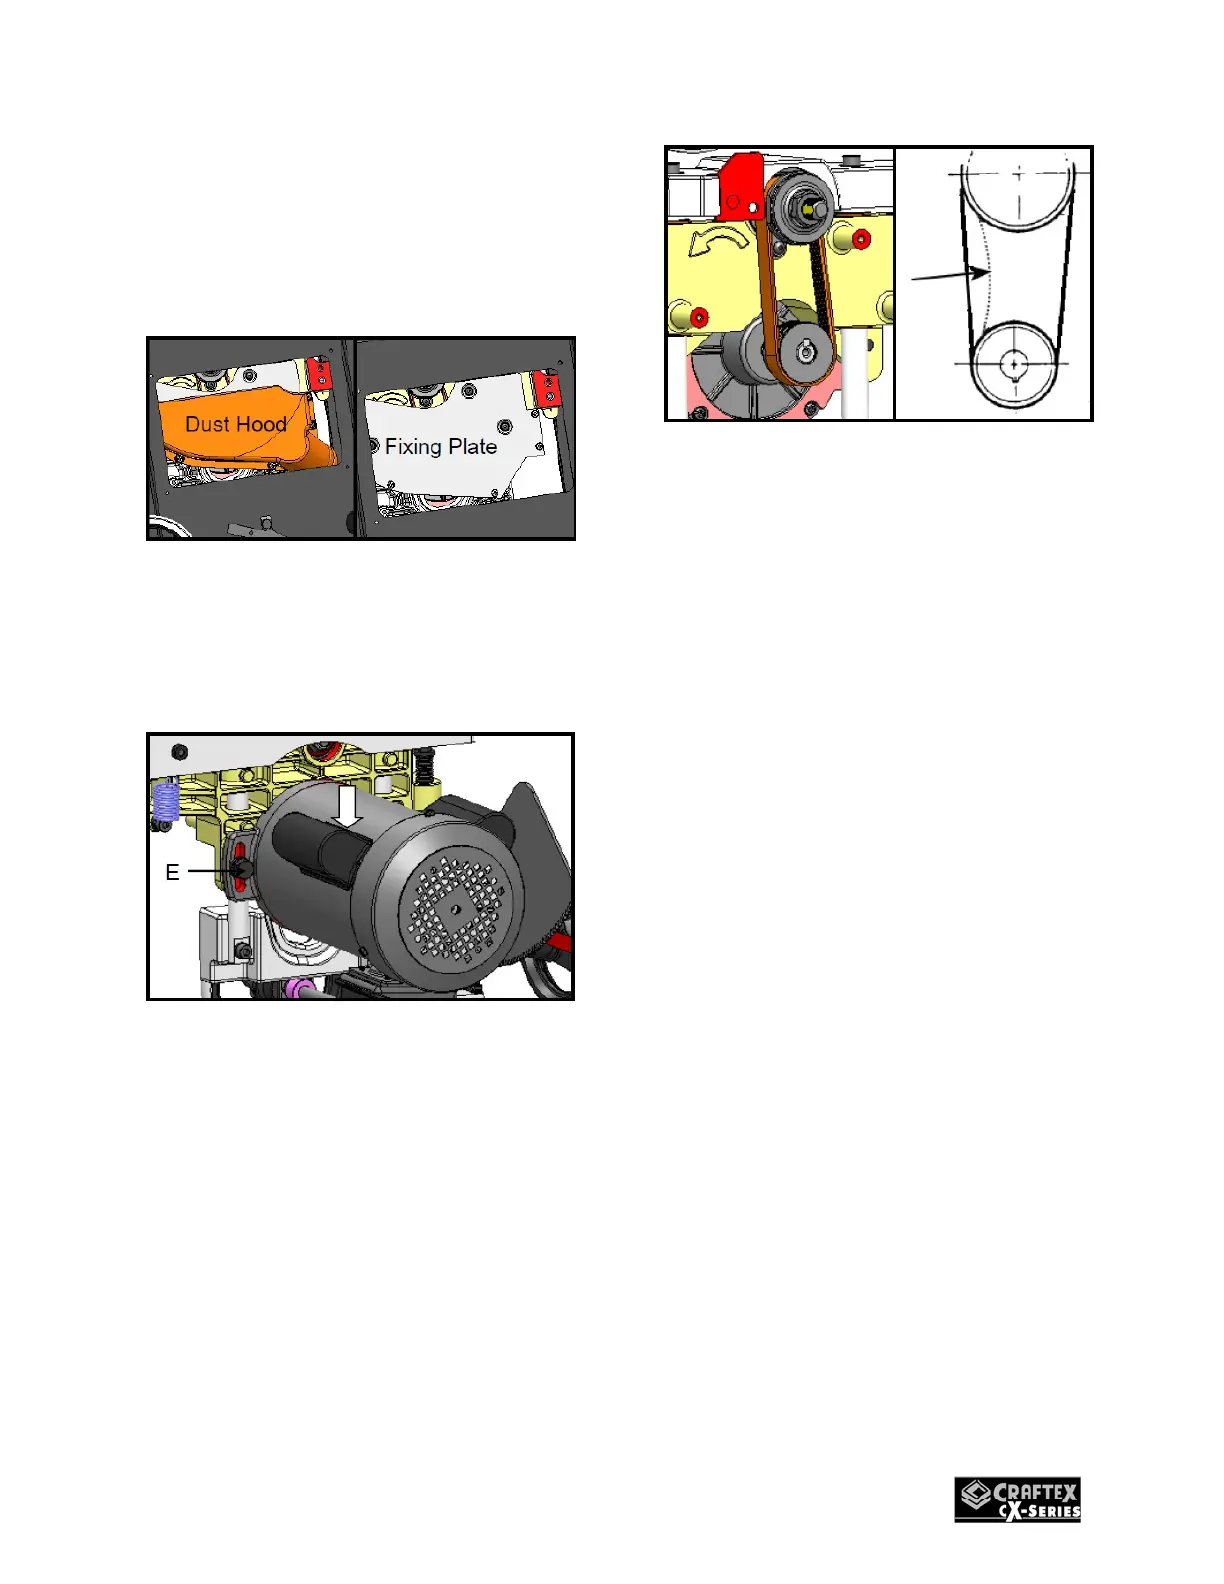
6. To check the correct belt tension,
press the belt in the center between
the pulleys, there should be a
minimum 1/8” deflection.
Figure 45
7. Tighten the Hex Cap Screw (E),
Figure 44 re-install the dust hood,
fixing plate and motor cover,
ensuring all fasteners are tight.
BELT REPLACEMENT
1. Disconnect the machine from its
power source.
2. Completely raise the blade to its
maximum height, then remove
the blade.
3. Remove the motor cover (G) and
storage box (H). Figure 42
4. Remove the dust hood (Philips
screwdriver needed) and the
fixing plate, (5mm Hex Key
required). Figure 43
5. Roll the belt off of the arbor pulley
(F) and the motor pulley (E),
Figure 46. (For easier removal
turn the belt sideways and slide
downwards)
 Loading...


