12
Figure 9
4.)Now tighten down the nuts holding
the square head bolts into place to firmly
secure the rail to the table.
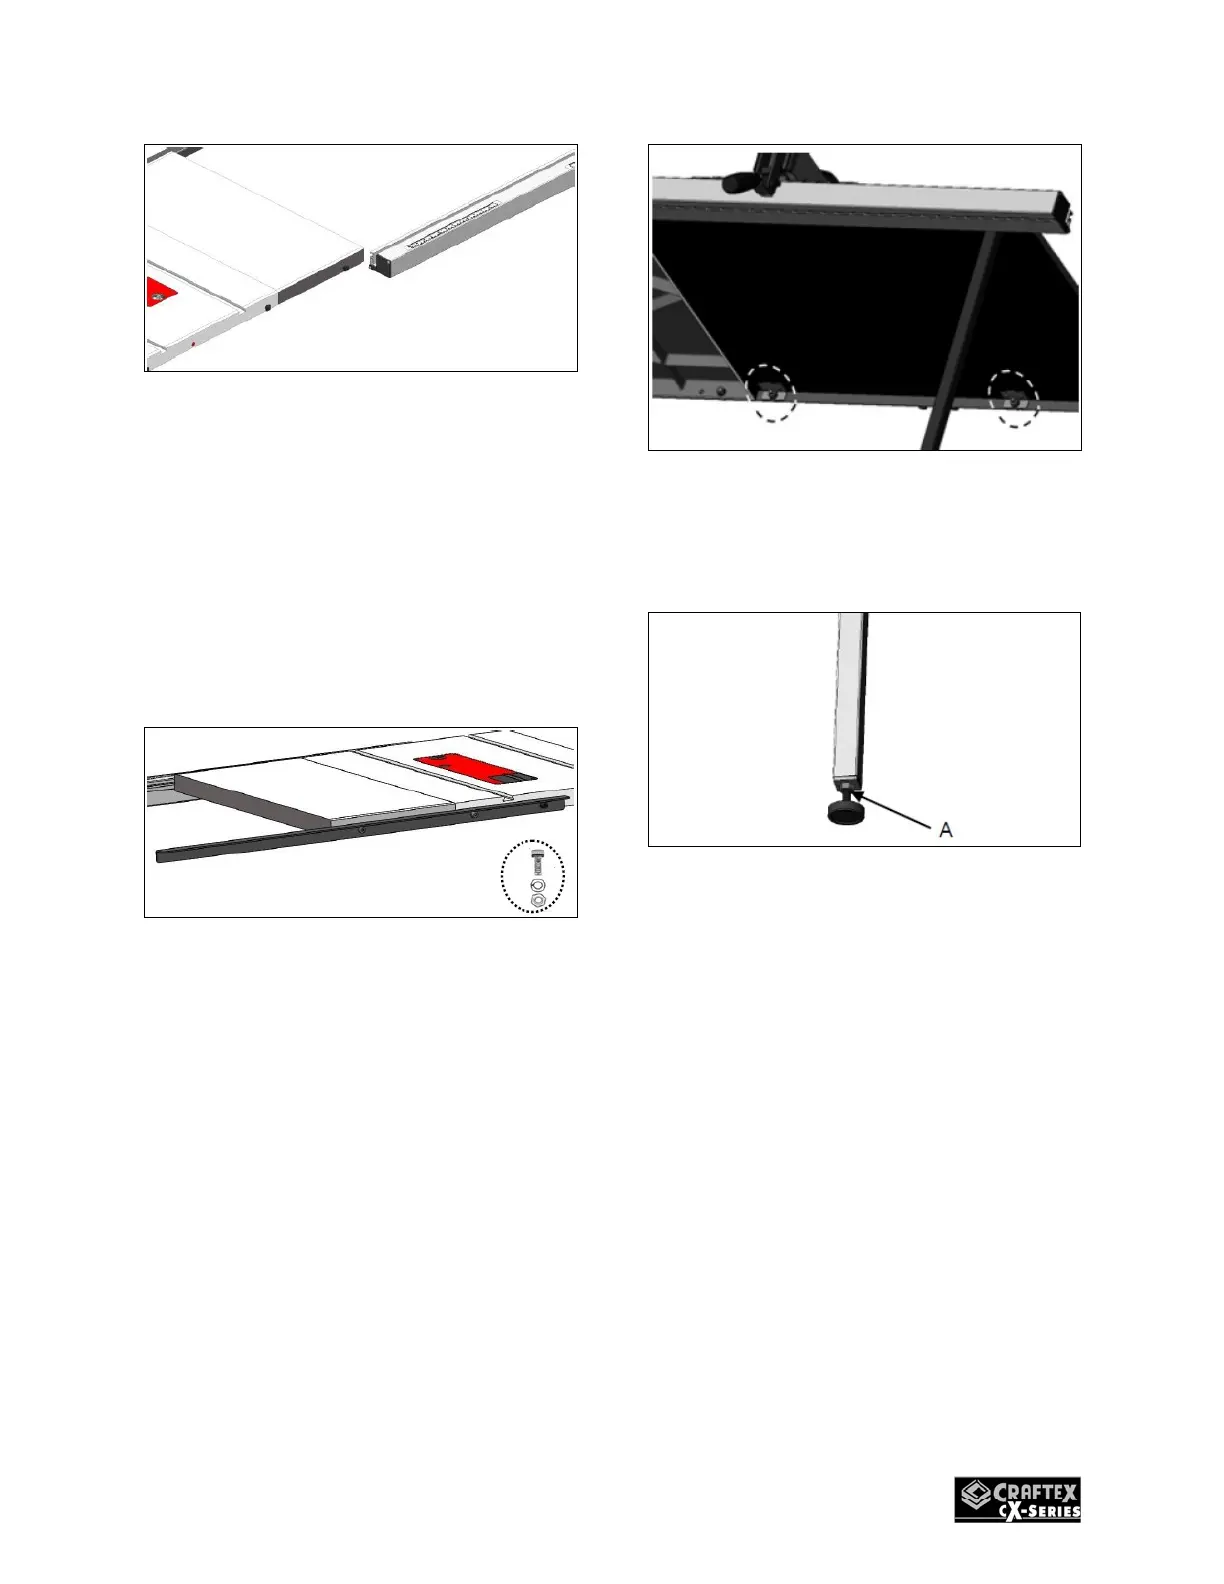
Rear Rail Installation
Use the supplied cap screws with lock
washers and hex head bolts and nuts to
assemble the rear rail on the table as
shown below in figure 10.
Figure 10
CX214 Extension Table and Rail
Installation
1.) You must place the right table
assembly upright with the extension
table and align the front rail mounting
holes. After aligning the holes then
fasten the table to the front rail using
2 M8 hex bolts, 8mm flat washers,
and M8 hex nuts. Now fasten the
table to the rear rail using the
supplied cap screws, lock washers,
8mm flat washers, and M8 hex nuts
as seen below in figure 11.
Figure 11
2.) Install the leveling feet with an M8
hex nut A into the bottom of the
extension table support leg as seen
below in figure12.
Figure 12
3.) Now fasten the extension table
support legs to the front rail using the
supplied 2 M8 hex bolts, 8mm flat
washers, M8 hex nuts, and two cap
screws with lock washers. Fasten
the other leg to the rear rail in the
same manner. Rotate both leveling
feet until they touch the ground then
tighten the hex nuts against the
support legs to secure the height of
the leveling feet. See figure 13.

 Loading...


