.... i ................. ,,,
Assembly (continued)
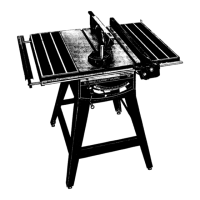
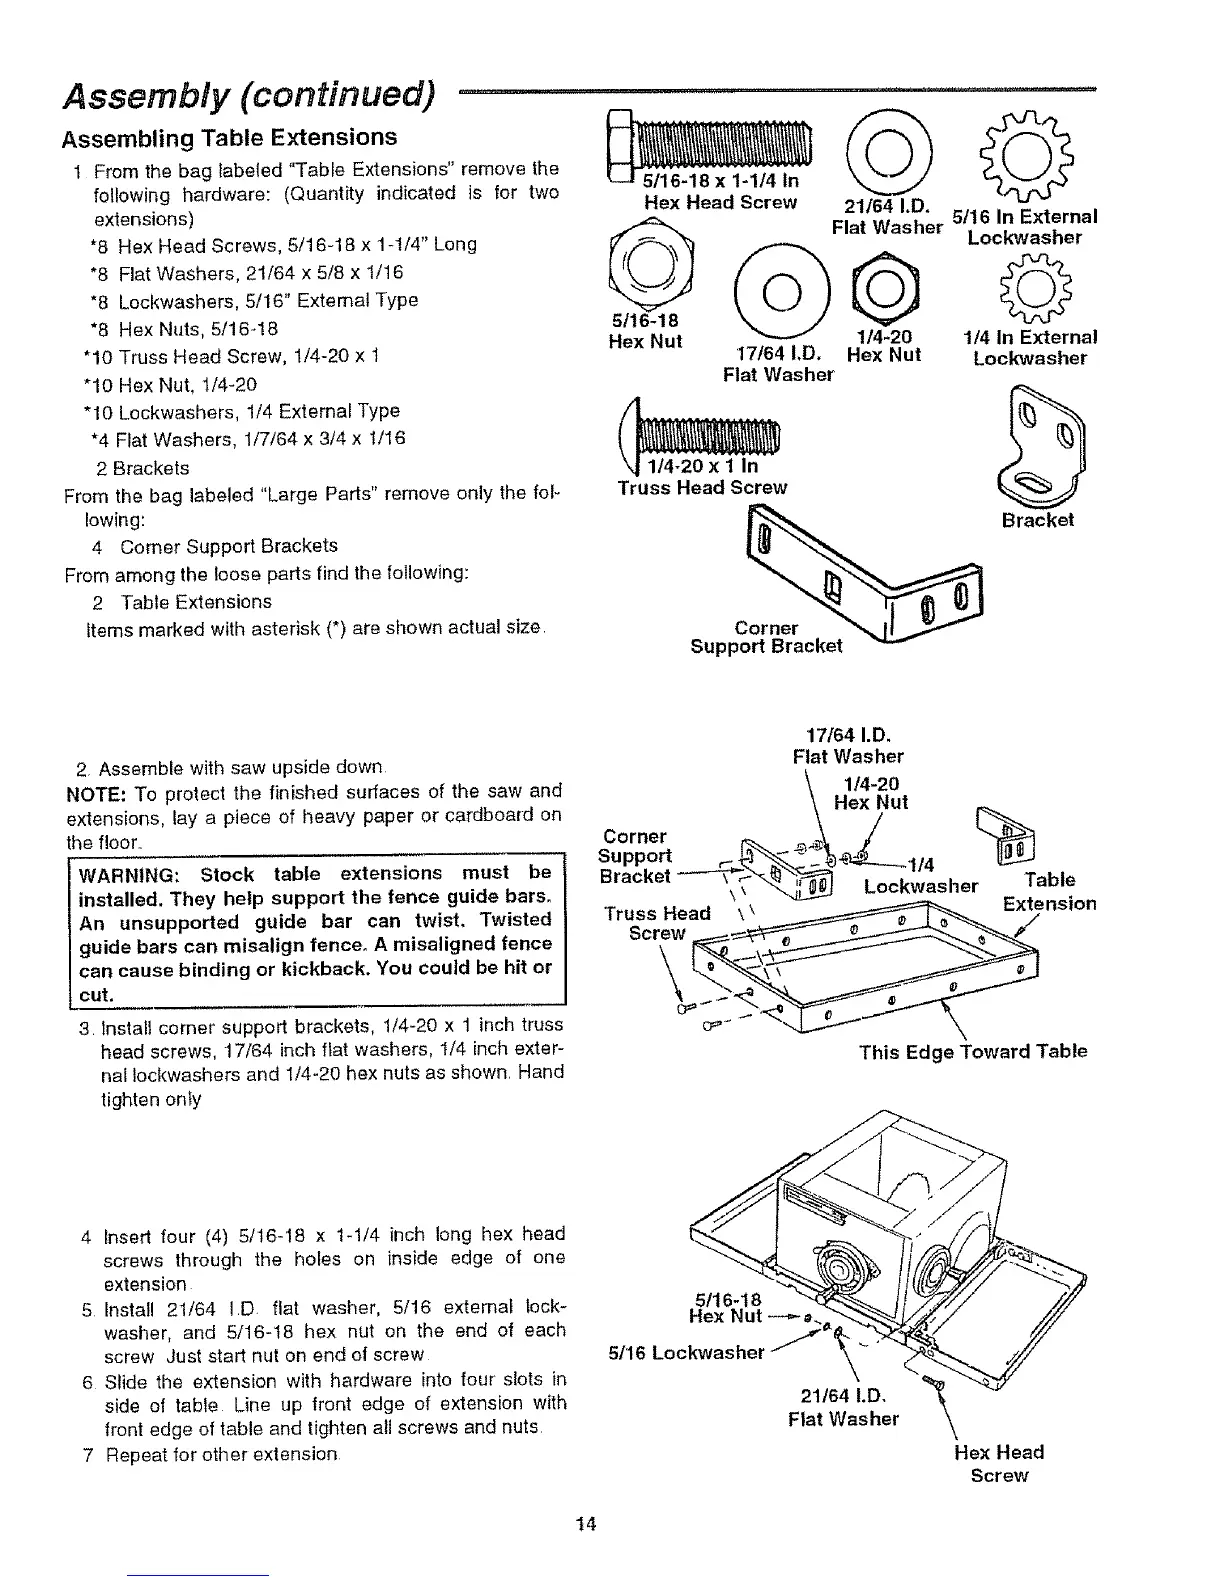
Assembling Table Extensions
1 From the bag labeled "Table Extensions" remove the
following hardware: (Quantity indicated is for two
extensions)
*8 Hex Head Screws, 5/16-18 x 1-1/4" Long
*8 Flat Washers, 21/64 x 5/8 x 1/16
*8 Lockwashers. 5/16" External Type
*8 Hex Nuts, 5/16-18
"10 Truss Head Screw, 1/4-20 x 1
"10 Hex Nut, 1/4-20
"10 Lockwashers, 1/4 External Type
*4 Flat Washers, 1/7/64 x 3/4 x 1/16
2 Brackets
From the bag labeled "Large Parts" remove only the fol-
lowing:
4 Comer Support Brackets
From among the loose parts find the following:
2 Table Extensions
items marked with asterisk (*) are shown actual size
Hex Head Screw
0
5/16-18
Hex Nut
21_41,D.
Flat Washer
@Q
17/64 I,D. Hex Nut
Flat Washer
O
5/16 In External
Lockwasher
©
114 In External
Lock'washer
Truss Head Screw
s°ppc
Bracket
2 Assemble with saw upside down
NOTE: To protect the finished surfaces of the saw and
extensions, lay a piece of heavy paper or cardboard on
the floor..
WARNING: Stock table extensions must be
installed. They help support the fence guide bars.
An unsupported guide bar can twist. Twisted
guide bars can misalign fence. A misaligned fence
can cause binding or kickback. You could be hit or
cut,
3 Install corner support brackets, 1/4-20 x 1 inch truss
head screws, 17/64 inch flat washers, 1/4 inch exter-
nal Iockwashers and 1/4-20 hex nuts as shown, Hand
tighten onty
17/64 I.D.
Flat Washer
\ 1/4-20
\ Hex Nut
Corner _._\ / (_
support
Bracket ----__ Lockwasher Table
k' _'-4z.z_
This Edge Toward Table
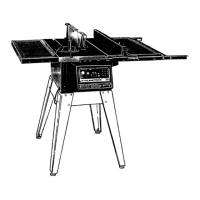
4 insert four (4) 5/16-18 x 1-1/4 inch long hex head
screws through the holes on inside edge of one
extension
5 Instal! 21/64 ID fiat washer, 5/16 external lock-
washer, and 5/16-t8 hex nut on the end of each
screw Just start nut on end of screw
6 Slide the extension with hardware into four slots in
side of table Line up front edge of extension with
front edge of table and tighten all screws and nuts
7 Repeat for other extension
5/16-18
Hex Nut _
51'16Lock'washer
21/64 I.D.
Flat Washer
Hex Head
Screw
t4