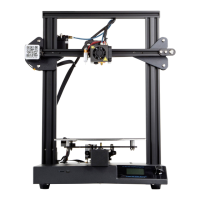
The Creality CR20 Pro is a 3D printer designed for FDM (Fused Deposition Modeling) technology, offering a build volume of 220x220x250mm. This user manual provides comprehensive instructions for its setup, operation, and maintenance, ensuring users can achieve optimal printing results.
Function Description:
The CR20 Pro is a desktop 3D printer capable of creating three-dimensional objects from digital designs using filament. It operates by extruding heated thermoplastic material layer by layer onto a build platform, which then solidifies to form the desired object. The printer supports both online printing (connected to a computer) and offline printing (via TF card), providing flexibility in its usage. It is designed for standard CR20 Pro use, and detailed instructions are available on the included TF card.
Important Technical Specifications:
- Model: CR-20 Pro
- Printing Size: 220x220x250mm
- Molding Technology: FDM (Fused Deposition Modeling)
- Nozzle Number: 1
- Slice Thickness: 0.1mm-0.4mm
- Nozzle Diameter: Standard 0.4mm
- Precision: ±0.1mm
- Filament: Φ1.75mm PLA (recommended for calibration and testing; supports experimental/exotic filaments after calibration)
- File Format: STL/OBJ/AMF
- Working Mode: Online or TF card offline
- Slice Software: Creality Slicer/Cura/Repetier-Host/Simplify3D
- Power Supply:
- Input: AC 100-240V/200-240V 50/60Hz
- Output: DC 24V
- Total Power: 270W
- Bed Temperature: <100℃
- Nozzle Temperature: <250℃
- Resume Print: Yes
- Auto Leveling: Yes (BLTouch)
- Filament Detector: No
- Operating System: Windows XP/Vista/7/8/10, MAC/Linux
- Printing Speed: ≤180mm/s, Normal 30-60mm/s
Usage Features:
The CR20 Pro is designed for user-friendly operation, from assembly to printing.
- Device Installation: The manual guides users through installing the gantry frame and the filament rack using M5X25 screws and M4X8 screws with M4 T-nuts.
- Cable Connection: Clear diagrams illustrate how to connect the E (Extruder), Y (Y-axis), Z (Z-axis), and X (X-axis) motor cables, as well as the main power cable to a grounded three-hole power jack. The circuit wiring diagram further details connections for fans, power supply, limit switches, mini USB, LCD displayer, auto leveling (BLTouch), thermistors (Nozzle1, Nozzle2, Bed), hot bed, nozzles, controlled fans, and touch screen.
- Screen Information: The LCD display provides a comprehensive interface for controlling the printer. Key information displayed includes print rate, model name, current and set temperatures for the nozzle and hot bed, cooling fan rate, and current nozzle location.
- Screen Options (Menu Structure):
- Info Screen: Displays basic printer status.
- Main Menu:
- Move axis: Allows manual movement of X, Y, Z axes, or Extruder.
- Auto Home: Returns the print head to the origin.
- Bed Leveling: Initiates the bed leveling process.
- Preheat PLA/ABS: Sets nozzle and bed temperatures for PLA (185℃/45℃) or ABS (240℃/70℃).
- Cool down: Closes and cools down the nozzle.
- Set home offsets: Configures home position offsets.
- Disable Steppers: Disables stepper motors, allowing manual movement.
- Control Menu:
- Temperature: Heats the nozzle and bed, or changes fan speed.
- Motion: Adjusts motion parameters.
- Filament: Manages filament settings.
- BLTouch: BLTouch specific settings.
- Store settings/Load settings: Saves or loads printer configurations.
- Language: Changes the display language (English/Chinese).
- Print from TF: Initiates printing from the TF card.
- Tune Menu (during printing):
- Speed: Adjusts printing speed percentage.
- Nozzle/Bed: Adjusts extrusion head and hot bed temperatures.
- Fan speed: Adjusts fan speed.
- Flow: Adjusts consumable flow percentage.
- Change Filament: Initiates filament replacement.
- Pause Printing/Stop Printing: Controls print job execution.
- Loading Filament: Two methods are provided for preheating and loading filament. Users can either preheat via the "Prepare" menu (Preheat PLA/ABS) or directly set nozzle and bed temperatures in the "Control" menu. Filament is loaded by pressing the extruder lever and inserting the 1.75mm filament until it emerges from the nozzle.
- Replacing Filament: Instructions include cutting the filament near the extruder and feeding new filament, or preheating the nozzle to quickly withdraw and feed new filament.
- Bed Leveling: A crucial step for print quality. The process involves:
- Using "Prepare" → "Auto home" to bring the nozzle to the origin.
- Moving the Z-axis (Prepare → Move axis → Move Z → Move 0.1mm) and rotating the knob until a 0.2mm gap (A4 paper thickness) is achieved between the nozzle and the bed. The value "A" is recorded.
- Adjusting the Z Offset (Control → Motion → Z Offset) by rotating the knob to a new value "C" where C = B + A (B is the initial Z Offset value). Settings are then stored.
- Software Installation: The manual outlines the installation of Creality Slicer (version 1.2.1.msi). This involves double-clicking the installer, selecting the language, choosing the machine model (CR-20 Pro), and completing the wizard.
- First Printing (Slicing & Printing):
- Slicing: Insert the TF card into a computer with a reader. Open Creality Slicer, load a 3D model file (STL, OBJ, AMF), wait for slicing to complete, and save the generated G-code file to the TF card.
- Printing: Insert the TF card into the printer. Navigate to "Print from TF" on the LCD screen and select the desired G-code file to start printing.
Maintenance Features:
Regular maintenance is essential for the longevity and performance of the CR20 Pro.
- Cleaning: The printer should be cleaned frequently. Power off the machine before cleaning. Use a dry cloth to remove dust, adhered plastics, or other materials from the frame, guide rails, and wheels. Glass cleaner or isopropyl alcohol is recommended for cleaning the print surface before each print.
- Hotend Maintenance: When cleaning debris from the hotend, always use the provided tools. Do not touch the nozzle directly when heated to avoid injury.
- Troubleshooting: A detailed flowchart guides users through common issues and their resolutions, including:
- SD card issues: Erasing, formatting, or replacing the SD card.
- File name issues: Renaming files with alphabet and numbers.
- Slicing problems: Moving the model, restarting slicing, or restoring the model with software.
- Stepper motor/limit switch issues: Reconnecting cables or using replacement methods.
- Heating problems (bed/nozzle): Reconnecting cables, checking thermistors, or heat pipes.
- Print misalignment: Restarting slicing, adjusting timing belt tension.
- Spraying/Coupling issues: Fastening the coupling.
- Filament feeding issues: Cleaning or replacing filament.
- E stepper rotation issues: Reconnecting cables or using replacement methods.
- After-Sales Service:
- Return/Replacement/Warranty: 7-day return, 15-day replacement, 1-year warranty, lifetime maintenance.
- Replacement Requirements: Product must be intact (no damage, scratches, etc.), all parts and tools complete, and a valid purchase invoice/warranty with matching product number must be provided.
- Warranty Coverage Exclusions:
- Accessories not damaged by transportation (platform sticker, forming plate, acrylic cover, card reader, TF card, platform glass, USB cable, filament, rack, tools).
- Minor profile scratches from factory testing or long-distance transport that do not affect normal use.
- Nozzle assembly (nozzle, heating block, throat pipe, heat sink, Teflon tube) has a 3-month warranty.
- Motherboard, LCD display, power supply, hot bed have a 12-month warranty for free maintenance; users bear costs for maintenance beyond warranty.
- Lack of effective after-sales service card or serial number.
- Machine/components exceeding warranty period.
- Damage from unauthorized modification (nozzle, machine structure, third-party components, firmware changes).
- Damage from incorrect installation or use.
- Damage from use in environments not specified by the product.
- Damage from improper use (beyond workload, moisture) or maintenance.
- Damage from using other branded components or low-quality consumables.
The CR20 Pro is designed to be a reliable and versatile 3D printing solution, with clear guidance provided for every step of the user experience.