DigitalMedia Presentation Systems Crestron DMPS-100/200/300-C/300-C-AEC
50 • DigitalMedia Presentation Systems: DMPS-100/200/300-C/300-C-AEC Operations Guide – DOC. 7219D
4. Adjust the input compensation level with the j and k buttons.
Compensation can range from -10 dB to 10 dB. A compensation level of 0
dB provides no compensation.
NOTE: While adjusting the compensation level, the master volume level
can be adjusted by turning the VOLUME control clockwise to raise the
volume, or counterclockwise to lower the volume. When adjusting the
volume, the display changes to indicate the volume level.
5. Press MENU or ENTER to save changes and return to the “Input
Compensation” menu.
6. Repeat steps 3 through 5 for each input to be adjusted.
7. Press MENU to return to the “Audio Setup” menu.
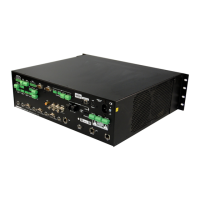
Microphones
The DMPS-100/200/300-C can be connected to several microphones (two for
DMPS-100-C, four for DMPS-200-C, and six for DMPS-300-C). Matrix mixing
allows for a completely different stereo mix of all microphones at each of the
DMPS-100/200/300-C's outputs. The microphone inputs feature switchable gating,
compression, and limiters.
Access the
“Microphones” Menu
To access the “Microphones” menu:
1. Access the “Audio Setup” menu as described on page 40.
2. Press the k or j buttons until Microphones is displayed on the LCD and
press ENTER to display the “Microphones” menu.
3. To return to the “Audio Setup” menu, press MENU.
Set Microphone Input Gating
Microphone input gating can be individually set on each of the microphone inputs.
To switch microphone gating on or off:
1. Access the “Microphones” menu as described above.
2. Press the k or j buttons to display each of the Gating choices. Press
ENTER to display the desired microphone gating control display.
“Mic 1 Gating” Menu
3. Press the k or j buttons to display the desired setting (On or Off) to
enable or disable the gating function. Press ENTER to save the setting. The
current setting is indicated with an asterisk (*).
4. To exit the “Mic Gating” menu without saving changes, press MENU.
Set Microphone Input
Compression
Microphone input compression can be individually set on each microphone input. To
switch microphone compression on or off:
1. Access the “Microphones” menu as described above.
2. Press the k or j buttons to display each of the Mic Compression choices.
Press ENTER to display the desired microphone compression menu.