Operating Instruction and Documentation
CSL640/641
- 52 – TES1518/E
• Continue lowering the lift (loosen set screw again) until the lift has reached its
lowest position.
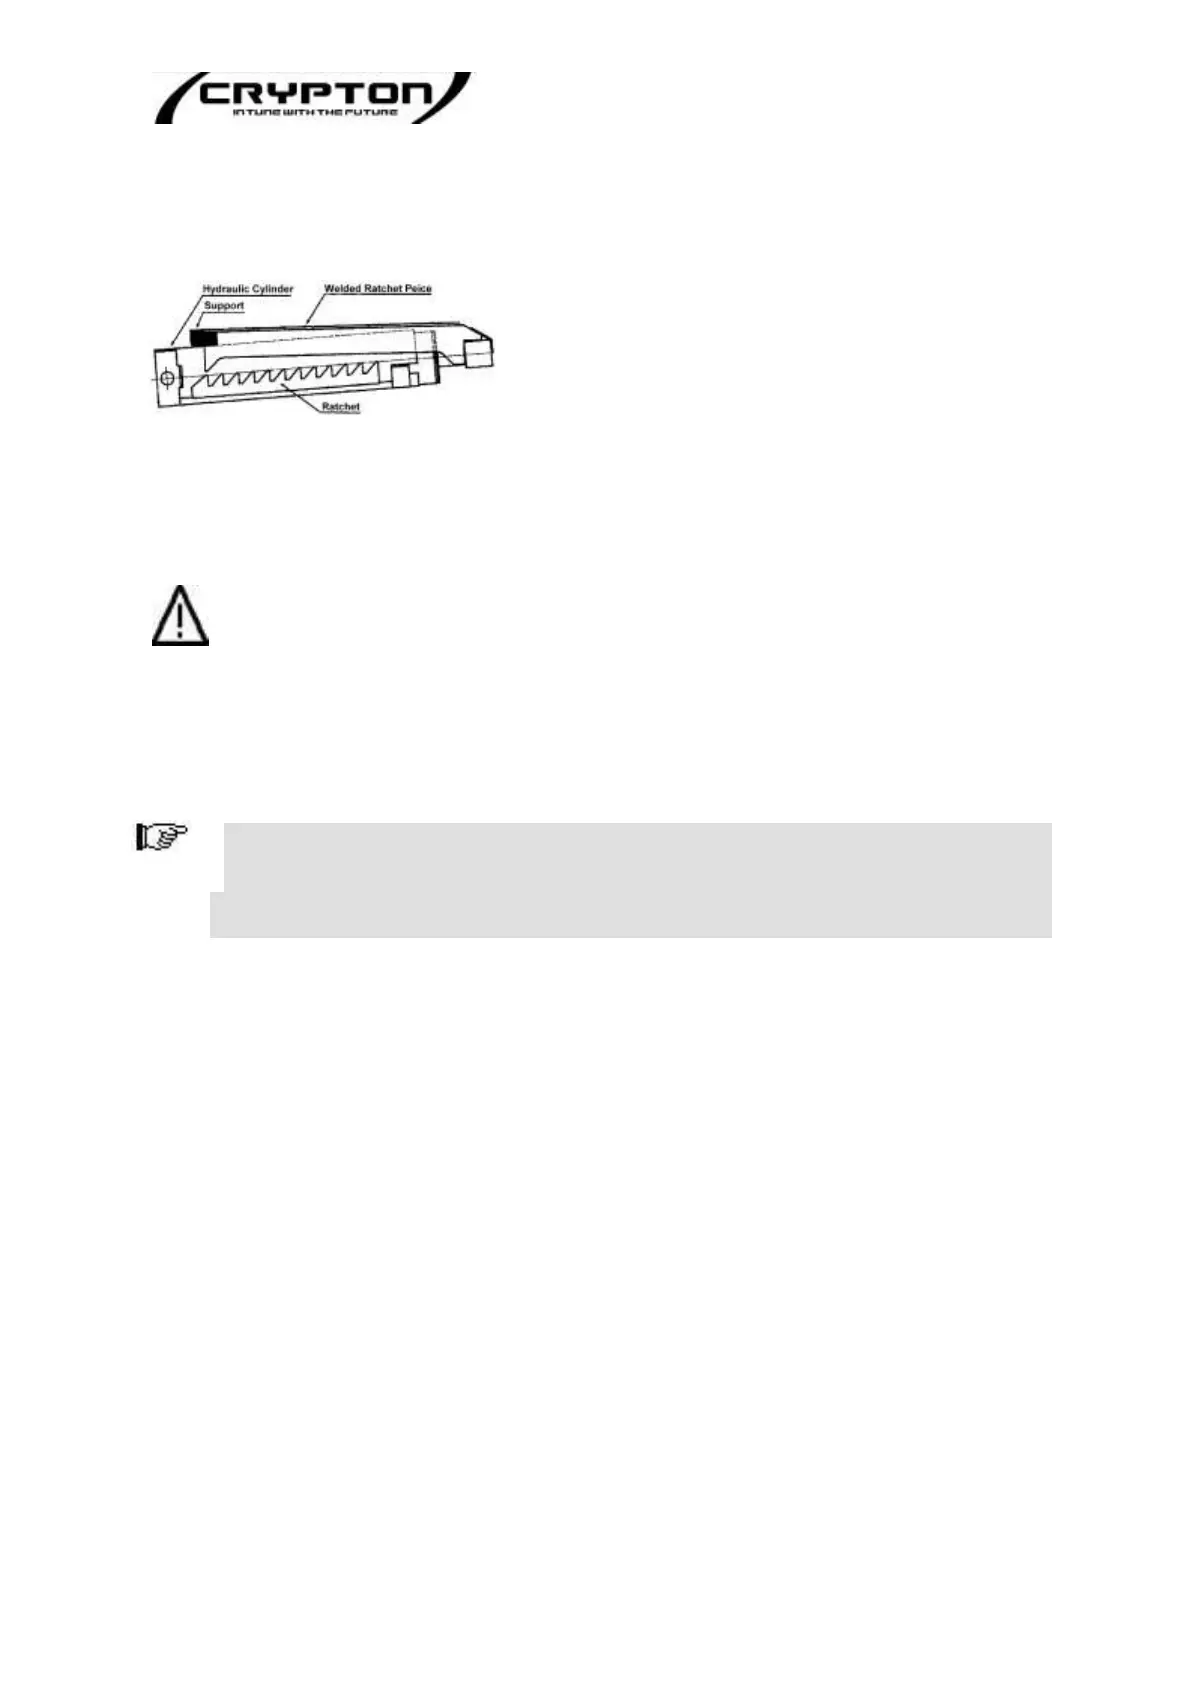
Pic 11: Removing support
• Fasten the set screw and secure it by fastening the locking screw.
• Turn out thread pins at both stop valves of the bottom of hydraulic cylinders. Secure them
with the red security nuts.
After finishing the emergency lowering, all of the set screws must be adjusted back to
their original positions. Otherwise a malfunction may occur.
• Reinstall covering plates of both stop valves in the drive-on areas of the platforms.
• Drive vehicle off the lift
• Shut down the lift until the defective pieces or valves have been replaced
7. Inspection and Maintenance
Before conducting maintenance work, preparations must be made to ensure that
during maintenance and repair work there is no risk to the safety of people working
on
or around the lift and also that there is no risk of damage to equipment being used on
or around the lift.
To guarantee the utmost availability and to ensure that the lift remains functional, maintenance
work contracts are organised between our clients and their local retailers.
A service must be performed at regular intervals of 12 months through the operator in
accordance with following service manual. If the lift is in continuous operation or in a dirty
environment, the maintenance rate must be increased.
During daily operation the lift must be closely observed to ensure that it is functioning correctly.
In the case of malfunction or leakage the technical service must be informed.
7.1 Maintenance schedule for the lift
• Before beginning any maintenance work isolate the power supply. Secure the main switch
(lock it). Secure the danger area around the automotive lift and secure the lift against
unintentional lowering.
• Clean the piston-rod using compressed air.
Grease the piston rods with multipurpose oil.
Clean and check the stripper of the guidance-piston.
• Grease the lubricate nipples with a multipurpose lipid. (Example: Auto Top 2000 LTD.
Agape)
• Clean and lubricate the moving parts of the lift (hinge bolts, sliding pieces, and sliding
surfaces) grease with a multipurpose lipid (example: Auto Top 2000 LTD. Agape).
• Check the hydraulic tubes for leakage.
Life time of the hydraulic hoses.
The use duration of the hose lines should not exceed six years, including a storage time of at
the most two years.