Cuda 2412 • 8.914-384.0 • Rev. 5/12
AUTOMATIC PARTS WASHER Troubleshooting Guide
18
SECTION 4: TROUBLESHOOTING
TESTING INDIVIDUAL
COMPONENTS
NOTE: The following troubleshooting procedures re-
quire the use of a volt/ohm meter. If you are not familiar
with using a volt/ohm meter do not attempt to perform
the following troubleshooting procedures. If you need
assistance please contact your distributor.
Wash Cycle Timers
Step 1:
Disconnect power to the machine.
Step 2:
Disconnect all wires and remove the timer from the
control panel and (See Timers and Switches on the
Control Panel).
Step 3:
With the timer in the OFF position, test for continuity
using an ohm meter.
If there is continuity the timer is no longer functional;
replace the timer.
Step 4:
With the timer in the ON position, test for continuity
using an ohm meter.
If there is not continuity the timer is no longer functional;
replace the timer.
Heating Element
Step 1:
Disconnect power to the machine.
Step 2:
Remove the rear panel from the machine (four screws;
use a 5/16” wrench or socket – See Figure Below).
Step 3:
Detach the power leads from the heating element.
Step 4:
Use an ohm meter to measure the resistance of the
heating element. The resistance should be approxi-
mately 10 Ohms if not, replace the heating element
(See Heating Element).
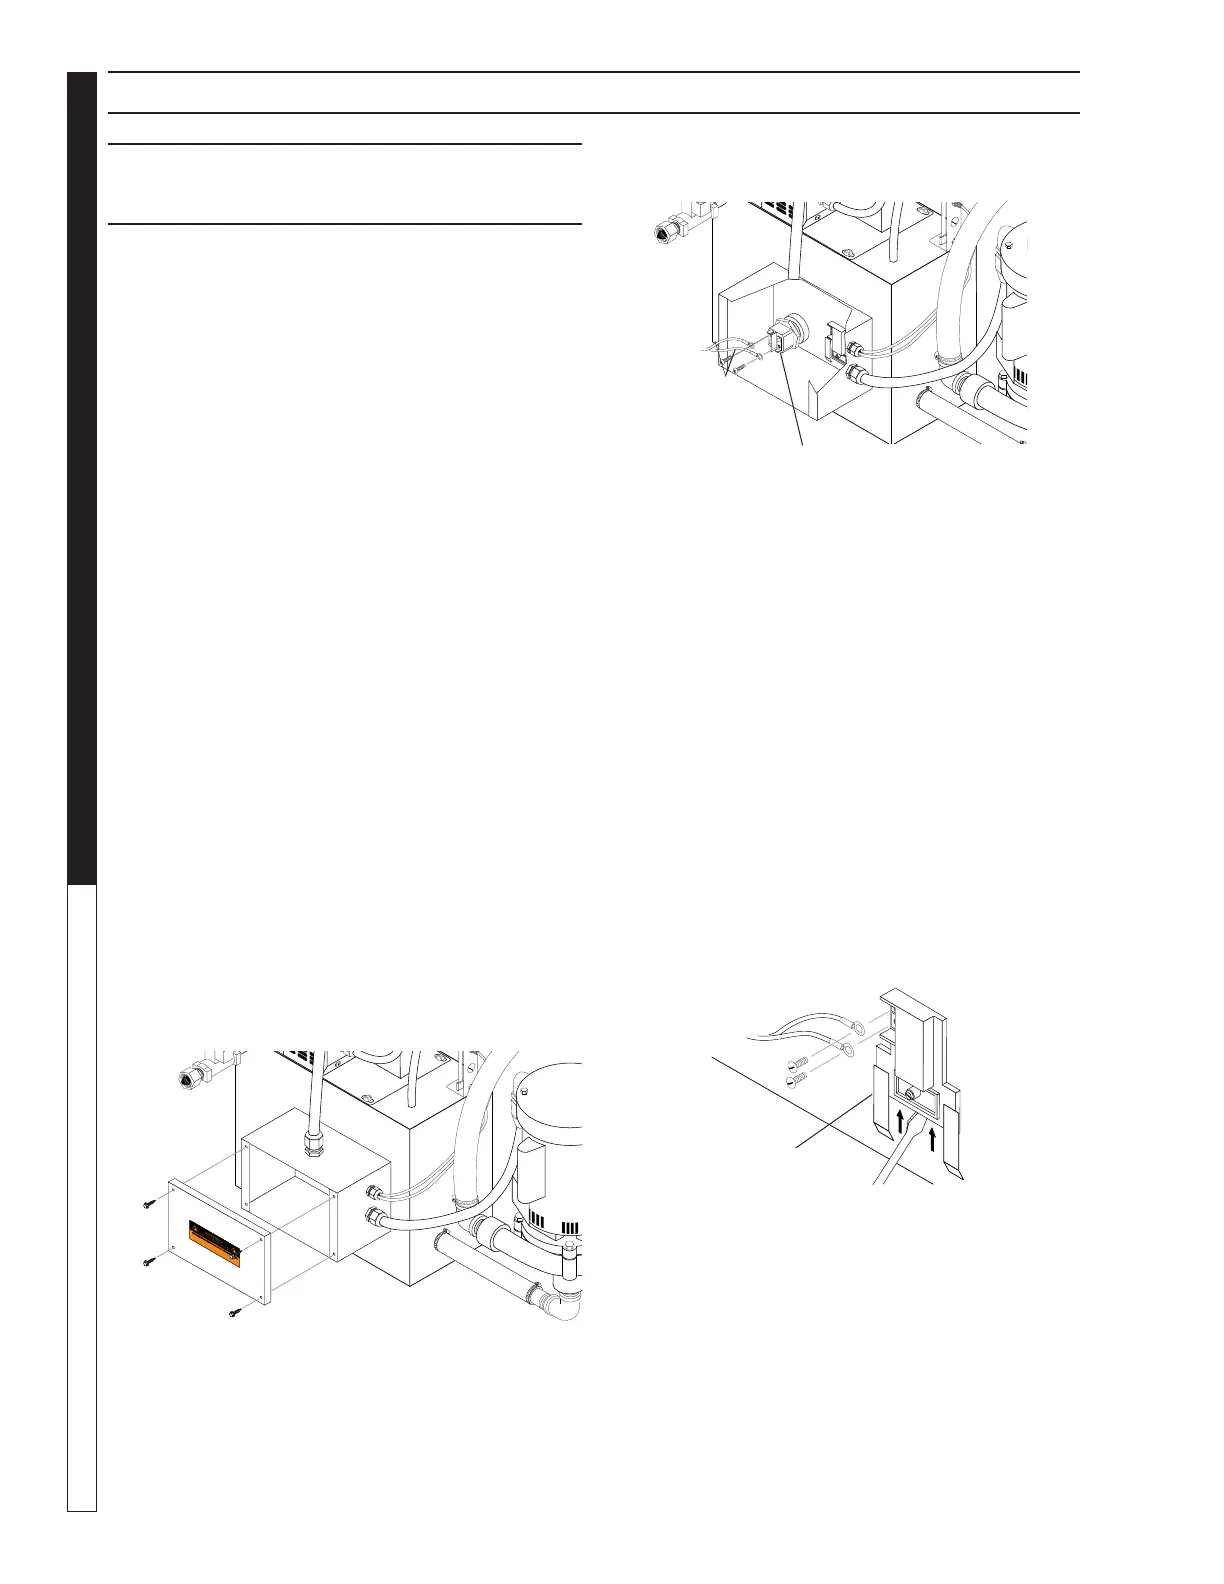
Thermostat
Step 1:
Disconnect power to the machine.
Step 2:
Remove the rear panel from the machine (ten screws;
use a 5/16” wrench or socket ).
Step 3:
Detach the power leads from the thermostat.
Step 4:
Using a large flat-head screwdriver, pry the thermostat
out of the mounting bracket, then remove it from the
machine (See Figure Below).
Step 5:
Set the thermostat to 120°F, warm it to just above
120°F, then test for continuity.
If there is continuity the thermostat is no longer
functional; replace the thermostat.
Step 6:
Allow the thermostat to cool to room temperature, then
test for continuity.
If there is not continuity the thermostat is no longer
functional; replace the thermostat.
Screwdriver
Mounting
Bracket
Heating
Element
Power
Leads