Cuda 2412 • 8.914-384.0 • Rev. 5/12
AUTOMATIC PARTS WASHER Maintenance Guide
20
Cleaning out the Sump
Step 1:
Remove oil from the cleaning solution using the oil
skimmer.
Step 2:
Remove the debris screen.
Step 3:
Drain the wash solution from the sump chamber.
To drain the solution either use the sump drain
or a small submersible pump.
Step 4:
Remove sand and other debris from the bottom of the
sump chamber. To remove the debris either flush it
out through the sump drain, or vacuum it out using a
wet/dry vac. Dispose of the debris in accordance with
applicable local, state, and federal regulations.
NOTE: Take special care to ensure that the heating
element and the low-water float are free of debris.
A build up of debris around the heating element will
decrease heating performance and may cause the ele-
ment to overheat and fail. A build up of debris around
the float may cause the low water shut-off system to
malfunction (See Low Water Shutoff System)
Step 5:
Replace the debris screen.
Step 6:
Heat the wash water to operating temperature, then
add appropriate amount of factory detergent.
Step 7:
Run the machine through a 15-minute wash cycle.
REPAIRING THE MACHINE
The following procedures outline the steps necessary
to replace specific items on the machine that could
wear out or otherwise fail.
Heating Element
Required Tools and Equipment
•5/16"wrenchorsocket
•1-1/2"socketandbreakerbar
•sealingtapeorcompound
•mediumphillips-headscrewdriver
Replacement Procedure
Step 1:
Disconnect power to the machine.
Step 2:
Drain the wash solution from the sump.
SECTION 5: MAINTENANCE AND REPAIR
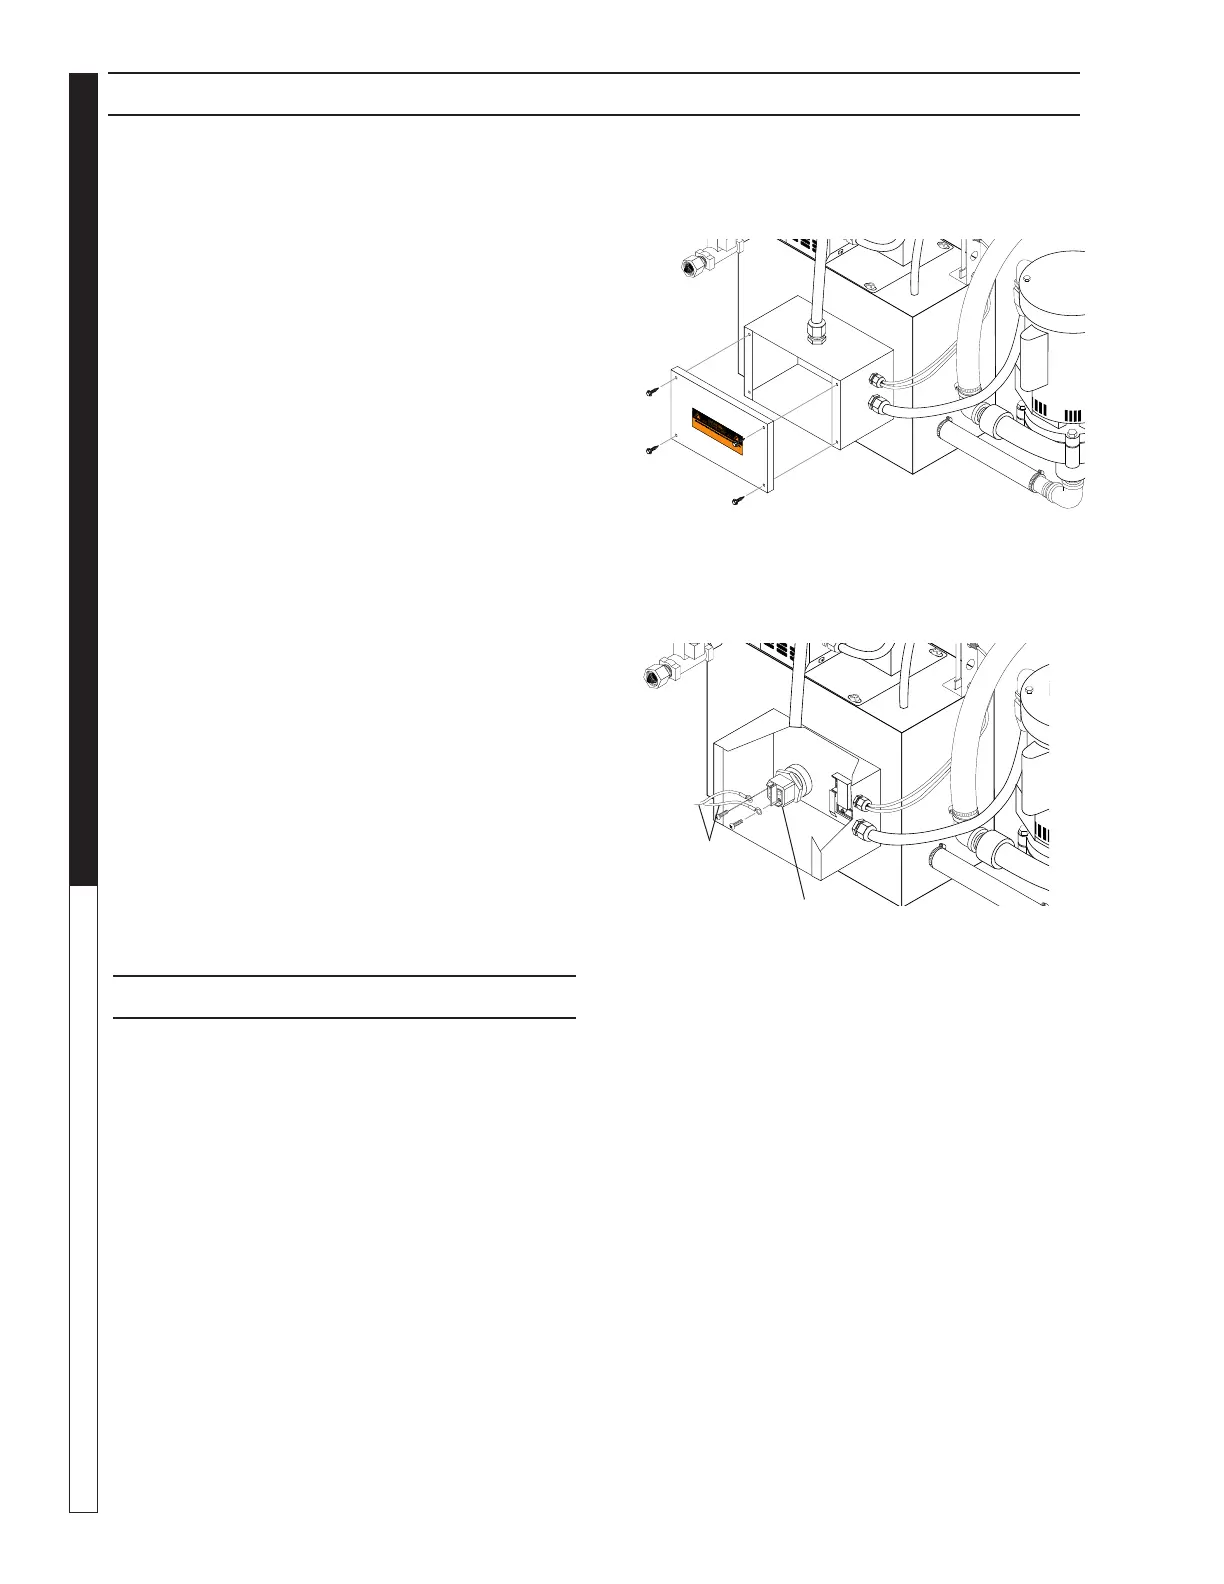
Step 3:
Remove the rear panel from the machine (four screws;
use a 5/16” wrench or socket – See Figure Below).
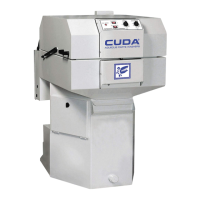
Step 4:
Detach the power leads from the heating element
(See Figure Below).
Step 5:
Using a 1-1/2" socketand breaker bar, unscrew the
heating element from the machine.
NOTE: Since the heating element is in continuous con-
tact with the cleaning solution the threads may corrode
slightly. The element may be difficult to remove. When
you install a new heating element, use sealing tape or
compound on the threads to deter corrosion, and be
sure to install the rubber gasket to prevent leakage.
Step 6:
Install the new heating element. Installation is the
reverse of removal.
Heating
Element
Power
Leads