12
ASSEMBLY INSTRUCTIONS
— CONTINUED
Screw-On Couplings
Screw-On Couplings, which thread onto the end
of Rigid or IMC conduit, are optional for conduit
sizes 2", 2 1/2", 3", 3 1/2" and 4".
Screw-On Couplings Procedure:
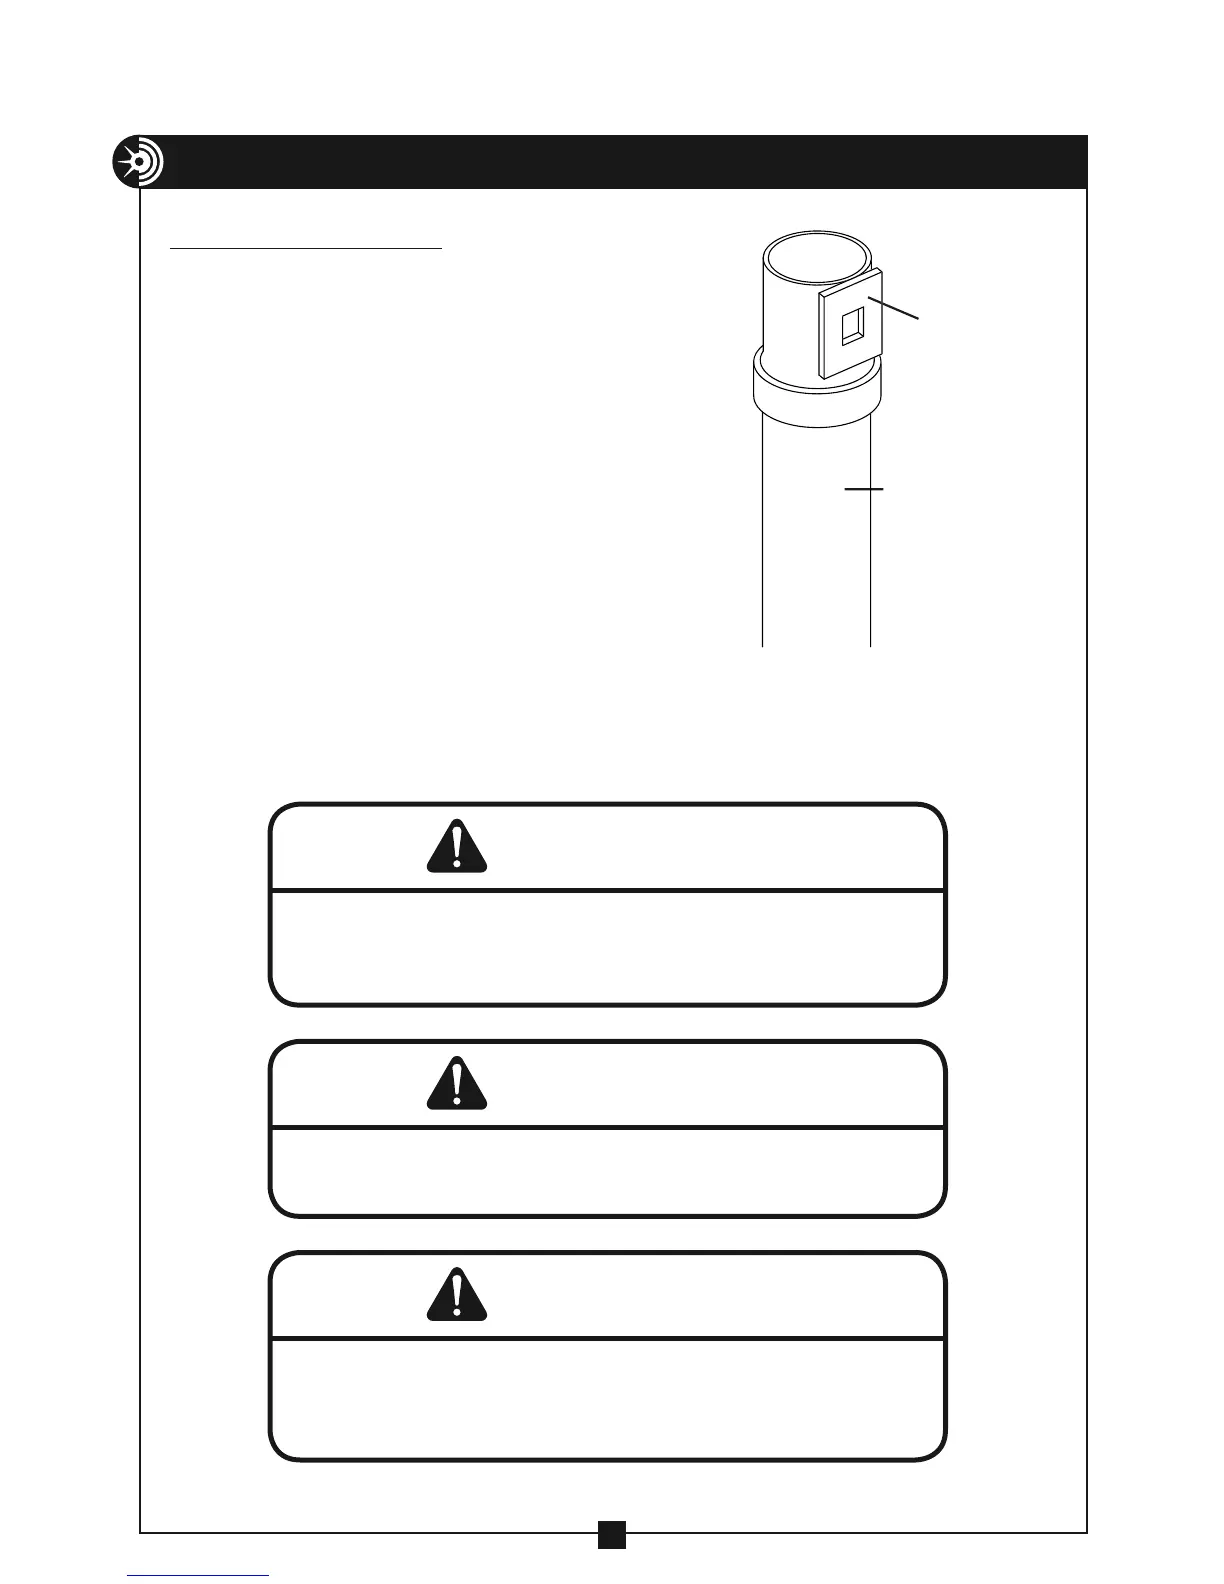
1. Match the coupling to the conduit size.
2. Thread coupling onto the conduit until tight.
Then, slightly back off coupling until the
coupling receiver plate faces the direction
where the puller will be positioned. See
Figure 12.
3. Install the correct size coupling into the
coupling adapter located in the nose unit by
inserting the receiver plate into the coupling
adapter until the spring loaded pawl "snaps"
into place. See Figures 10a through 10d.
WARNING
Thread Screw-On Coupling onto conduit a minimum of 4 full turns. Inspect
the conduit threads to make sure they are in good condition.
WARNING
DO NOT use screw-on couplings when pulling in PVC conduit. Screw-on
couplings may detach and cause serious injury or death. When pulling in
PVC conduit, ONLY use slip-in couplings.
WARNING
NOTE: To disassemble couplings from coupling adapter, pull the ring
on the back of the coupling adapter.This will retract the spring loaded
pawl and release the coupling. (See Figure 10e).
RE
EIVER
TURN TO FACE
NDUI
Figure 12