Do you have a question about the curt 56471 and is the answer not in the manual?
Explains installation difficulty based on time, effort, and installer expertise.
Specifies the rating for signal circuits, which is 3.0-amps per side.
Specifies the rating for tail and running circuits, which is 6.0-amps total.
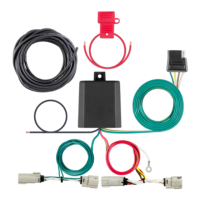
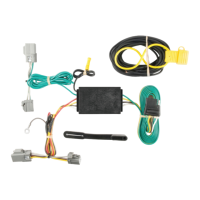
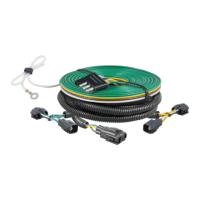
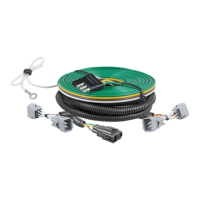
Details specific locations (S1-S10) for wiring connections in SUVs and vans.
Lists necessary tools such as ratchet, sockets, and screwdrivers for the installation process.
Recommends periodic inspection of wires and connections for damage or looseness.
Disconnect the negative battery terminal to ensure safety during installation.
Instructions for removing taillight trim using sockets and fasteners.
Locate and separate vehicle taillight wiring connectors carefully.
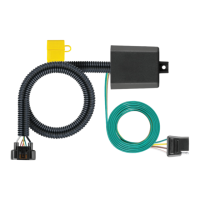
Route specific wires (yellow, green) and securely mount the converter box.
Establish a ground point and route the 4-flat connector for trailer hookup.
Reinstall removed parts, reconnect the battery, and test the harness function.
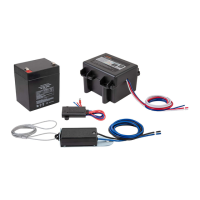
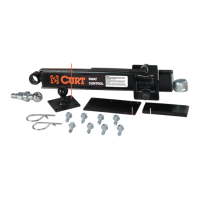
Details the powered converter system, 12-volt negative ground requirement, and securing power wire.
Instructions for connecting the battery terminal, fuse holder, and grounding the system.
Explains wire color codes (green, red, yellow, brown) and their respective connections.
| Brand | curt |
|---|---|
| Model | 56471 |
| Category | Automobile Accessories |
| Language | English |