CURTMFG.COM
•
PRODUCT SUPPORT: 877.287.8634
•
17601-INS-RB
•
09/23/2021
•
ECN8903
•
PAGE 4
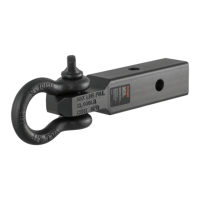
Step 10
Slide the L-support in between the two captive support brackets as
shown. L-support bracket should be placed in the highest position
possible while still allowing clearance under the trailer frame. Install the
second carriage bolt in the first hole directly below the trailer A-frame.
With the L-bracket installed, tighten both nylock nuts to 25 lb-ft.
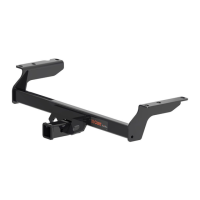
Step 13
Pry the spring bar onto the L-bracket by rotating the lift bar to vertical.
With the spring bar supported by the L-bracket, remove the lift handle.
Secure the spring bar by installing the retainer clip and cotter pin.
Step 11
Repeat Steps 8 through 10 with the second support
bracket on the opposite side of the trailer A-frame.
WARNING
Keep clear of the pivot path of all moving parts when there is tension
on the spring bar. Maintain control of the lift handle at all times when
raising or lowering the spring bar. Be sure that the locking clip and
cotter pin are in place once the spring bar is in position.
Step 12 - Raise the spring bars
Pull the spring bar out from the A-frame and
hook the lift bar into the L-bracket as shown.
Step 14
Check the vehicle height and adjust the angle of the head using the
set screws (#13, #14) as required until desired loading is reached.
With the spring bars secured, lower the jack to apply load to the hitch.
The vehicle should settle evenly. Remeasure the front and rear bumper
reference points. If the front has settled much more than the rear,
adjust the set screws until the vehicle and trailer are level. The spring
bars should be nearly horizontal when correct height is achieved.
Step 15 - Tighten Head Fasteners
Tighten all 3/4" bolts and lock nuts to 200 ft-lbs. Tighten the set
screw (#13) to 50 ft-lbs. Failure to tighten the hardware may result in
fastener loss or failure.
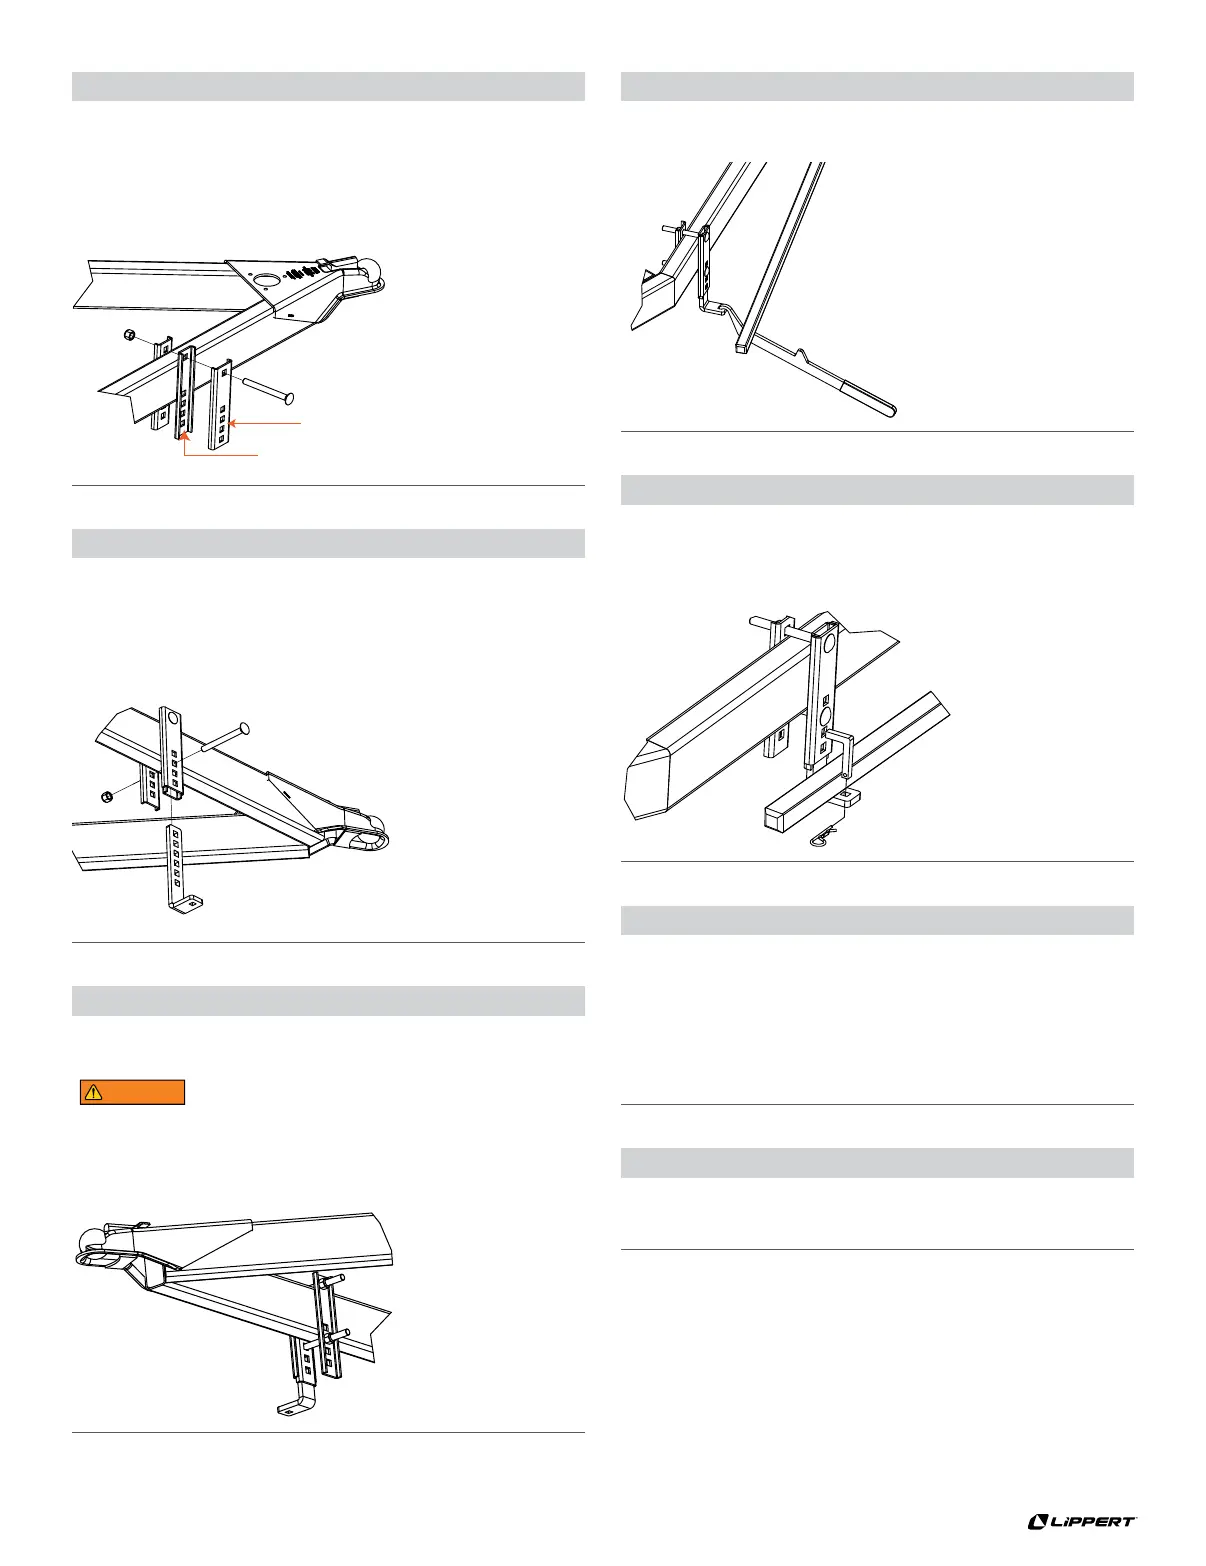
Step 9
Place a carriage bolt through the top hole on all three support
brackets, spin the nylock nut loosely onto the bolt and hang the
assembly over the trailer A-frame on the center line from Step 10.
Note: The wide channel bracket should be installed
over the narrow channel as detailed below.
Wide channel bracket
Narrow channel bracket