Curtis 1030 Acuity Manual, Rev. C
7
3 — ACU-SET SOFTWARE
Establishing communication between Acuity and computer
Follow these steps to establish communication.
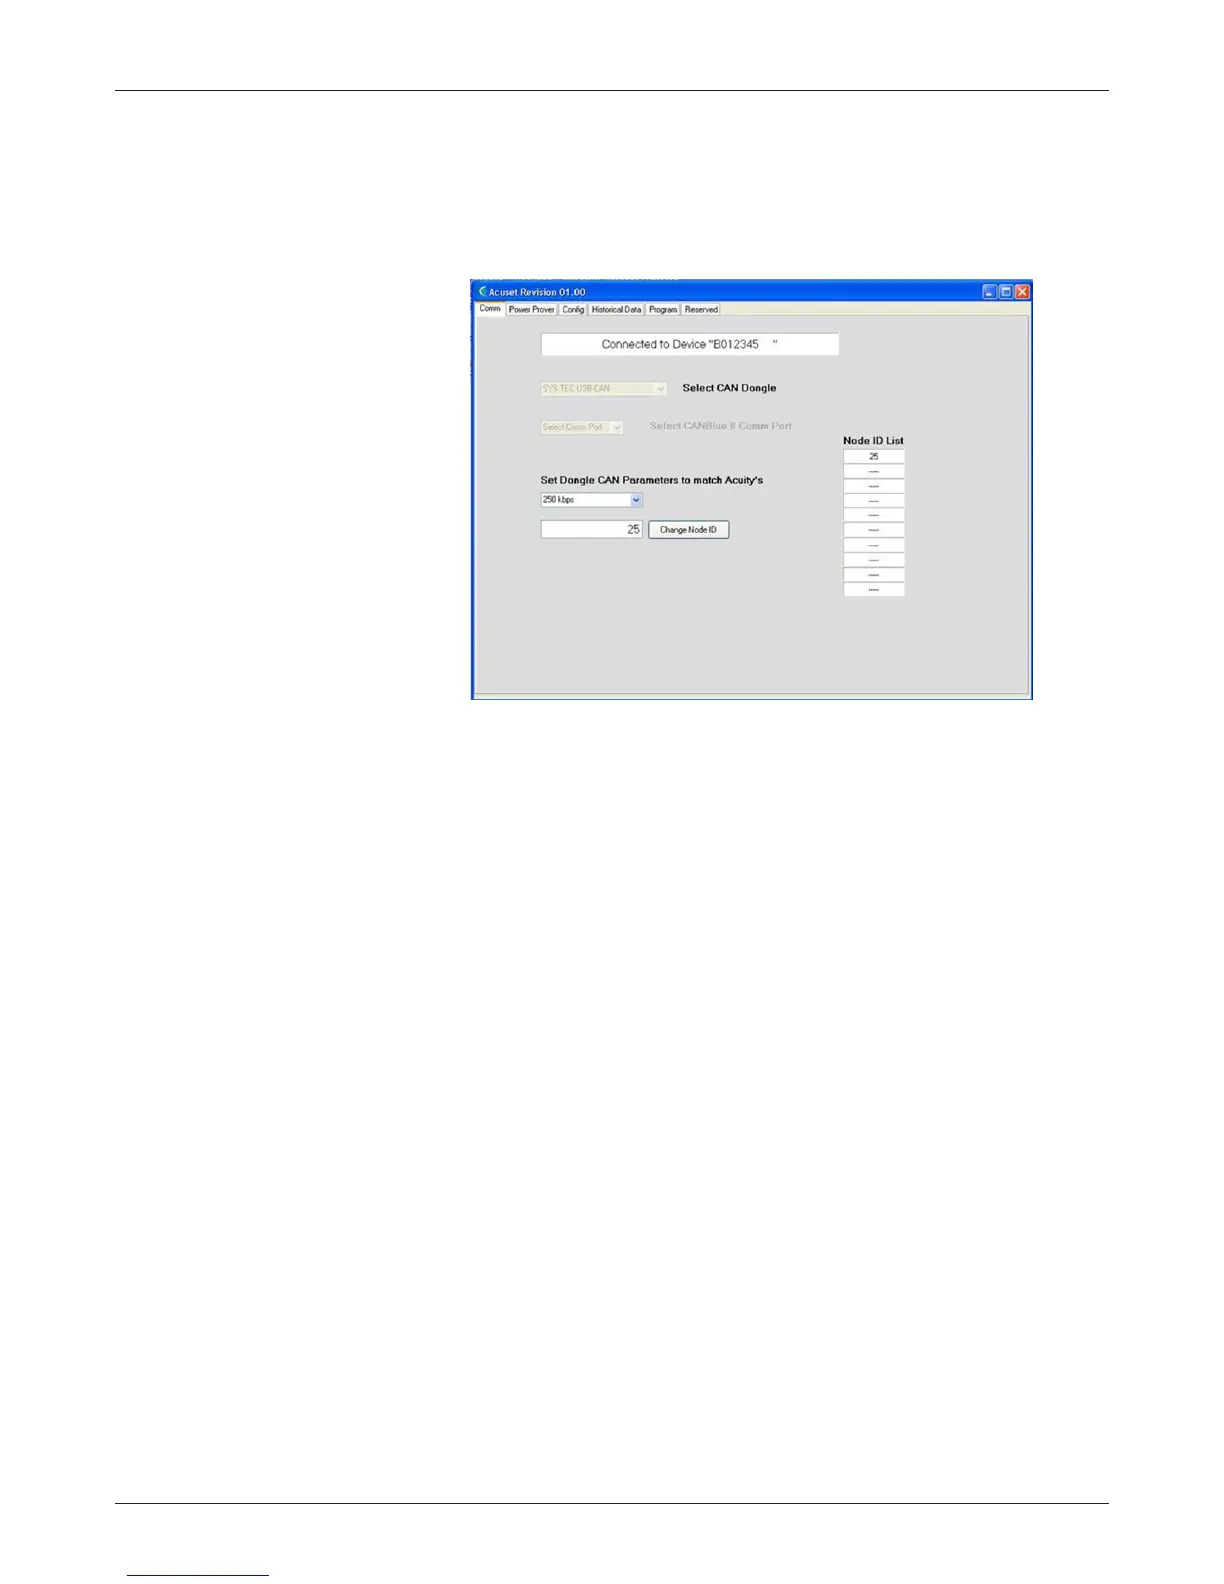
• Click on the COMM tab at the top of the Acu-Set screen.
• From the drop-down menu, select your CAN dongle:
Kvaser BlackBird WiFi
SYS TEC USB-CAN
Peak USB-CAN [default selection]
CANBlue II.
Note: If you are using the CANBlue Bluetooth dongle, select CANBlue
# Comm Port in the field below the dongle selection field.
• When the default Peak dongle is chosen and the baud rate and node ID match
the Acuity, Acu-Set will automatically display the Power Prover tab. If this did
not happen, review the Baud Rate and CAN Node ID settings.
The default baud rate is 125 kbps. If it is necessary to change this setting
to match your system, select the proper baud rate from the drop down menu:
100 kbps
125 kbps [default setting]
250 kbps
500 kbps
1000 kbps.
The default Node ID is 42. If it is necessary to change this value, enter
a value between 1 and 127 that is not already in use. The Node ID List shows
the Node IDs of all devices that are transmitting in that network at the selected
baud rate.
 Loading...