CHAPTER 2: HANDLING GUIDELINES FOR AXN MODULES 13
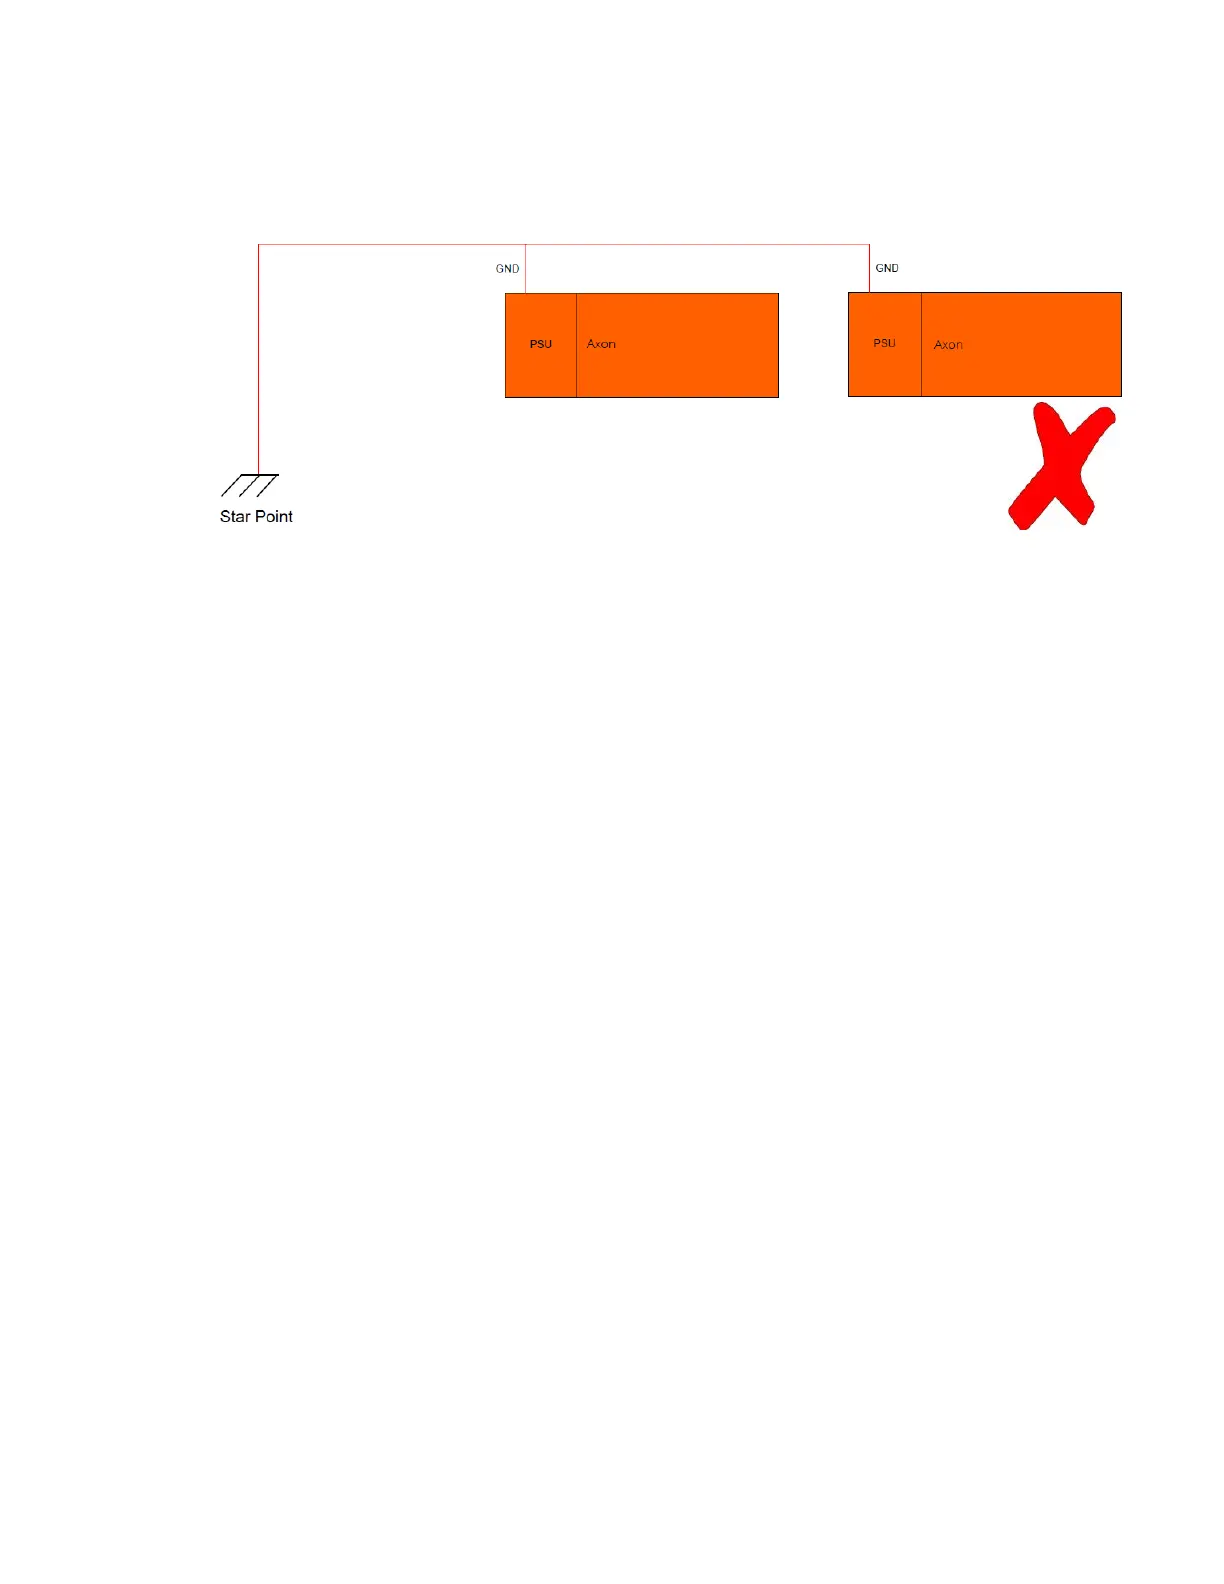
Incorrect star grounding for multiple chassis
If multiple AXNs are used, then all ground signals should be taken back to the star point and no two chassis should
share common cables for the GND, POWER(-) or CHASSIS signals.
Figure 14: Example of incorrectly connecting the GND signals of two chassis
Connecting the laptop to the AXN chassis and logging in
1. Power on the laptop.
2. At the log in screen, type QuickStartKit and then press Enter.
3. Connect the USB-to-RJ45 Ethernet connector to one of the USB ports on the laptop.
The Ethernet connection appears as Ethernet 2 on the Laptop, pre-configured to IP address 192.168.28.100.
4. Connect the AXN BCU-to-dual RJ-45 cable (AXN/CON/002) to the BCU in slot 0 of the chassis and then
tighten the thumbscrews to 0.6 Nm (0.44 foot pound-force) torque.
5. Connect one end of the Ethernet cable (AXN/CON/007) to the RJ45 adapter on the BCU; connect the other
end to the RJ45 adapter on the laptop.
6. Connect the power cable (CON/PSU/008/FL/100) to the chassis PSU connector; connect the other end to a
power supply (red connector positive, black negative) set to 28V at 5 amps minimum.
7. Turn on the power supply.
The PSU LED on the AXN chassis lights green and the Ethernet connection from chassis to laptop activates.
8. Test the connection by opening a command window on the laptop (Start/CMD) and type ping 192.168.28.1
and then press Enter.